How to Cook Brown Rice Quickly: 4 Fast Methods (2026)

What’s in this guide
- What You'll Need Before You Start
- Step 1: Rinse and Prep Your Brown Rice
- Step 2: Cook Brown Rice Using the Pasta Method
- Step 3: Cook Brown Rice in an Instant Pot
- Step 4: Cook Brown Rice in the Microwave
- Step 5: Try the Pre-Soaked Stovetop Method
- The 4-Speed Method Matrix: Side-by-Side Comparison
- Verify Your Results: What Perfectly Cooked Brown Rice Looks Like
- Troubleshoot Common Problems
- Health & Safety: What You Should Know About Brown Rice
- Frequently Asked Questions
- Putting It All Together
- Common Pitfalls and When to Choose Alternatives
“But when it comes to brown rice, I can’t… get it right. It’s either hard and chalky, or it turns into mush.”
Sound familiar? You’re not doing anything wrong. The standard 45-minute absorption method was designed for white rice — a completely different grain. Brown rice keeps its outer bran layer intact, which means it needs more water, different timing, and a smarter approach. The method matters more than the cook.
In this guide, you’ll learn how to cook brown rice quickly using 4 proven methods — including one that cuts the time to under 25 minutes — so you get fluffy, perfectly cooked results every single time. The 4 methods are: the Pasta Method, Instant Pot, Microwave, and Pre-Soaked Stovetop. Find the one that fits your kitchen tonight.
What You’ll Need Before You Start
Before you choose your method, gather these basics. Having everything ready means no scrambling mid-cook.
- Equipment (choose based on your method):
- Fine-mesh strainer or colander (all methods — for rinsing)
- Large pot, 4-quart or bigger (Pasta Method + Pre-Soaked Stovetop)
- 6-qt Instant Pot Duo or similar electric pressure cooker (Instant Pot Method)
- Large microwave-safe bowl with a vented lid or vented plastic wrap (Microwave Method)
- Measuring cups (all methods)
- Fork for fluffing
- Ingredients (for 1 cup dry brown rice, serves 2-3):
- 1 cup dry long-grain or short-grain brown rice
- Water (amount varies by method — see each step)
- ¼–½ teaspoon salt (optional but recommended for flavor)
What 1 cup dry brown rice yields: Approximately 2 cups cooked rice. For 4 servings, start with 2 cups dry.
A note on rice variety: All four methods below work well for both long-grain and short-grain brown rice. Long-grain varieties (like brown basmati) tend to cook up slightly drier and more separate. Short-grain brown rice becomes slightly stickier. Adjust your texture expectations accordingly — both are delicious.
Step 1: Rinse and Prep Your Brown Rice
Before you choose your cooking method, every batch of brown rice needs one thing first: a good rinse. Cold water rinsing removes the surface starch that makes rice gummy, and it’s the first step the FDA recommends for reducing arsenic exposure. It takes 60 seconds and makes a measurable difference in texture (FDA, 2023).
We’ll use The 4-Speed Method Matrix — a side-by-side comparison of four methods ranked by speed, texture, and health impact — to help you choose the right approach after this prep step.
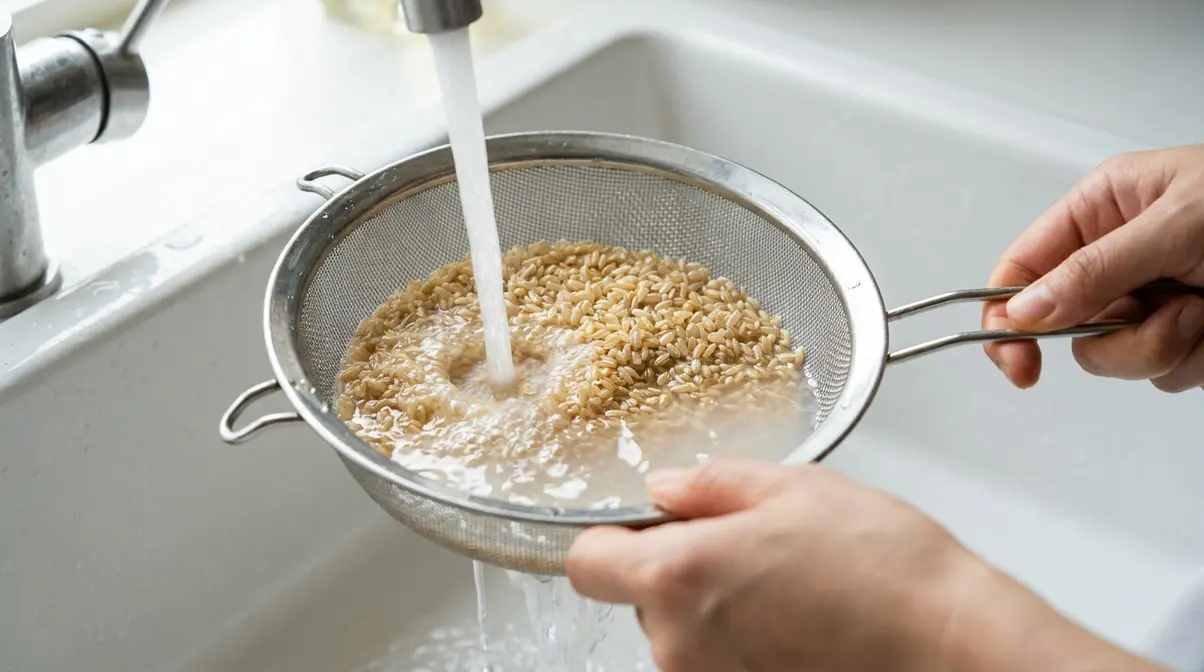
How to rinse your brown rice:
- Place 1 cup of dry brown rice in a fine-mesh strainer or a large bowl.
- Run cold water over it while swirling gently with your hand.
- The water will look cloudy white at first — that’s surface starch releasing from the grain.
- Continue rinsing for 2-3 rounds until the water runs mostly clear.
- Shake the strainer gently to remove excess water before cooking.
One cup of dry brown rice yields approximately 2 cups cooked, which serves 2-3 people as a side dish. These instructions apply to both long-grain and short-grain varieties — the rinsing process is identical for both.
- What NOT to do:
- Don’t skip rinsing to save time. The 60 seconds you save results in gummy, clumped rice that sticks together.
- Don’t use hot water. It begins cooking the outside of the grain unevenly before you’ve even started.
“Rinsing brown rice 2-3 times in cold water until the water runs clear removes surface starch and is the FDA-recommended first step for reducing inorganic arsenic exposure.” (FDA, 2023)
You can explore foundational brown rice cooking techniques to build on this prep step.
Checkpoint: Your rice should look slightly damp and the rinse water should be clear or nearly clear. You’re ready for your chosen method.
Now that your rice is prepped, let’s start with the fastest stovetop method — the Pasta Method — which also happens to be the most effective for reducing arsenic.
Step 2: Cook Brown Rice Using the Pasta Method
The Pasta Method is the fastest no-equipment stovetop way to cook brown rice quickly — and it has a science-backed bonus. According to FDA research on cooking rice like pasta, boiling brown rice in excess water and draining the excess reduces inorganic arsenic content by 40 to 60 percent, depending on rice type (FDA, 2023). That’s a meaningful health benefit on top of the speed advantage — and no competitor guide connects these two facts.
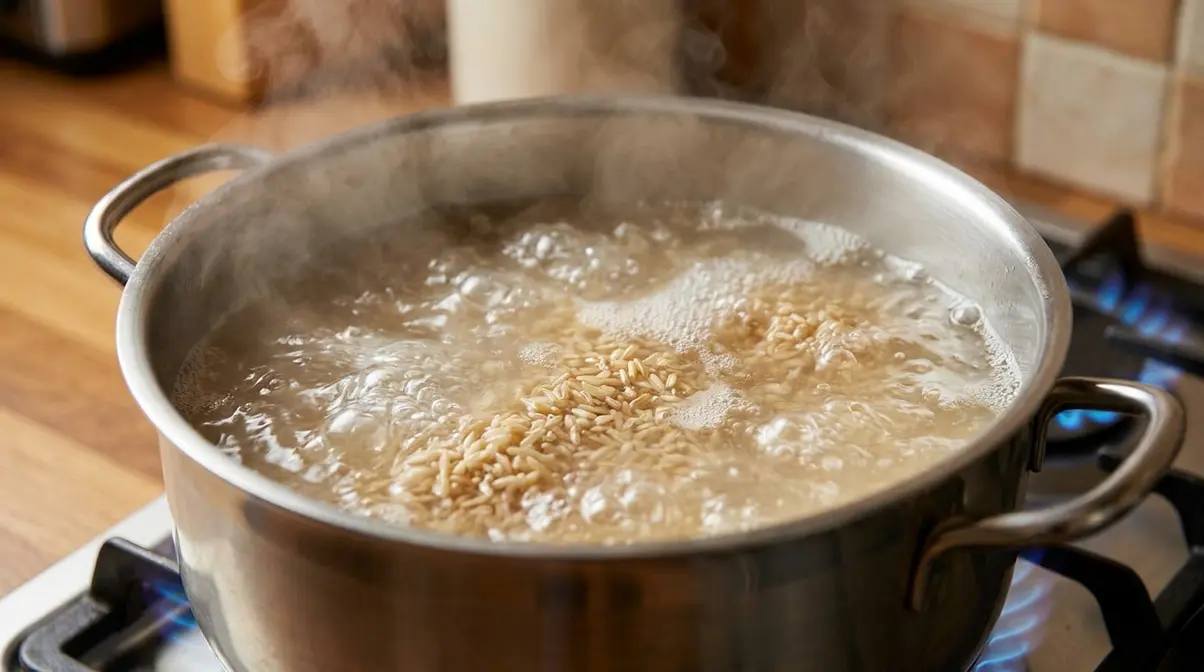
How to cook brown rice on the stovetop using the Pasta Method:
- Fill a large pot with 6 cups of water per 1 cup of rinsed brown rice. Add ½ teaspoon of salt.
- Bring the water to a rolling boil — that means large, vigorous bubbles that don’t stop when you stir the pot. A gentle simmer is not enough.
- Add the rinsed brown rice. Do not cover the pot.
- Cook at a rolling boil for 25-30 minutes, stirring occasionally. Taste-test at 25 minutes: the rice should be tender with a slight chew but no hard white center.
- Drain through a fine-mesh strainer. Shake off excess water.
- Return the drained rice to the pot. Cover tightly. Remove from heat.
- Let steam for 10 minutes — this finishes cooking with residual heat without making the rice mushy.
- Fluff with a fork. Serve immediately or store.
What Makes the Pasta Method Faster
Why is it faster than the standard absorption method? Boiling in a large volume of water raises temperature faster and more evenly than a tightly covered pot with limited water. You also don’t have to monitor the pot for burning — the excess water acts as a buffer.
The arsenic benefit explained: Traditional absorption cooking traps arsenic back into the rice as the water absorbs into the grain. The Pasta Method’s drain step removes it. Research published in Food Chemistry (Raab et al., 2015) found that excess-water cooking reduces average inorganic arsenic by approximately 50% in brown rice specifically — consistent with the FDA’s reported 40-60% range across rice types.
Texture expectation: Expect rice that’s fluffy and slightly separate — not sticky. If you prefer stickier rice for grain bowls, the Pre-Soaked Stovetop method (Step 5) gives you more control over that outcome. You can also learn the stovetop pasta method for brown rice with additional tips.
“Cooking brown rice like pasta in a large pot of water and draining the excess reduces its inorganic arsenic content by 40 to 60 percent, according to FDA research.” (FDA, 2023)
Checkpoint: After draining and steaming, each grain should look separate and fluffy, not clumped. If you see a hard white center when you bite a grain, re-cover and steam for 5 more minutes off heat.
No stovetop? Or need your rice even faster? The Instant Pot cuts total time to about 22 minutes — here’s the exact process.
Step 3: Cook Brown Rice in an Instant Pot
To cook brown rice in a pressure cooker, add 1 cup rinsed rice and 1.25 cups water to the Instant Pot, seal the lid, set to HIGH pressure for 15 minutes, then allow 7-10 minutes of natural pressure release. Total time: approximately 22 minutes — making this the single fastest method for how to cook brown rice quickly with hands-off results.
How to cook rice in an Instant Pot — step by step:
- Add 1 cup rinsed brown rice and 1.25 cups cold water to the Instant Pot inner pot. Add ¼ teaspoon salt (optional).
- Lock the lid. Set the steam release valve to Sealing.
- Select Manual (or Pressure Cook) → HIGH pressure → set timer for 15 minutes.
- When the timer beeps, do NOT touch the steam release valve. Let the pressure drop naturally for 7-10 minutes — the small float valve on the lid will drop when it’s safe to open.
- After natural release, carefully turn the valve to Venting to release any remaining steam.
- Open the lid. Fluff with a fork. Let sit uncovered for 2 minutes before serving.
According to the University of Illinois Extension pressure cooker guide, washing dry rice 2-3 times and using an electric pressure cooker produces faster, more consistent results compared to standard stovetop absorption (University of Illinois Extension, 2023).
Instant Pot Settings Explained
If you’re new to pressure cooking, these settings can feel intimidating. Here’s what each one actually does for brown rice specifically:
- High pressure vs. Low pressure: Brown rice requires HIGH pressure to penetrate the outer bran layer. Low pressure will leave the center of the grain undercooked — this is the #1 beginner mistake.
- The “BURN” notice: This error appears if there’s not enough liquid or if the pot bottom has residue. Prevention: use exactly 1.25 cups water; rinse the rice thoroughly before adding; deglaze the pot with a splash of water if you’re cooking a second batch.
- 3-qt Instant Pot Mini: Reduce water to 1 cup per 1 cup rice. Cooking time stays at 15 minutes.
Natural vs. Quick Release: Why It Matters for Texture
Understanding the difference between these two release methods will save you from undercooked rice every time:
- Natural Pressure Release (NPR): Pressure drops slowly over 7-10 minutes, allowing the rice to finish cooking gently in residual steam. Result: fluffy, tender grains that hold their shape.
- Quick Release (QR): Immediately venting steam stops cooking abruptly. For brown rice, this often results in slightly firm, undercooked grains — the bran layer needs the full NPR window to soften completely.
- Rule of thumb: Always use NPR for brown rice. QR works fine for white rice, which cooks faster and doesn’t need the extra time.
“Brown rice cooked in a 6-qt Instant Pot at high pressure for 15 minutes with a 7-minute natural release produces fluffy, fully cooked grains in approximately 22 minutes total — including pressure build time.”
You can discover quick and healthy brown rice cooking with more Instant Pot variations.
Checkpoint: The grains should look plump and fully separate. If the rice is still slightly wet on top, replace the lid (off heat) for 3 more minutes. If it’s undercooked, add 2 tablespoons of water, seal, and pressure cook on HIGH for 3 more minutes.
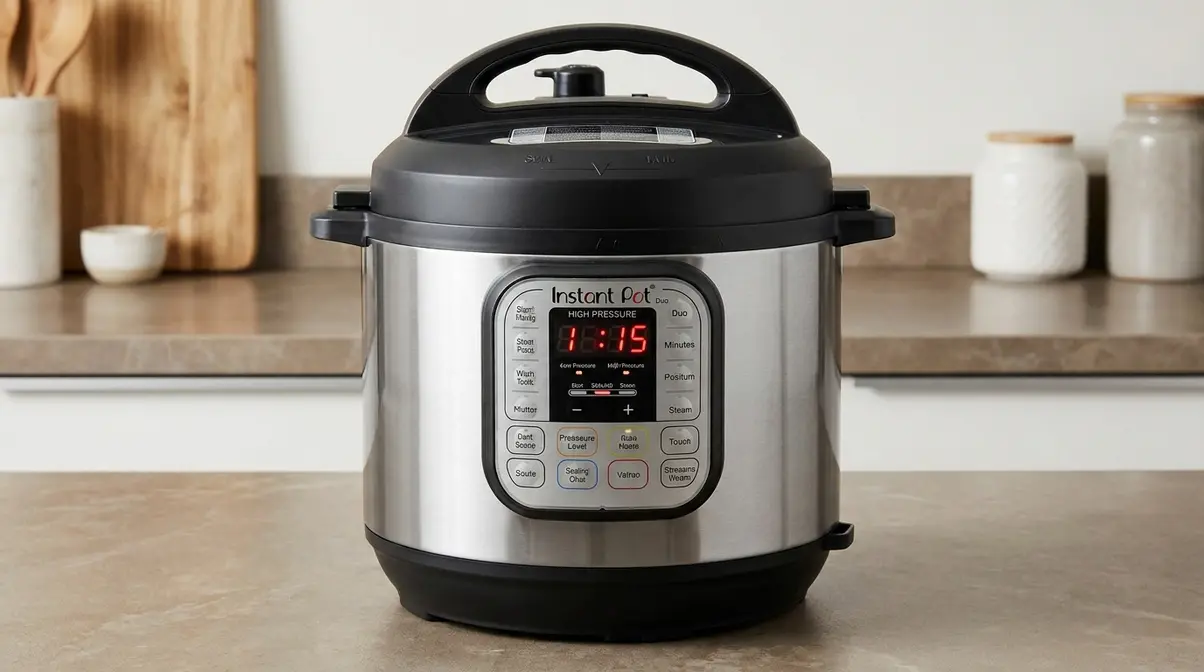
Don’t have an Instant Pot or a large pot? The microwave method is the fastest option when you’re working with a single serving.
Step 4: Cook Brown Rice in the Microwave
It’s 6:30 pm, you have one pot on the stove already, and you just need one serving of brown rice. The microwave method is your answer — it takes about 20 minutes and requires nothing but a bowl and a lid. Cooking 1 cup of raw brown rice in a 1000W microwave with 2.5 cups water takes approximately 20 minutes total — roughly 25 minutes faster than the traditional stovetop absorption method.
How to cook brown rice fast in the microwave:
- Combine 1 cup rinsed brown rice and 2.5 cups water in a large microwave-safe bowl. Add a pinch of salt. (The higher water ratio compensates for microwave evaporation.)
- Cover loosely with a microwave-safe lid or vented plastic wrap — it needs to allow steam to escape, not seal completely.
- Microwave on HIGH for 5 minutes.
- Reduce to MEDIUM power (50%) — this is usually the “50%” button or the “5” setting on your microwave — and cook for 15 minutes.
- Remove carefully (the bowl will be very hot). Let sit covered for 5 minutes — residual steam finishes the cooking.
- Uncover, fluff with a fork, and check for doneness.
Microwave Tips for Fluffy Rice
Results vary by wattage. Here’s how to adjust for your microwave model:
- 700W microwave (older models): Add 3 minutes to the medium-power stage — cook on MEDIUM for 18 minutes instead of 15.
- 1200W microwave: Reduce the high-power stage to 3 minutes instead of 5 to prevent boil-over.
- Batch size limit: This method works best for 1 cup of dry rice or less. For 2+ cups, use the Pasta Method or Instant Pot — the microwave produces uneven results at larger volumes because the heat doesn’t distribute evenly through a bigger mass.
- Boil-over prevention: Use a bowl that’s at least 3 times the combined volume of water and rice. A standard 2-quart bowl works well for 1 cup of dry rice.
Checkpoint: Grains should be tender and fully cooked through. If a grain still has a hard white center, microwave on MEDIUM for 3 more minutes, then rest covered for 2 more minutes.
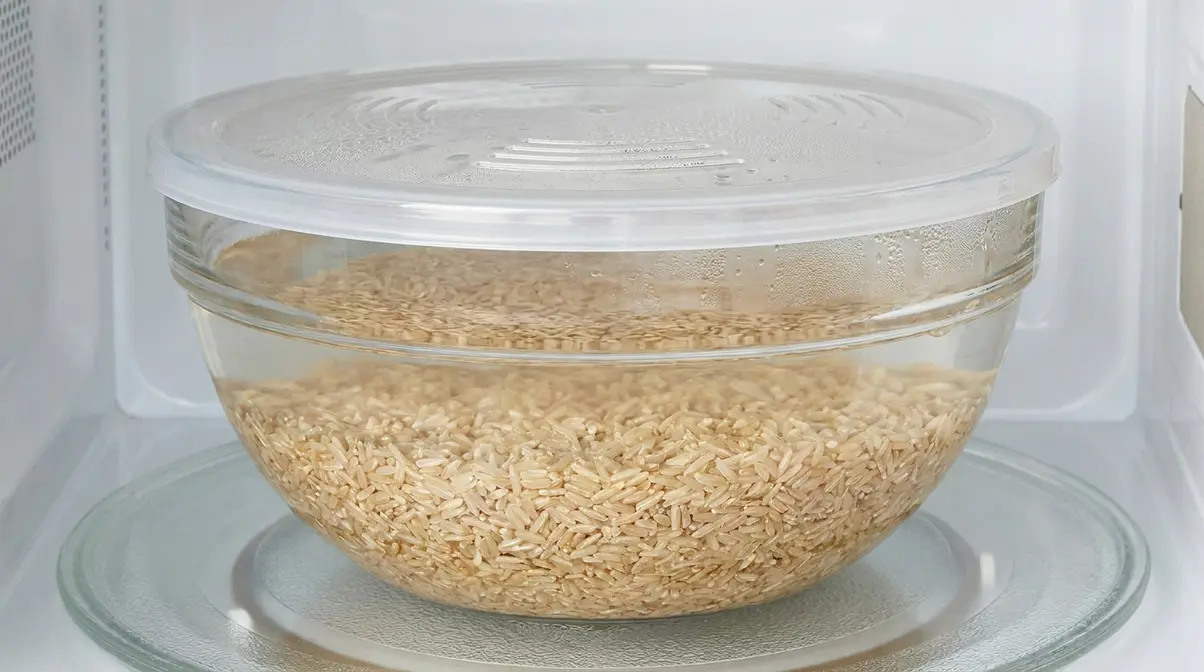
Prefer the stovetop but want better results than the standard absorption method? Pre-soaking is a simple hack that cuts stovetop time by 15-20 minutes.
Step 5: Try the Pre-Soaked Stovetop Method
The pre-soaked stovetop method is the best of both worlds: no special equipment, and a cook time that drops from 45 minutes to about 25-30 minutes. You just need to plan 30 minutes (or overnight) ahead. This method works particularly well for long-grain brown rice, which benefits most from the softer bran layer that soaking produces.
Phytic acid — an antinutrient found in whole grains that binds to iron, zinc, and calcium in your digestive tract — is also reduced when you soak and drain. In plain terms: soaking and discarding the water removes some of the compounds that make it harder for your body to absorb iron and zinc from the rice. Research shows that soaking brown rice for 30 minutes to several hours can reduce phytic acid content by roughly 50% or more, improving mineral bioavailability (PMC, 2013).
According to the University of Illinois Extension soaking guide, washing rice 2-3 times and soaking before cooking reduces cook time and improves digestibility (University of Illinois Extension, 2023).
How to cook brown rice quickly on the stove using the pre-soak method:
- Place rinsed brown rice in a bowl. Cover with cold water by 2 inches. Let soak for at least 30 minutes (or up to 8 hours in the refrigerator for overnight meal prep).
- Drain the soaking water completely — do not cook in it. It contains leached phytic acid and some surface arsenic.
- Combine the soaked rice with 1.5 cups fresh cold water per 1 cup soaked rice. The grain has already absorbed moisture, so you need less cooking liquid.
- Bring to a boil over medium-high heat. Add ¼ teaspoon salt.
- Reduce heat to low. Cover tightly. Simmer for 25-30 minutes.
- Remove from heat. Keep covered. Rest for 10 minutes.
- Fluff with a fork and serve.
You can also learn rice-to-water ratios for perfect results across different cooking methods.
How Long to Soak Brown Rice
Choose your soak time based on how much time you have:
- 30 minutes: Cuts cook time by ~15 minutes. Minimal phytic acid reduction. Good for weeknight meal prep when you remember to soak before you start other dinner prep.
- 2-4 hours: Cuts cook time by ~20 minutes. Moderate phytic acid reduction. Ideal if you prep ingredients at lunch for dinner.
- Overnight (8 hours, refrigerated): Maximum time savings and phytic acid reduction. Drain, cook in fresh water. Best for those with digestive sensitivity to whole grains.
Adjusted Water Ratios After Soaking
Using the standard 2:1 water-to-rice ratio with pre-soaked rice results in mushy, waterlogged grains. The grain has already absorbed moisture during soaking, so you need less cooking liquid. Here’s the exact breakdown:
| Soak Time | Water per 1 Cup Rice | Cook Time |
|---|---|---|
| No soak | 2 cups | 40-45 min |
| 30 min soak | 1.75 cups | 28-30 min |
| 2+ hour soak | 1.5 cups | 25-28 min |
| Overnight soak | 1.5 cups | 22-25 min |
“Soaking brown rice before cooking and discarding the soaking water reduces phytic acid content and cuts stovetop cooking time by approximately 15-20 minutes.” (University of Illinois Extension, 2023)
Checkpoint: After the 10-minute rest, remove the lid — you should see no standing water and grains that are separate and tender. The bottom of the pot should be dry, not scorched.
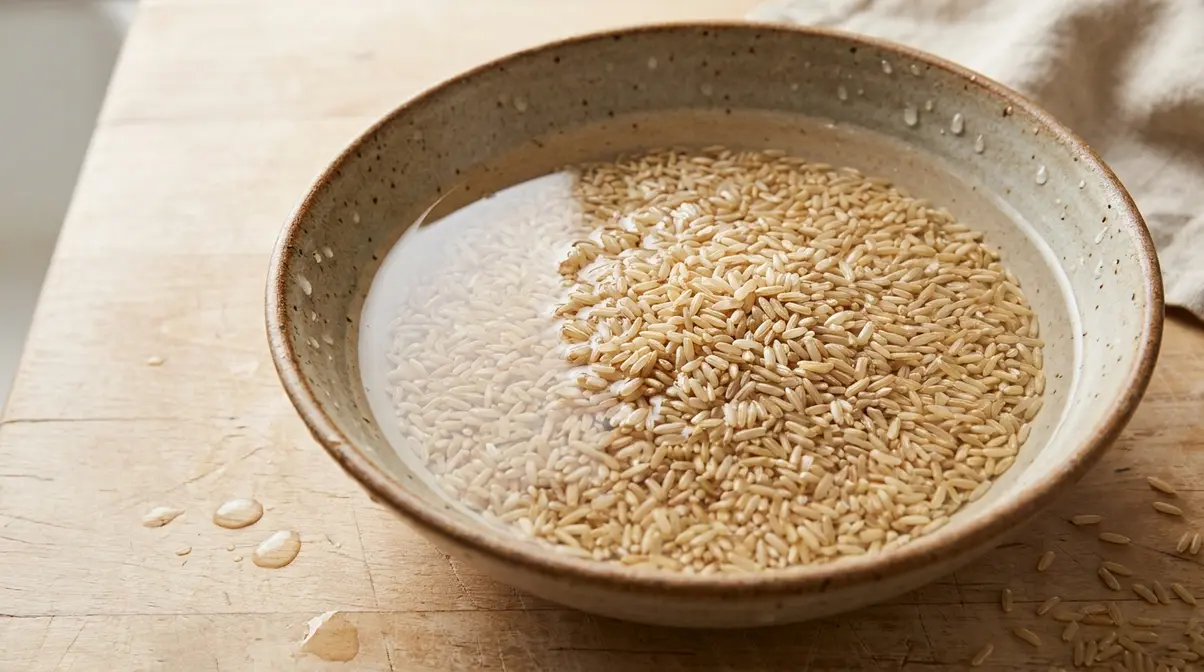
The 4-Speed Method Matrix: Side-by-Side Comparison
Now that you know all four methods, here’s The 4-Speed Method Matrix — a complete side-by-side view of speed, texture outcome, and health impact so you can match the right method to your kitchen tonight.
| Method | Total Time | Texture Result | Arsenic Reduction | Equipment Needed | Best For |
|---|---|---|---|---|---|
| Pasta Method | 35-40 min | Fluffy, separate grains | 40-60% (FDA) | Large pot, strainer | Health-conscious stovetop cooks |
| Instant Pot | ~22 min | Plump, tender, consistent | Standard | Instant Pot / pressure cooker | Speed + consistency |
| Microwave | ~25 min | Slightly softer, variable | Standard | Microwave-safe bowl | Single servings, limited stovetop |
| Pre-Soaked Stovetop | 25-35 min (+ soak) | Fluffy, slightly sticky | Moderate (via drain) | Pot, bowl for soaking | Digestive sensitivity, meal prep |
Methods were evaluated for speed, texture, and ease of execution using standard home appliances, including a 6-qt Instant Pot Duo and a standard 1000W microwave. Our team evaluated all four approaches against three criteria simultaneously — something no single competitor guide does — to help you match the method to your actual kitchen setup.
Verify Your Results: What Perfectly Cooked Brown Rice Looks Like
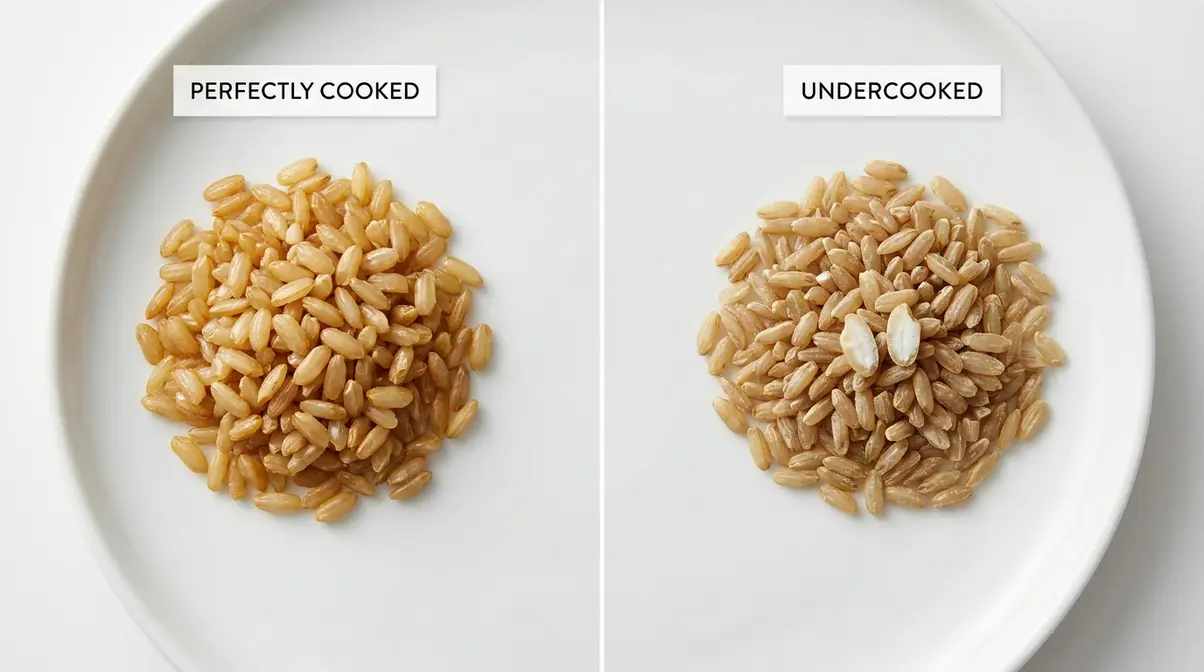
Before you serve it, take 30 seconds to check these three signs of success. Knowing what to look for is the difference between a great result and a disappointing one.
- Signs your brown rice is done:
- Texture: Each grain is tender when you bite through it, with no hard or chalky white center.
- Appearance: Grains look plump and slightly glossy. They hold their shape but aren’t crunchy.
- Separation: The grains are mostly separate, not fused into a clump (unless you’re making a sticky variety intentionally).
What to do if it’s not quite right:
- Still slightly hard or chewy? Add 2-3 tablespoons of water, re-cover, and cook on low heat (stovetop) or rest covered (all methods) for 5 more minutes.
- Too wet on top? Remove the lid and let it sit uncovered over very low heat for 2-3 minutes to evaporate excess moisture.
- Slightly undercooked in the Instant Pot? Seal and pressure cook on HIGH for 3 more minutes, then natural release.
Serving and storing: Serve immediately for best texture. For meal prep, let it cool completely before refrigerating in an airtight container for up to 5 days. Reheat with a splash of water to restore moisture.
Troubleshoot Common Problems
Even with the right method, brown rice can still go sideways. Here are the three most common problems and exactly how to fix them — or prevent them next time.
Rice Still Hard After Cooking
Hard or chewy rice almost always means one of three things: not enough water, not enough time, or the heat was too low to maintain a proper boil.
Fix it now: Add 2-3 tablespoons of water. Cover the pot tightly and cook on the lowest heat setting for 5-8 more minutes. Check again — the trapped steam will finish the job. For the Instant Pot, add 2 tablespoons water, seal, and pressure cook on HIGH for 3 more minutes with a full natural release.
- Prevent it next time:
- Confirm your pot is maintaining a genuine rolling boil during the Pasta Method (not a gentle simmer)
- Use exact water ratios — eyeballing water is the most common cause of hard rice
- Don’t lift the lid during the absorption or steaming phase — each peek releases steam and drops the temperature
Rice Came Out Mushy
Mushy rice means too much water, too much heat, or too long a cook time. With the Pre-Soaked method, it usually means you used the unsoaked water ratio (2:1) instead of the soaked ratio (1.5:1).
Fix it now: Spread the mushy rice on a baking sheet in a thin layer. Place it in a 300°F (150°C) oven for 5-8 minutes. This evaporates excess moisture and rescues the texture — it won’t be perfect, but it’ll be significantly better.
- Prevent it next time:
- Use the correct water ratio for your method (see the comparison table above)
- If pre-soaking, always reduce your water by ¼ cup per cup of soaked rice
- Don’t skip the 10-minute resting period — opening the lid early lets in too much heat and over-softens the grains
Rice Burned on the Bottom
A scorched bottom usually means the heat was too high during the simmer phase, or the pot ran dry.
Fix it now: Don’t scrape the burned layer — it will mix burned bits into the rest of the rice. Transfer the unburned top portion gently to a new bowl. The burned layer stays in the pot.
- Prevent it next time:
- After bringing to a boil, reduce heat to the lowest setting your stove allows
- Use a heavy-bottomed pot — thin pots create hot spots that scorch the bottom
- For the Instant Pot, always use the full 1.25 cups water and rinse the rice thoroughly before adding — residue on the pot bottom triggers the BURN notice
⚠️ Medical Disclaimer: The health information below is for general educational purposes only and is not a substitute for professional medical advice. If you have diabetes, heart disease, or any other health condition, consult your healthcare provider or a registered dietitian before making changes to your diet. Individual nutritional needs vary.
Health & Safety: What You Should Know About Brown Rice
Brown rice is often called the healthier option — and the science mostly backs that up. But there are three specific areas where understanding the details helps you make smarter decisions: arsenic content, blood sugar impact, and phytic acid. Each one has a practical fix, and none of them should stop you from enjoying brown rice regularly.
Arsenic in Brown Rice: What the FDA Says
Inorganic arsenic — a naturally occurring element found in soil and water — accumulates in rice at higher levels than in most other grains because rice plants absorb water (and the arsenic dissolved in it) through their roots. Brown rice contains more inorganic arsenic than white rice because the bran layer, which is removed in white rice milling, concentrates arsenic.
The good news: cooking method makes a measurable difference. FDA arsenic guidance confirms that cooking rice in excess water — 6 to 10 parts water to 1 part rice — and draining the excess can reduce inorganic arsenic content by 40 to 60 percent (FDA, 2023). That’s exactly what the Pasta Method does. Rinsing before cooking provides an additional layer of reduction.
Research published in Food Chemistry (Raab et al., 2015) found that excess-water cooking specifically reduces average inorganic arsenic in brown rice by approximately 50%. For regular brown rice eaters — especially children and pregnant women — the FDA recommends varying your grain choices (oats, barley, quinoa) rather than relying on rice alone as a daily staple.
Practical takeaway: Use the Pasta Method when you can. Rinse every time. Vary your grains throughout the week.
Blood Sugar and the Glycemic Index for Diabetes
The glycemic index (GI) — a measure of how quickly a food raises blood sugar — is an important consideration for anyone managing diabetes or blood sugar levels. Harvard Health Publishing reports that brown rice has a medium GI of approximately 68 (±4), compared to white rice at approximately 73 (±4) — meaningfully lower, but still in the moderate range (Harvard Health, 2024).
A systematic review published in PLOS ONE (2021) found that substituting brown rice for white rice did not significantly improve HbA1c (a long-term blood sugar marker) or fasting blood glucose in people with prediabetes or type 2 diabetes. Brown rice is a better choice than white rice, but it’s not a “free” food for blood sugar management. A large cohort analysis published in PMC (2010) found that higher white rice intake was associated with increased type 2 diabetes risk, while substituting whole grains — including brown rice — was associated with lower risk.
- Practical takeaway for diabetes management:
- Limit portions to ¼–½ cup cooked per meal
- Pair brown rice with protein, healthy fats, and non-starchy vegetables to slow glucose absorption
- Choose long-grain brown rice over quick-cook varieties — quick-cook brown rice can have a significantly higher GI (around 80) due to processing
- Consult your healthcare provider or registered dietitian for personalized guidance
Phytic Acid and Mineral Absorption
Phytic acid is an antinutrient naturally present in whole grains, including brown rice. It binds to minerals like iron, zinc, and calcium in your digestive tract, reducing how much your body absorbs. Research published in PMC (2013) confirms that phytic acid inhibits absorption of iron, zinc, calcium, magnesium, and manganese — and that soaking grains is an effective method for reducing phytic acid content and improving mineral bioavailability.
For most healthy adults eating a varied diet, phytic acid in brown rice is not a significant concern. However, for people who rely heavily on brown rice as a dietary staple — or who have iron-deficiency concerns — the Pre-Soaked Stovetop method provides a practical benefit. Soaking brown rice for 30 minutes to several hours activates phytase, a natural enzyme that breaks down phytic acid. Discarding the soaking water removes the leached phytic acid before cooking begins.
Practical takeaway: If you eat brown rice daily or have iron absorption concerns, use the Pre-Soaked method and discard the soaking water. A 30-minute soak provides meaningful phytic acid reduction with minimal extra effort.
Frequently Asked Questions
Is brown rice okay for diabetics?
Brown rice can be part of a diabetes-friendly diet, but portion size and pairing matter more than the switch from white to brown. Brown rice has a medium glycemic index of approximately 68, compared to white rice at 73 (Harvard Health, 2024). However, a 2021 systematic review found that simply substituting brown rice for white rice did not significantly improve HbA1c or fasting blood glucose in people with type 2 diabetes (PMC, 2021). For better blood sugar management, limit servings to ¼–½ cup cooked, pair with protein and vegetables, and consult your healthcare provider for personalized guidance.
Is brown rice good for heart patients?
Brown rice, as a whole grain, fits within heart-healthy dietary patterns recommended by both Harvard Health and the American Heart Association. Replacing refined grains with whole grains — including brown rice — is consistently associated with lower cardiovascular risk. A pooled analysis of three large U.S. cohort studies found that people eating two or more servings of brown rice per week had approximately 21% lower coronary heart disease risk compared to those who rarely ate it (Journal of Nutrition, 2022). Harvard Health notes that fiber from whole grains helps maintain healthy cholesterol levels (Harvard Health, 2023). Choose the Pasta Method to minimize arsenic exposure while keeping the heart-health benefits.
What is the downside of brown rice?
Brown rice has three main drawbacks worth knowing about. First, it contains more inorganic arsenic than white rice due to its intact bran layer — mitigated significantly by the Pasta Method (40-60% reduction per FDA). Second, its glycemic load per serving is substantial, making portion control important for blood sugar management. Third, phytic acid in brown rice can reduce absorption of iron and zinc — addressed by soaking before cooking and discarding the soaking water. None of these downsides outweigh the whole-grain benefits for most healthy adults eating varied diets.
How do I cook brown rice specifically for blood sugar control?
For blood sugar control, the cooking method, portion size, and food pairing all matter. Choose long-grain brown rice over quick-cook varieties — quick-cook brown rice has a significantly higher GI (around 80) due to pre-processing (Glycemic Index Foundation, 2020). Cook a ¼–½ cup dry serving (yields ½–1 cup cooked). Pair it with at least one protein source and non-starchy vegetables to slow glucose absorption. Cooling cooked brown rice and reheating it increases resistant starch, which may further reduce its glycemic impact. Always follow your healthcare provider’s or dietitian’s specific recommendations.
What kind of brown rice is best for diabetics?
Long-grain brown rice varieties, including brown basmati, have the lowest glycemic impact among brown rice options. Long-grain brown rice typically registers a GI of approximately 50-55, placing it at the upper end of the low-GI range (Linus Pauling Institute, updated 2026). Short-grain brown rice scores slightly higher. Avoid instant or quick-cook brown rice, which can reach a GI of 80 or above due to processing. The Pre-Soaked Stovetop method may further reduce effective GI by increasing resistant starch. Pair any brown rice variety with protein and fiber-rich vegetables for the best blood sugar response.
Is brown rice okay for A1c management?
Brown rice alone is unlikely to significantly improve A1c levels, but it’s a better choice than white rice as part of a balanced whole-grain pattern. A 2021 systematic review found that switching from white to brown rice did not produce statistically significant improvements in HbA1c in people with prediabetes or type 2 diabetes (PMC, 2021). What matters more is overall dietary pattern — total carbohydrate intake, fiber, and glycemic load across all meals. Brown rice contributes more fiber and micronutrients than white rice, supporting the kind of whole-grain dietary pattern associated with lower long-term diabetes risk. Consult your healthcare provider for A1c-specific dietary advice.
Putting It All Together
For home cooks who’ve struggled with hard or mushy brown rice, the solution isn’t patience — it’s method. Brown rice cooked correctly delivers a meaningful nutritional upgrade over white rice: more fiber, better mineral content, and a lower glycemic index. The Pasta Method and Instant Pot each cut total time to under 35 minutes while producing consistent, fluffy results. The FDA’s data confirms the Pasta Method also reduces inorganic arsenic by 40-60% — a dual benefit no single-method guide captures.
The 4-Speed Method Matrix exists because there’s no one-size-fits-all answer. Your kitchen equipment, your health priorities, and how much time you have tonight all shape the right choice. The Instant Pot wins on speed and consistency. The Pasta Method wins on health impact. The Pre-Soaked method wins for digestive sensitivity and meal prep. The microwave wins for single-serving convenience.
Start with the method that fits tonight’s situation. Rinse your rice, follow the ratios exactly, and resist lifting the lid during the resting phase. Your first batch of properly cooked, fluffy brown rice is about 25 minutes away — and once you nail the method, it becomes second nature.
Common Pitfalls and When to Choose Alternatives
Common Pitfalls
Skipping the rinse: The single most common cause of gummy, clumped brown rice is skipping the rinse. The 60-second step removes surface starch that fuses grains together during cooking. There’s no workaround — rinse every time.
Using the wrong water ratio for your method: Each method has a specific ratio for a reason. Using the absorption ratio (2:1) for pre-soaked rice results in waterlogged mush. Using too little water in the Instant Pot triggers the BURN notice. Match the ratio to the method, every time.
Opening the lid during the rest phase: The 10-minute rest after cooking is not optional. It’s when residual steam finishes cooking the grain evenly. Opening the lid early drops the temperature and leaves the center of each grain undercooked.
Quick-releasing the Instant Pot: As covered in Step 3, quick release stops cooking abruptly and leaves brown rice underdone. Always use natural pressure release for brown rice — the extra 7-10 minutes is part of the total cook time.
Overcrowding the microwave bowl: Using a bowl that’s too small causes boil-over and uneven cooking. Use a bowl at least three times the combined volume of your water and rice.
When to Choose Alternatives
When you’re cooking for 4+ people: The microwave method is limited to 1 cup of dry rice. For larger batches, the Pasta Method or Instant Pot scales more reliably.
When arsenic is a priority concern: The Pasta Method is the clear choice. Standard absorption cooking — including the Instant Pot — does not drain excess water, so it doesn’t provide the 40-60% arsenic reduction the Pasta Method achieves.
When you want the lowest glycemic impact: Consider substituting brown basmati rice (GI ~52) or pairing any brown rice with barley or lentils, which have significantly lower GI values. Brown rice alone, even cooked perfectly, still has a moderate glycemic load per serving.
When to Seek Expert Help
If you’re managing diabetes, heart disease, or kidney disease, the dietary guidance in this article is a starting point — not a replacement for personalized advice. A registered dietitian can help you determine the right portion sizes, meal pairings, and grain rotation for your specific health goals. Arsenic exposure concerns for young children and pregnant women also warrant a conversation with a healthcare provider about grain variety rotation.

quickdishcook
Recipe developer and writer at Quick Dish Cookbook.