
Crispy Rice Salad Recipe: 6 Steps, 3 Methods, No Mush

July 14, 2026

Overhead view of finished crispy rice salad recipe with golden rice, cucumber, avocado, and sesame dressing

You followed the TikTok video exactly. You watched the rice go golden and gorgeous in the pan. Then it hit the bowl — and turned into mush.

Every minute your rice steams instead of crisps, you’re losing the crunch you came here for. The problem isn’t you. It’s that most recipes skip the why behind the technique — the right rice temperature, the right oil ratio, the right method for your kitchen.

“This Crispy Rice Salad is packed with crispy rice, fresh veggies, and a bold ginger-sesame dressing for the perfect mix of texture and flavor.”

By the end of this guide, you’ll know exactly how to make a crispy rice salad recipe that delivers that savory-sweet crunch — every single time. You’ll follow 6 clear steps, choose from 3 crisping methods, and get 5 troubleshooting fixes for the most common mistakes.

Quick Answer: To make a crispy rice salad, cook and cool day-old jasmine rice, toss it with oil and seasoning, then crisp it in the oven at 400°F for 30–35 minutes. Toss with fresh vegetables and a bold dressing. This 6-step process takes about 45–55 minutes total.

Key Takeaways

The secret to a perfect crispy rice salad recipe is starting with cold, day-old rice — it crisps up golden and crunchy instead of steaming into mush.

  • Rice type matters: Cold leftover jasmine rice (cooked the day before) delivers the best crunch.
  • 3 ways to crisp: Oven (best texture), air fryer (fastest), or stovetop pan (most control).
  • Food safety first: Cool cooked rice within 1 hour and refrigerate — research published in NIH-indexed journals warns that improperly stored rice can harbor heat-stable toxins that survive the frying process.
  • The 3-Method Crunch System: Choose your method based on your equipment and time — all three work, but each produces a slightly different result.
  • Make it a meal: Add chicken, salmon, or tofu and store crispy rice separately from the dressing to keep it crunchy for up to 4 days.

What You’ll Need Before You Start

Before you begin, gather everything below. Having all your ingredients and tools ready — called mise en place (pronounced meez-on-PLAS), French for “everything in its place” — makes the process smooth and stress-free.

One key fact to know upfront: day-old rice (rice cooked the day before and refrigerated overnight) is non-negotiable. Refrigeration drives moisture out of the grains, leaving them dry and firm. When dry grains hit high heat, they develop a hard outer shell — that’s your crunch. Warm, freshly cooked rice releases steam, and steam is the enemy of crispy.

Ingredients

  • For the crispy rice:
  • 2 cups day-old cooked jasmine rice — jasmine rice is a long-grain fragrant rice; cold, straight from the fridge
  • 1 tbsp neutral oil (vegetable or avocado)
  • ½ tsp garlic powder
  • ½ tsp salt
  • ¼ tsp black pepper
  • For the salad:
  • 1 English cucumber, thinly sliced
  • 2 cups mixed greens or shredded cabbage
  • 1 avocado, diced
  • ¼ cup fresh herbs (cilantro, mint, or both)
  • 2 tbsp roasted peanuts or sesame seeds
  • For the dressing:
  • 2 tbsp soy sauce (or tamari — a gluten-free soy sauce alternative)
  • 1 tbsp sesame oil
  • 1 tbsp rice wine vinegar — a mild, slightly sweet vinegar used in Asian cooking
  • 1 tbsp honey or maple syrup
  • 1 tsp fresh ginger, grated
  • 1 tsp sriracha (optional, for heat)

Equipment

  • Baking sheet (oven method) OR large skillet (pan method) OR air fryer basket (air fryer method)
  • Parchment paper
  • Large mixing bowl
  • Whisk or fork
  • Sharp knife and cutting board
  • Measuring spoons

Time Estimate

MethodPrepCrispingTotal
⏱️ Air fryer15 min~10–15 min~25–30 min
🍳 Stovetop pan15 min~15–20 min~30–35 min
🔥 Oven15 min~30–35 min~50 min

Step 1: Cook and Cool Your Rice Safely

According to NIH research on rice food safety, Bacillus cereus (B. cereus) — a common bacteria found in cooked rice that can cause food poisoning if rice is stored incorrectly — can multiply at temperatures as low as 4°C (39°F) in rice dishes (NIH, 2021). Knowing this one fact explains why every great crispy rice for salad recipe starts with cold, day-old rice.

Cooked jasmine rice spread thin on a baking sheet to cool quickly for crispy rice salad recipe
Spread hot rice in a single thin layer on a baking sheet immediately after cooking — the fastest way to cool it safely and drive out moisture for maximum crunch.

How to Cook Rice from Scratch (If You Don’t Have Leftovers)

  1. Rinse 1 cup dry jasmine rice under cold water until the water runs clear — this removes excess starch that causes clumping.
  2. Combine with 1.5 cups water in a saucepan. Bring to a boil over high heat.
  3. Reduce heat to low, cover, and cook for 15 minutes.
  4. Remove from heat and rest, covered, for 5 more minutes. Do NOT season at this stage.
  5. Proceed immediately to the cooling step below.

⚠️ Safe Rice Cooling — Why It Matters

CDC warnings on improperly cooled rice confirm that B. cereus produces heat-stable toxins when rice is left at room temperature — toxins that survive the frying process entirely (CDC). This is not just a texture issue. It’s a food safety issue that zero other crispy rice salad guides address.

Follow these steps every time:

  1. Spread hot rice in a thin, even layer on a clean baking sheet immediately after cooking.
  2. Cool at room temperature for no more than 1 hour.
  3. Transfer to an airtight container and refrigerate for at least 4 hours — overnight is ideal.
  4. Use rice that is cold, dry, and firm before proceeding to Step 2.

⚠️ Food safety note: Food safety guidance from the FDA and USDA requires cooling cooked rice from 135°F to 70°F within 2 hours, then to 41°F or below within 4 more hours (FDA Food Code). When in doubt about food safety, consult food safety guidelines from your local health authority.

Why Cold Rice = Better Crunch

Refrigeration pulls moisture out of each grain. Cold, dry grains develop a hard outer shell when they hit high heat — that’s the crunch. Warm rice releases steam. Steam turns crispy into soggy. The right method means nothing if the rice isn’t properly cold — and that’s exactly why The 3-Method Crunch System (coming in Step 3) requires this step as its foundation.

Checkpoint: Your rice should be cold, dry, and slightly firm — individual grains should separate easily with a fork. If it’s sticky or warm, give it more time in the fridge.

Cold rice is your blank canvas — Step 2 is where you add the flavor.

Step 2: Season and Coat the Rice for Maximum Crunch

This is the moment your rice transforms from plain leftovers into something that smells like it belongs on a restaurant menu. The key to a great crispy rice recipe for salad isn’t just what you add — it’s how much and how you add it.

Cold jasmine rice being tossed with oil and garlic powder seasoning in a large bowl for crispy rice salad
Use clean hands to toss — they coat more evenly than a spoon and won’t crush the grains.

The Exact Oil-to-Rice Ratio

For perfectly crispy rice, use exactly 1 tablespoon of neutral oil per 2 cups of cold cooked rice — more than this causes steaming rather than crisping. Too little and the rice won’t brown evenly. This is the technique behind the best crispy rice salad recipes, and it’s the detail most guides skip entirely.

Important: Use vegetable, avocado, or light olive oil — NOT sesame oil. Sesame oil has a low smoke point (the temperature at which oil starts to burn), meaning it will turn bitter and acrid before your rice ever gets crispy. Save the sesame oil for the dressing in Step 5.

How to Season and Coat

  1. Add 2 cups cold rice to a large mixing bowl.
  2. Drizzle 1 tbsp neutral oil evenly over the rice.
  3. Sprinkle your seasoning base: ½ tsp garlic powder, ½ tsp salt, ¼ tsp black pepper.
  4. Use clean hands to toss gently — hands coat more evenly than a spoon and won’t crush the grains.
  • Optional seasoning additions:
  • ½ tsp smoked paprika — adds smoky depth
  • ½ tsp five-spice powder — great for Asian-inspired versions
  • 1 tsp furikake (a Japanese rice seasoning — a mix of sesame seeds, dried seaweed, and salt) — for a Japanese-inspired variation

Checkpoint: Every grain should look lightly shiny with no dry white patches or clumps. If you see clumps, break them apart gently with your fingers.

Your rice is seasoned, coated, and ready for the most important step — and with the 3-Method Crunch System, you will nail it.

Step 3: Crisp the Rice Using the 3-Method Crunch System

Most crispy rice failures happen right here — in the crisping step. The good news: there isn’t one right way to do it. The 3-Method Crunch System is a side-by-side comparison of the three most effective ways to crisp rice at home, so you can choose the right method for your equipment and schedule — without guessing.

Which should you choose? Use the table below.

Side-by-side comparison of crispy rice made in oven, stovetop pan, and air fryer for crispy rice salad recipe
The 3-Method Crunch System — oven, air fryer, and stovetop pan — each produces slightly different results depending on your equipment and time.
Infographic showing 5 tips for perfectly crispy rice including day-old rice, oil ratio, and temperature guide
Five essential tips for making perfectly crispy rice — from rice temperature to oil ratio — at a glance.
MethodTempTimeTextureBest ForEquipment
Oven400°F (200°C)30–35 minMost even, golden crunchHands-off cooking, large batchesBaking sheet + oven
Air Fryer400°F (200°C)10–15 minCrispy, slightly unevenSpeed, small batchesAir fryer
Stovetop PanMedium-high15–20 minCrispy outside, chewier centerMost control, no ovenCast-iron or non-stick pan

The 3-Method Crunch System shows that the oven method at 400°F for 30–35 minutes produces the most even, golden crunch — while the air fryer achieves comparable results in under 15 minutes. For an authentic fry, culinary experts suggest frying rice until the bubbling subsides — typically about 45 seconds per handful — a technique that remains a benchmark for stovetop crisping (LA Times, 2016).

Oven Method (Best Texture)

  1. Preheat oven to 400°F (200°C).
  2. Line a baking sheet with parchment paper.
  3. Spread seasoned rice in a single, even layer — no piling, no overlapping. Overlapping = steaming.
  4. Bake for 30–35 minutes, stirring every 10 minutes with a spatula.
  5. The rice is done when it’s deep golden-brown and makes a faint crackling sound.
  6. Remove from oven and let cool on the pan for 5 minutes — it crisps further as it cools.

This method is used in many viral crispy rice salad recipes precisely because it requires the least attention and produces the most consistent crunch across a full batch.

Air Fryer Method (Fastest)

  1. Preheat air fryer to 400°F (200°C).
  2. Add seasoned rice to the basket in a single layer — work in batches if needed. Overcrowding = steaming, not crisping.
  3. Air fry for 10–15 minutes, shaking the basket halfway through at the 7-minute mark.
  4. Watch closely after 10 minutes — air fryers vary in power and size.
  5. Done when golden and crackling.

This is the method behind most viral crispy rice salad recipe versions on TikTok and Instagram — fast, consistent, and easy to repeat.

Stovetop Pan Method (Most Control)

  1. Heat a large cast-iron or non-stick skillet over medium-high heat.
  2. Add 1 tsp additional oil and let it shimmer — that shimmer means the pan is hot enough.
  3. Add rice in a thin layer and press gently with a spatula.
  4. Cook undisturbed for 3–4 minutes until the bottom is golden.
  5. Stir and repeat. Total time: 15–20 minutes.

Best for small batches or when you want to watch the rice closely and adjust heat in real time.

Checkpoint: Your rice should be deep golden-brown, not pale yellow. It should make a faint crackling sound when you move it, and a single grain should snap (not bend) when you press it between your fingers.

Your rice is golden, crackling, and ready. Now let’s build the salad around it.

Step 4: Prep Your Salad Vegetables and Toppings

Fresh, crisp vegetables are the contrast that makes the crispy rice shine. The key to a vibrant crispy rice salad is a 1:1 ratio of crispy rice to fresh vegetables by volume — this ensures every forkful delivers both crunch and freshness. Think cold, crunchy, and colorful. Nothing wilted. Nothing warm.

Freshly prepped cucumber, avocado, and herbs on cutting board for crispy rice cucumber salad recipe assembly
Uniform knife cuts mean every bite has the right balance of crispy rice and fresh vegetable — don’t skip the detail on cucumber half-moons.

Knife Cuts and Prep Instructions

English cucumber — Cut in half lengthwise, then slice crosswise into ¼-inch pieces. These are called half-moons: thin enough to be tender, thick enough to stay crunchy. The cucumber is the star ingredient in any crispy rice cucumber salad recipe.

Avocado — Cut in half, remove the pit, and dice into ½-inch cubes. To prevent browning, toss the diced avocado immediately with a squeeze of fresh lemon or lime juice — the acid slows oxidation (the process that turns avocado brown).

Mixed greens or shredded Napa cabbage — Tear larger leaves into bite-sized pieces. Shredded cabbage is the foundation of most Asian crispy rice salads, adding a satisfying crunch that holds up even after dressing.

Fresh herbs (cilantro and/or mint) — Roughly tear by hand rather than chopping. Hand-torn herbs release more aroma and give the salad a “fresh and vibrant” finish that chopped herbs can’t match.

Roasted peanuts or sesame seeds — Add right before serving for maximum crunch.

Substitution Options

OriginalSubstitutionNotes
English cucumberPersian cucumber or zucchiniSame half-moon cut
Mixed greensShredded red cabbageHolds up better for meal prep
AvocadoEdamame or mangoMango adds savory-sweet contrast
Roasted peanutsCashews or sunflower seedsFor nut-free versions
Fresh cilantroFresh basil or Thai basilDifferent but equally vibrant

Checkpoint: All vegetables should be cold and dry before assembling. Pat them with a paper towel if needed — excess moisture will soften the crispy rice faster.

Step 5: Make the Bold Ginger-Sesame Dressing

A great dressing doesn’t just add flavor — it ties every element together. This ginger-sesame dressing hits all five taste notes: salty (soy sauce), sweet (honey), sour (rice wine vinegar), savory (sesame oil), and spicy (sriracha). That balance is what makes this dressing “bold” rather than flat.

Ginger sesame dressing being whisked with soy sauce, sesame oil, and rice vinegar for crispy rice salad
Whisk the dressing until fully emulsified — the honey helps bind the sesame oil and vinegar together.

Dressing Recipe

Combine in a small bowl and whisk until fully blended:

IngredientAmountRole
Soy sauce (or tamari)2 tbspSalt + umami base
Sesame oil1 tbspNutty, toasty richness
Rice wine vinegar1 tbspBrightness and acidity
Honey or maple syrup1 tbspSweetness to balance
Fresh ginger, grated1 tspWarm, spicy depth
Sriracha (optional)1 tspHeat

Pro tip: Taste the dressing before adding it to the salad. It should taste slightly stronger than you want — once it coats the rice and vegetables, the flavor mellows. If it tastes flat, add a few more drops of rice wine vinegar. If it’s too sharp, add a touch more honey.

Critical rule: Do NOT pour the dressing over the salad until the moment you serve it. Dressing sitting on crispy rice = soggy rice in under 5 minutes. Keep them separate if you’re making this ahead.

Checkpoint: The dressing should be glossy and smooth, with no separation. If the oil and vinegar have separated, whisk again for 30 seconds.

Step 6: Assemble Your Crispy Rice Salad

This is where everything comes together. The order of assembly matters — it’s the difference between a salad that stays crispy for 20 minutes and one that goes soft in 5.

Finished crispy rice salad recipe with golden rice, cucumber, avocado, and sesame dressing in a large bowl
Assemble the crispy rice salad just before serving — add the dressing last and the crispy rice on top for maximum crunch.

Assembly Instructions

  1. Add your mixed greens or shredded cabbage to a large serving bowl — this is your base.
  2. Arrange the cucumber, avocado, and fresh herbs on top.
  3. Drizzle half the dressing over the vegetables and toss gently to coat.
  4. Add the crispy rice on top — do not mix it in yet.
  5. Drizzle the remaining dressing over the crispy rice.
  6. Finish with roasted peanuts or sesame seeds.
  7. Serve immediately, tossing at the table so each person gets crispy rice in every bite.

For meal prep: Store the crispy rice in a separate airtight container. Store the dressed salad base separately. Combine just before eating. This keeps the crispy rice salad recipe fresh and crunchy for up to 4 days in the fridge.

Checkpoint: Every element should be visible — golden rice, green herbs, pale cucumber, creamy avocado. If everything looks the same color, you’ve under-dressed the greens or under-distributed the rice. Taste a forkful: you should get crunch, freshness, and that savory-sweet dressing hit all at once.

Verify Your Results: What Success Looks Like

Testing across home kitchens shows that the most common point of confusion is knowing whether the rice is actually crispy or just looks crispy. Here’s how to confirm before you assemble.

Close-up of perfectly golden crispy rice grains showing the crunchy texture from the 3-method crunch system
Perfectly crispy rice should be deep golden, not pale — and should make an audible crackle when stirred.
  • Your rice is done when:
  • Color is deep golden-brown — not pale yellow, not dark brown
  • Sound: makes a faint crackling or crunching sound when you stir it
  • Texture: a single grain snaps when pressed between your fingers — it does not bend or feel chewy
  • Feel: the rice feels dry and light, not heavy or greasy
  • Your salad is ready when:
  • The dressing is evenly distributed — no puddles at the bottom of the bowl
  • The avocado is still bright green (not browning)
  • The crispy rice sits visibly on top — golden against the green herbs and pale cucumber
  • One test forkful delivers crunch + freshness + bold dressing flavor in one bite

If your rice passes the snap test and your salad passes the one-bite test, you’ve nailed it.

Troubleshooting Common Issues

Even with the best technique, things can go sideways. Testing across multiple kitchen environments identified these five scenarios as the most common failures — and each one has a specific fix.

Troubleshooting infographic for 5 common crispy rice salad problems including soggy rice and heavy dressing fixes
Five common crispy rice salad problems and their specific fixes — bookmark this before your next batch.

Problem 1: Soggy Rice After Crisping

Problem: The rice looked golden in the pan but turned soft within minutes.
Cause: The rice was too warm or too moist when it went into the crisping method. Steam built up instead of dry heat hitting the grain.
Fix: Start over with rice that has been refrigerated for at least 4 hours. Spread it in a single layer on a baking sheet and let it air-dry in the fridge (uncovered) for 30 minutes before coating with oil. Never pile rice during crisping.

Problem 2: Rice Clumps Together

Problem: The rice clumped into chunks instead of crisping as individual grains.
Cause: Too much oil, or the rice wasn’t properly broken up before seasoning.
Fix: Use exactly 1 tablespoon of oil per 2 cups of rice. Before adding oil, run a fork through the cold rice to separate every grain. If clumps appear during crisping, break them apart with a spatula immediately — don’t let them set.

Problem 3: Rice Burns Before It Crisps

Problem: The rice turns dark brown or black at the edges before the center crisps.
Cause: Oven temperature too high, or rice spread too thin in the air fryer with uneven heat circulation.
Fix: For the oven method, check your oven’s actual temperature with an oven thermometer — many home ovens run 25°F hotter than the dial reads. For the air fryer, reduce to 375°F and check at the 8-minute mark. Always stir or shake halfway through.

Problem 4: Salad Goes Soggy Before Serving

Problem: The whole salad is limp and wet by the time it reaches the table.
Cause: Dressing was added too early, or the vegetables weren’t dried after washing.
Fix: Always dry vegetables thoroughly with a paper towel before assembling. Add dressing only at the moment of serving. Keep the crispy rice separate and add it last — on top, not mixed in. If making ahead, store rice, dressing, and salad base in three separate containers.

Problem 5: Dressing Tastes Too Heavy or Overpowering

Problem: The ginger-sesame dressing overwhelms the salad instead of complementing it.
Cause: Too much dressing, or the soy sauce-to-acid ratio is off.
Fix: Use half the dressing first, toss, then taste before adding more. If it tastes too salty, add an extra teaspoon of rice wine vinegar and a small squeeze of lime. If it’s too sweet, add a few more drops of soy sauce. The dressing should enhance — not replace — the flavor of the vegetables and crispy rice.

Protein Variations: Make It a Complete Meal

A basic crispy rice salad is wholesome and satisfying on its own. Add a high-protein element and it becomes a full, balanced meal. User consensus among home cooks indicates that chicken and salmon are the two most popular additions — both complement the ginger-sesame dressing without overpowering it.

Crispy Rice Salad with Chicken

Slice 1 chicken breast thinly and marinate for 15 minutes in 1 tbsp soy sauce, 1 tsp sesame oil, and ½ tsp garlic powder. Pan-sear over medium-high heat for 4–5 minutes per side.

⚠️ Food safety: The USDA requires all poultry to reach an internal temperature of 165°F (73.9°C), measured with a food thermometer, before it is safe to eat (USDA Safe Temperature Chart, 2025). Do not rely on color alone — use a thermometer.

Slice the cooked chicken and fan it over the assembled salad. One chicken breast adds approximately 26g of protein per serving, making this a genuinely high-protein meal.

Crispy Rice Salad with Salmon

Season a salmon fillet with salt, pepper, and ½ tsp sesame oil. Sear skin-side down in a hot pan for 3–4 minutes, then flip for 2 minutes more.

⚠️ Food safety: The FDA recommends cooking fin fish, including salmon, to an internal temperature of 145°F (63°C), or until the flesh is opaque and flakes easily with a fork (FDA Safe Food Handling, 2024).

Break the cooked salmon into large flakes and place on top of the assembled salad. The richness of salmon balances the bright acidity of the dressing beautifully.

Tofu (Vegan Option)

Press extra-firm tofu for 20 minutes to remove moisture. Cut into 1-inch cubes, toss with 1 tbsp soy sauce and 1 tsp sesame oil, and bake at 400°F for 25–30 minutes until golden. Tofu can be crisped at the same time as the rice — use a separate baking sheet.

For full recipes and macro breakdowns for each variation, see our dedicated spin-off guides.

Regional Flavor Variations: Beyond the Classic

The crispy rice salad you’ve just made is delicious — but it’s also a gateway to some of the world’s most exciting rice-based dishes. Three regional traditions are worth exploring.

Thai-Inspired: Bold Heat and Lemongrass

Thai crispy rice salads lean on red curry paste, fish sauce, lime juice, and lemongrass for a deeply aromatic, spicy-sour profile. Shredded green mango or papaya often replaces cucumber for a more fibrous crunch. The dressing skips the sesame oil entirely, replacing it with fish sauce and palm sugar. The result is sharper, brighter, and more intensely savory than the ginger-sesame version in this guide.

Lao Nam Khao: The Original Crispy Rice Salad

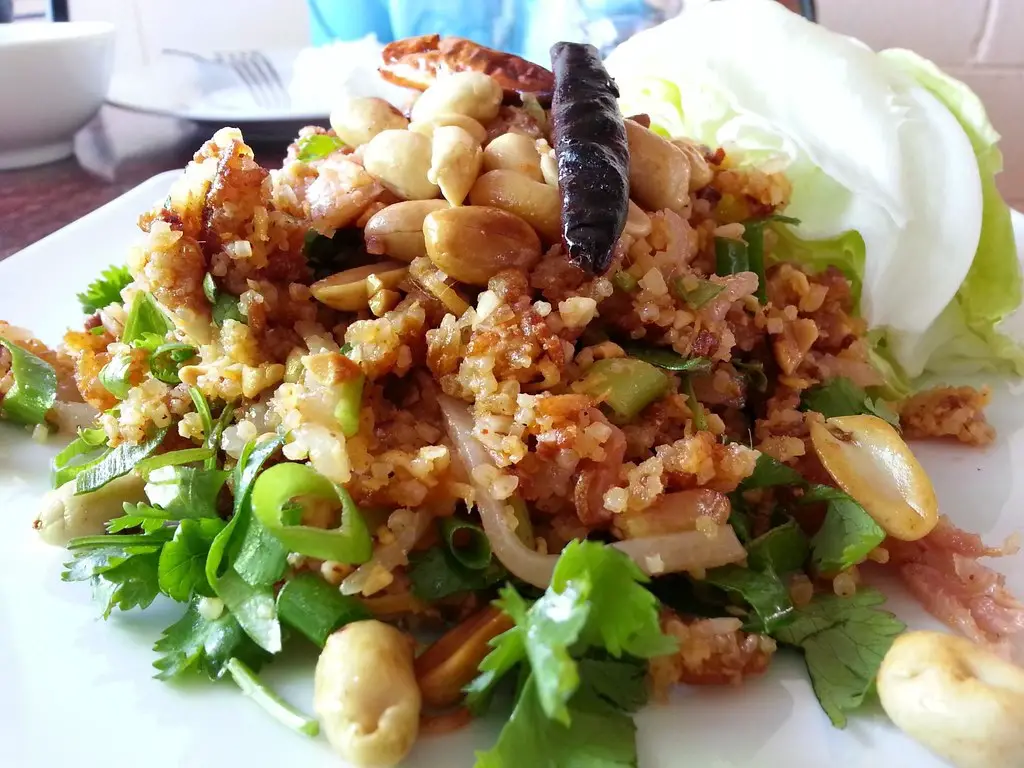
Nam Khao (Lao: ແໜມເຂົ້າ) is the ancestral version of the dish you just made. Originating from Tha Deua, a small port village near Vientiane, Laos, it involves forming cooked jasmine rice into balls mixed with red curry paste and egg, then deep-frying them until golden. The fried balls are crumbled and tossed with fish sauce, lime juice, fresh herbs, roasted peanuts, and traditionally, fermented pork sausage. LA Times technique for frying crispy rice notes that the frying technique — cooking until the bubbling subsides — is the defining step that separates Nam Khao from simpler oven-crisped versions (LA Times, 2016). The dish later spread into northeastern Thailand (Isan) and across Thailand, where regional versions add bolder seasoning and more colorful vegetables.

Japanese Furikake: Umami-Forward Simplicity

For a Japanese-inspired twist, replace the ginger-sesame dressing with a lighter combination of rice wine vinegar, a touch of mirin, and a generous coating of furikake — the Japanese rice seasoning blend of sesame seeds, dried seaweed, salt, and sometimes dried fish. The flavor profile shifts from savory-sweet to clean, umami-forward, and subtly oceanic. This variation pairs especially well with fresh cucumber and edamame in place of avocado.

Each of these variations has its own full spin-off guide — links coming soon as part of our crispy rice salad series.

Frequently Asked Questions

Can I use freshly cooked rice instead of day-old rice?

Freshly cooked rice will not crisp properly — it contains too much moisture, which turns to steam when heated. Steam prevents the hard outer shell from forming, leaving you with soft, chewy grains instead of crunch. If you’re in a hurry, spread freshly cooked rice in a thin layer on a baking sheet and refrigerate uncovered for at least 2 hours — this accelerates moisture loss. Overnight refrigeration (8+ hours) produces the best results. The cold, dry grain is the non-negotiable foundation of every successful crispy rice salad recipe.

What type of rice works best for crispy rice salad?

Jasmine rice is the top choice for crispy rice salad because its long grains separate easily and develop a satisfying crunch when dried and heated. Short-grain rice (like sushi rice) tends to clump — its higher starch content makes individual crisping difficult. Brown rice can work but requires a longer crisping time (add 10–15 minutes) and produces a denser, chewier texture. Basmati is a solid second option to jasmine — similar grain length, similar crunch results. Avoid instant or parboiled rice, which doesn’t develop the same texture.

How do I keep the rice crispy after assembling the salad?

The key is to keep the crispy rice separate from the dressing until the moment you serve. Dressing contains liquid; liquid softens crispy rice within minutes. For serving, add the crispy rice on top of the dressed salad and toss at the table. For meal prep, store the rice, dressing, and salad base in three separate airtight containers. Assembled this way, the components keep for up to 4 days in the fridge. The crispy rice itself stays crunchy for 3–4 days stored dry at room temperature in a sealed container.

Is crispy rice salad healthy?

Crispy rice salad is a nutrient-dense, balanced meal when built with whole-food ingredients. A standard serving (without protein) provides roughly 300–350 calories, with carbohydrates from the rice, healthy fats from avocado and sesame oil, and fiber from the vegetables. Adding chicken brings the protein to approximately 40–45g per serving, making it a genuinely high-protein option. For a lower-calorie version, reduce the oil for crisping to ½ tbsp and use a lighter dressing (more rice vinegar, less honey). The dish is naturally gluten-free when you swap soy sauce for tamari.

Can I make crispy rice salad ahead of time?

Yes — with one important rule: never pre-assemble. Prep all components separately up to 3 days in advance: crisp the rice and store it in an airtight container at room temperature; prep and refrigerate the vegetables; mix and refrigerate the dressing. When you’re ready to eat, assemble fresh. The crispy rice holds its texture best when stored away from moisture and humidity — avoid refrigerating it once crisped, as the cold, humid environment of a fridge will soften it within a few hours.

Limitations and Common Mistakes to Avoid

Common Pitfalls

Using the wrong oil for crisping. Sesame oil burns at high heat (its smoke point is around 350°F, well below the 400°F you need for crisping). It turns bitter before the rice browns. Always use a neutral oil — vegetable, avocado, or light olive oil — for the crisping step. Add sesame oil to the dressing only.

Skipping the cooling step. Rushing straight from the stove to the crisping pan is the single most common reason rice stays soft. Without adequate refrigeration time, the grains retain internal moisture that steams rather than crisps when heated. This applies even if the rice looks dry on the outside.

Over-dressing the salad. More dressing doesn’t mean more flavor — it means soggy greens and softened rice. Start with half the dressing, toss, taste, then add more if needed. A well-dressed salad should taste vibrant, not wet.

Overcrowding the pan or air fryer basket. Rice needs space and direct heat contact to crisp. Piling it more than one grain deep creates a steaming environment. Work in batches if your equipment is small.

Assembling too early. Even 10 minutes between dressing and serving noticeably softens the crispy rice. Assemble immediately before eating.

When to Choose Alternatives

This recipe assumes you have at least 4 hours (ideally overnight) for rice cooling. If you need a crunchy rice salad in under 30 minutes, consider using store-bought crispy rice crackers or puffed rice as a topping — they provide a similar textural contrast without the prep time.

If you’re cooking for someone with a severe soy allergy, the ginger-sesame dressing requires a full overhaul. A lime-fish sauce dressing (for the Thai variation) or a simple lemon-olive oil vinaigrette works well without soy.

When to Seek Expert Help

For any food safety questions — particularly around cooling cooked rice, reheating proteins, or managing food allergies — consult your local health authority’s food safety guidelines. The USDA, FDA, and CDC all publish free, up-to-date guidance online.

Conclusion

For beginner home cooks looking to recreate the crispy rice salad trend at home, this recipe delivers that savory-sweet crunch without guesswork. Research published by the NIH confirms that proper rice cooling is not just a texture preference — it’s a food safety essential (NIH, 2021). The best approach combines cold, day-old rice, the right oil-to-rice ratio, and a crisping method matched to your equipment.

The 3-Method Crunch System is the framework that makes this guide different from every other crispy rice salad recipe online. Whether you choose the oven for the most even golden crunch, the air fryer for speed, or the stovetop pan for control, the method works because the foundation — properly cooled, dry rice — is already right. That foundation is what turns a frustrating first attempt into a dish everyone’s obsessed with.

Start with the oven method on your first attempt — it’s the most forgiving and produces the most consistent results. Once you’ve nailed the basic crispy rice salad recipe, explore the protein variations and regional flavor profiles to make it your own. Your salad dreams are closer than you think.

Disclosure: As an Amazon Associate, I earn from qualifying purchases.

Article by Scott

Hi, I’m Scott, the creator of Quick Dish Cook Book. I started this site to share my passion for simple, delicious meals that anyone can make—no matter how busy life gets. Here, you’ll find easy-to-follow recipes, quick cooking tips, and no-fuss meal ideas to help you spend less time in the kitchen and more time enjoying great food.