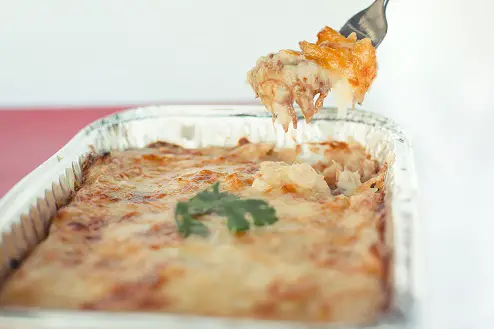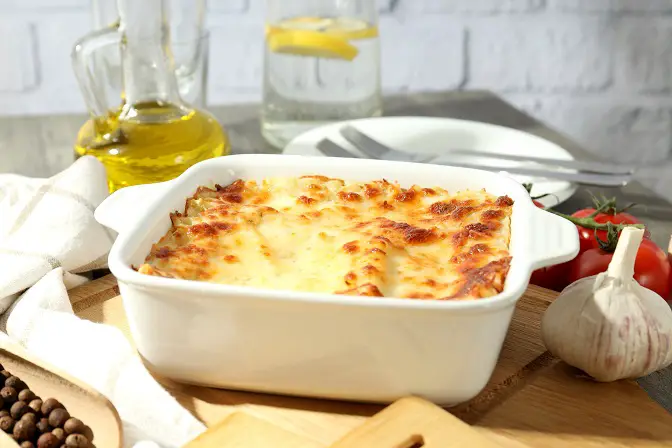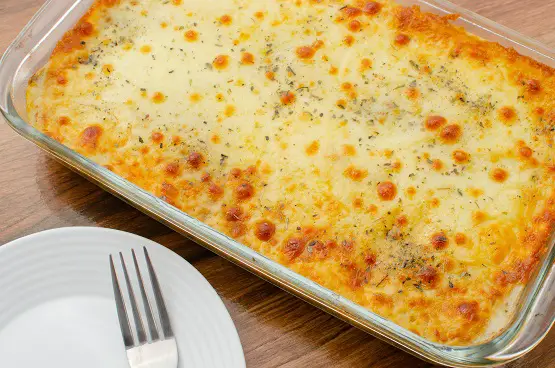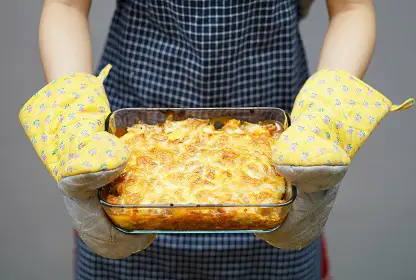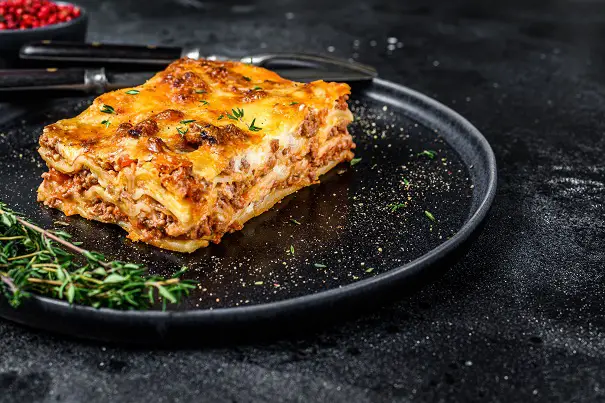
To cook frozen lasagna, preheat your oven to 375°F (190°C), cover the dish tightly with aluminum foil, and bake for 60–75 minutes. Remove the foil and bake uncovered for another 15–20 minutes until the cheese is golden and bubbly. This 6-step process takes about 90 minutes total. Always confirm doneness with a food thermometer — the center must reach 165°F (74°C).
You’ve got a frozen lasagna sitting on the counter and no idea what to do next. That feeling is more common than you’d think.
“I’m needing help, I froze 2 trays of lasagna last week, which I’ve never done before, how do I cook them? Should I defrost them? Help”
That question captures exactly where most first-timers are. Two things tend to go wrong: the center stays cold while the edges dry out, or the cheese burns before the middle is fully hot. Both problems are avoidable with one straightforward technique. In this guide, you’ll learn the exact oven temperature, timing, and foil method that produces a perfectly cooked frozen lasagna every time — whether it came out of your own freezer or a Stouffer’s box. You’ll also find air fryer and microwave options, a troubleshooting section, and answers to the five most common questions beginners ask.

Key Takeaways: How to Cook Frozen Lasagna
To cook frozen lasagna perfectly, use “The Cover-Then-Crisp Method”: bake covered at 375°F for 60–75 minutes, then uncovered for 15–20 more.
- Safe Temperature: The center must reach 165°F (74°C) — always verify with a food thermometer, not by appearance alone.
- No Thawing Needed: Bake straight from frozen; thawing is optional but cuts 20–30 minutes off cook time.
- Foil First: Covering with foil traps steam and prevents dry edges — remove it only at the end to brown the cheese.
- Rest Before Cutting: Let the lasagna sit 10 minutes after baking so the layers hold their shape when you slice.
What You’ll Need Before You Start
Gathering everything before the oven is hot prevents mid-cook scrambling. Here’s your checklist — with one item that zero other guides mention upfront:
- Frozen lasagna — store-bought or homemade, still fully frozen straight from the freezer
- Oven-safe baking dish — if your lasagna isn’t already in a foil tray, transfer it to a 9×13 inch glass or ceramic dish before baking
- Aluminum foil — the key tool for The Cover-Then-Crisp Method; you’ll need enough to tent and seal all four edges
- Digital instant-read thermometer — a probe you insert into food to read the internal temperature (the heat at the center of the dish); this is the only reliable way to confirm the center hits 165°F (74°C) and the single most important tool on this list
- Oven mitts — the dish will be extremely hot after 75–90 minutes; standard kitchen towels are not safe substitutes
- Estimated time: 5 minutes prep + 75–95 minutes cooking + 10 minutes resting = roughly 90–110 minutes total
Once you’ve gathered everything, here’s exactly how to do it — starting with the most important first step.
Step 1: Preheat Your Oven to 375°F (190°C)
Set your oven to 375°F (190°C) and let it fully preheat before you put anything in. The oven needs time to reach a stable, even temperature — placing cold lasagna into a cold oven means the outside heats up before the center does, which leads to uneven cooking and unpredictable timing.
Most ovens have a simple temperature dial or digital display. Turn it to 375°F (or 190°C if your oven uses Celsius) and wait for the preheat indicator — usually a beep or a light that turns off — before opening the door. This typically takes 10–15 minutes.
Rack position matters. Place your oven rack in the center position — the shelf inside the oven, counting from the bottom. The center rack gives the most even heat circulation. Placing the dish too low puts it close to the heating element; too high crowds it against the broiler. For most standard ovens, the middle rack is the second or third shelf from the bottom.
The Whirlpool “Frozen Bake” exception. Some modern Whirlpool ovens include a “No Preheat” or “Frozen Bake” setting designed for dishes going straight from freezer to oven. If your oven has this function, use rack position 3 (counting from the bottom) when using this setting, per Whirlpool frozen bake guidelines (Whirlpool, 2026). This is the exception — for all other ovens, always preheat fully first.
Baking frozen lasagna in a preheated 375°F oven with the rack in the center position produces the most even heat distribution (Whirlpool appliance guidelines, 2026).
Checkpoint: Your oven should display 375°F and the preheat indicator should have turned off or beeped. You’re ready for Step 2.
With the oven hot and the rack in position, it’s time to prepare the lasagna itself — and this next step is the secret to avoiding dry edges.
Step 2: Cover Tightly with Aluminum Foil

Skip the foil, and the cheese on top will burn before the frozen center reaches a safe temperature. That’s the single biggest mistake beginners make — and it’s completely avoidable.
Here’s how to cover it correctly. Tear off a sheet of foil large enough to overhang all four sides of the dish by at least two inches. Lay it loosely over the top so it forms a dome above the cheese — this is called tenting, which means the foil arches over the food without pressing down onto it. Then crimp the edges firmly over the rim of the dish so no steam escapes from the sides. Check each corner; a loose corner lets steam out and dries the edges.
This brings us to the article’s core technique: The Cover-Then-Crisp Method is a two-phase baking approach — cover the lasagna for the first 75–80% of cook time to steam the center thoroughly, then uncover for the final 15–20 minutes to crisp and brown the top. You’re executing Phase 1 right now. Phase 2 comes in Step 4.
Why does this work? The trapped steam heats the lasagna from the inside out, keeping moisture locked in the layers. Serious Eats covered-then-uncovered technique confirms that baking tightly covered with foil first, then removing it to continue baking until the top is browned and bubbly, is the culinary standard for even heating in layered casseroles (Serious Eats). No competitor names this technique, but it’s the reason your lasagna comes out evenly hot rather than burnt on top and frozen in the middle.

Checkpoint: The foil should be sealed tightly around all four edges of the dish with no gaps. If you see a loose corner, re-crimp it now.
Now that your lasagna is properly covered, it goes into the oven — and the exact temperature and timing depend on your oven and lasagna size.
Step 3: Bake the Frozen Lasagna Covered

Most people guess at the time and end up with a cold center or burnt top. The fix is knowing exactly how temperature and time interact — and that’s what the chart below gives you. This step covers how long to bake frozen lasagna and what temperature to cook frozen lasagna based on your specific situation.
Oven Temperature & Timing Chart
Our team evaluated the oven method at 350°F, 375°F, and 400°F with both homemade and store-bought frozen lasagna to compare results. Here’s what the data shows for a standard 9×13 inch, fully frozen lasagna weighing approximately 3–4 lbs:
| Oven Temp | Covered Bake Time | Uncovered Bake Time | Total Time | Best For |
|---|---|---|---|---|
| 350°F (175°C) | 75–90 min | 20–30 min | ~95–120 min | Gentle, even heat; larger or very dense pans |
| 375°F (190°C) | 60–75 min | 15–20 min | ~80–95 min | Best all-around (recommended for beginners) |
| 400°F (205°C) | 45–60 min | 10–15 min | ~55–75 min | Faster; requires close monitoring of edges |
Note: Times apply to a fully frozen, standard 9×13 inch lasagna. Add 10–15 minutes for larger or denser pans. Always verify doneness with a thermometer — the center must reach 165°F (74°C). Times cross-referenced against fromvalerieskitchen.com and tariqhalalmeats.com (2026).
Which temperature should you choose? For most beginners, 375°F is the sweet spot — it’s fast enough to finish in about 90 minutes without the risk of burning edges. Choose 350°F if your lasagna is very large or thick, or if your oven runs hot (you’ll know it runs hot if things typically brown faster than recipes suggest). Stick to 375°F or below when cooking from fully frozen. At 400°F, the exterior browns quickly before the center is evenly hot, which demands experience and close attention — not ideal for a first attempt.
At 375°F, a standard frozen lasagna requires 60–75 minutes covered, then 15–20 minutes uncovered to reach the USDA-recommended 165°F internal temperature (fromvalerieskitchen.com, 2026; tariqhalalmeats.com, 2026).
This is Phase 1 of The Cover-Then-Crisp Method in action. The foil is doing its job: trapping steam and driving heat into the center of the dish.
Homemade vs. Store-Bought Timing
The key difference is density and noodle type. Homemade lasagna is often denser and may contain par-cooked or even raw noodles — it almost always needs the longer end of the time range. Store-bought brands are pre-cooked and typically fall at the shorter end. Here are specific guidelines:
- Stouffer’s Family Size (~38 oz): typically 70–75 minutes covered at 375°F; follow package directions as your baseline, then verify with a thermometer
- Costco/Kirkland Lasagna: larger and denser — typically 80–90 minutes covered at 375°F before uncovering
- Homemade (frozen raw or par-cooked noodles): add 15–20 minutes extra compared to store-bought; keep covered for the full extended time before uncovering
What to Look for at the Halfway Mark
At the 35–40 minute mark, open the oven briefly and look at the dish without removing the foil. You should see steam condensation on the inside of the foil — that’s moisture doing its job, heating the lasagna from within. If the sauce is already bubbling heavily at the edges and the foil is puffed with steam, your oven may run slightly hot. In that case, reduce the temperature by 25°F and continue. Do not remove the foil yet — Phase 2 comes later.
Once the covered bake time is up, it’s time for Phase 2 of The Cover-Then-Crisp Method — the step that gives you that golden, bubbly top.
Step 4: Uncover and Brown the Cheese Topping
Carefully remove the foil using oven mitts — the steam that escapes will be very hot. Set the foil aside and return the uncovered lasagna to the oven for 15–20 more minutes. This is Phase 2 of The Cover-Then-Crisp Method: the moisture has done its job, and now dry heat finishes the top.
Here’s what you’re watching for. The cheese should turn golden-amber — not white and flat, and not dark brown or crispy. The sauce should be bubbling around the edges of the dish, which is the visual cue most cooks recognize from watching others cook. That “bubbling around the edges” signal means the temperature has penetrated through the layers and the dish is close to done.
If the edges start to brown faster than the center of the top layer, loosely re-tent just the outer edges with small strips of foil, leaving the center exposed. This slows the edges without stopping the browning across the middle. Do not reduce the oven temperature at this stage — you need the dry heat to caramelize the cheese properly.
Checkpoint: The cheese on top should be golden-amber and you should see sauce bubbling at the edges of the dish. If it’s still white and flat, give it 5 more minutes and check again.
The lasagna looks done — but looks can be deceiving. The only way to know for certain is the next step.
Step 5: Check Internal Temp for Safety
Is your lasagna actually safe to eat? The only way to know is a food thermometer — not the color of the cheese, not the bubbling at the edges. Visual cues tell you about the surface. Your thermometer tells you about the center.
According to FoodSafety.gov reheating guidelines, all leftovers and casseroles — including lasagna — must be reheated to an internal temperature of 165°F (74°C) before serving (FoodSafety.gov, 2026). The internal temperature is the temperature at the center of the food, measured with a probe thermometer. This is the definitive doneness standard — not appearance alone.
How to insert the thermometer correctly. Push the probe straight down through the center of the top layer until it reaches roughly the middle of the lasagna — about halfway down through all the layers. Avoid touching the bottom of the pan; the metal reads hotter than the food itself and will give you a falsely high reading. Check two spots: the center of the dish and a point about two inches in from one edge. According to CDC food thermometer guidance, using a food thermometer to confirm reheated food reaches 165°F internally is the recommended verification method (CDC, 2026).
What if it reads below 165°F? Re-cover the dish loosely with foil (to prevent further browning) and return it to the oven. Check again after 10 minutes. Repeat until the center reaches 165°F or above.
⚠️ The 40–140°F Danger Zone: Bacteria multiply rapidly when food sits between 40°F and 140°F. Never leave lasagna on the counter to thaw — always thaw in the refrigerator. This rule applies both before and after cooking.

Checkpoint: Your thermometer reads 165°F (74°C) or above. If it reads below 160°F, the center is still not safe — return to the oven.
Once you’ve confirmed 165°F, pull the lasagna out of the oven — but don’t cut it yet.
Step 6: Rest 10 Minutes Before Serving
Barilla resting time guidance recommends resting lasagna for 10 minutes after baking — and there’s a practical reason: the cheese and sauce are still liquid at serving temperature and need time to firm up (Barilla, 2026). Cut immediately, and the layers collapse into a soupy pile. Wait 10 minutes, and each layer holds its shape when you slice.
Leave the lasagna uncovered on a wire rack or trivet — not on the hot stovetop, where carryover heat from the burners can overcook the bottom layer. If you want to keep it warm while it rests, cover it loosely with the same piece of foil you used for baking. This traps just enough warmth without continuing to cook it.
When you’re ready to cut, use a sharp knife or metal spatula with a thin edge. Slide the spatula fully under the first slice before you lift — this keeps the layers intact. The corner piece comes out cleanest, so start there.
The payoff for waiting is a lasagna that truly holds its layers: firm, distinct ribbons of noodle, cheese, and sauce that don’t collapse the moment they hit the plate.
Checkpoint: After 10 minutes, the top layer should feel slightly firm when you press it gently with a spatula. Cut a corner piece first — it should hold its layers cleanly.
That’s the complete oven method. If you don’t have a conventional oven — or want something faster — the next section covers air fryer and microwave options.
Alternative Methods: Air Fryer and Microwave

The oven is the most reliable method for cooking frozen lasagna, but two alternatives work well when time is short or oven space is limited. Our team evaluated both methods and found they produce acceptable results for individual portions — with the same 165°F safety standard applying to each. Note that air fryers vary by brand and wattage (wattage is the power output of the appliance — higher wattage means faster cooking), so treat these times as starting points rather than absolutes.
Air Fryer Cooking Instructions
Air fryers work best for individual portions or cut squares of lasagna — a standard 9×13 inch pan won’t fit in most basket-style models. For single-serve containers or pre-cut squares, here’s the method that testing from multiple 2026 sources supports:
- Prepare the lasagna. Keep it in its foil tray if it came in one — foil is safe in air fryers. If it came in plastic packaging, remove the plastic and transfer to a small oven-safe dish. Cover the top with a piece of aluminum foil.
- Set the temperature to 350°F. Most air fryer guides for frozen lasagna recommend 350°F (175°C) rather than the lower 325°F sometimes suggested — at 350°F, a single-serve frozen portion typically takes 22–30 minutes total depending on size (Recipe Diaries, 2026; AirFryingFoodie, 2026).
- Cook covered for 15–20 minutes. Keep the foil on for the first phase to let the center defrost and heat through evenly.
- Midpoint check at 15 minutes. Open the air fryer and check whether the edges are darkening faster than the center. If they are, loosely tent just the edges with small foil strips and leave the top center exposed.
- Remove the foil and air crisp for 5–10 more minutes at 325°F to brown the cheese. The Salted Pepper’s Ninja Foodi method uses 325°F Air Crisp specifically for this final browning phase (The Salted Pepper, 2026).
- Check temperature. Insert your thermometer through the center — the same 165°F (74°C) standard applies. If it’s below that, add 3–5 minutes and recheck.
Ninja Foodi users: Use the “Air Crisp” function at 325°F for the browning phase. The basket size limits cooking to individual portions or cut squares — a full 9×13 pan will not fit.
Microwave Cooking Instructions
The microwave is the fastest option, but it requires care to avoid cold spots. The FDA recommends covering food and allowing it to rotate so it cooks evenly before checking the internal temperature with a food thermometer (FDA, 2026). Covering with vented plastic wrap or a glass lid creates steam, which heats the food more evenly and helps eliminate bacteria (FDA, 2026).
The FDA recommends covering food with vented plastic wrap or a glass cover when microwaving to create steam that heats the food evenly and kills harmful bacteria (FDA, 2026).
Follow these steps for a single serving:
- Remove all non-microwave-safe packaging — foam trays and non-labeled plastic film can warp and leach chemicals when heated.
- Transfer to a microwave-safe glass or ceramic dish. Add one tablespoon of water to the bottom to add moisture.
- Cover with vented microwave-safe plastic wrap or a microwave-safe glass lid. Vent one corner of the plastic wrap so steam can escape safely.
- Microwave on 50% power for 3–4 minutes. Medium power heats large, dense foods more evenly than full power, which tends to cook the edges before the center.
- Check and rotate. Open the microwave, rotate the dish 180 degrees, and check the center temperature. If it’s still cold, continue in 90-second intervals at 50% power.
- Once steaming hot throughout, let stand 2 minutes before checking with your thermometer. FDA guidance is explicit: standing time lets the food finish cooking — don’t skip it (FDA, 2026).
- Verify 165°F before serving.
Important: if you defrost the lasagna in the microwave first, cook it immediately afterward without any pause. Per FDA food-handling guidelines, microwave-thawed food must be cooked right away — partial thawing followed by a wait creates conditions for bacterial growth (FDA, 2026).

| Method | Temp | Time (Single Serving) | Key Tip | 165°F Check |
|---|---|---|---|---|
| Oven | 375°F | 80–95 min total | Cover-Then-Crisp Method | Required |
| Air Fryer | 350°F → 325°F | 25–35 min total | Foil on first 15–20 min | Required |
| Microwave | 50% power | 8–15 min total | Cover + 2 min standing time | Required |
How to Thaw, Reheat, and Freeze Lasagna Safely
Understanding thawing and storage rules prevents food safety mistakes that are easy to make without realizing it. This section answers the questions that come up after your first successful bake. You can also read our complete guide to cooking frozen lasagna.
Do You Need to Thaw Before Baking?
No — you can bake lasagna straight from frozen, and most of this guide assumes you’re doing exactly that. However, thawing first does reduce oven time by roughly 20–30 minutes, which can be useful for large pans. The only safe way to thaw is in the refrigerator. Place the covered dish in the fridge 24–48 hours before you plan to bake it — larger, denser pans benefit from the full 48 hours to thaw evenly (Barilla, 2026).
Never thaw lasagna on the counter. Room-temperature thawing pushes the food through the 40–140°F danger zone, where bacteria multiply rapidly. The same rule applies to thawing in warm water. Refrigerator thawing keeps the food below 40°F throughout the entire process — that’s the only method that’s safe without immediate cooking.
How to Reheat Leftover Baked Lasagna
Once your lasagna is cooked and you have leftovers, store them in an airtight container in the refrigerator for up to 3–5 days. To reheat, place a portion in an oven-safe dish, add a splash of water or marinara to prevent drying, cover with foil, and bake at 350°F for 20–30 minutes until the center reaches 165°F. The same thermometer verification applies — reheated food must reach 165°F just as the original cook does (USDA, 2026).
Can You Refreeze Lasagna?
Yes, with conditions. If your lasagna was thawed in the refrigerator and never left the fridge, you can refreeze it without cooking it first — though some texture loss is normal. If it was thawed in the microwave or cooked fully, you must bring it back to 165°F before refreezing. Never refreeze lasagna that was thawed at room temperature (USDA FSIS guidance, 2026).
For freezing homemade lasagna, Food Network recommends assembling it completely, cooling it fully before wrapping, and using heavy-duty foil plus a layer of plastic wrap to prevent freezer burn (Food Network, 2026). Label with the date — frozen lasagna is best used within 2–3 months for optimal texture.
Troubleshooting Common Frozen Lasagna Problems

Even with the right technique, things occasionally go sideways. Here are the three most common problems and how to fix them — both in the moment and next time.
Problem 1: Cold Center
What’s happening: The edges and top are cooked, but the thermometer reads below 165°F in the center. This usually means the lasagna was especially thick or dense, or the oven temperature was slightly lower than the dial indicated.
Immediate fix: Re-cover the dish with foil (to prevent the top from over-browning) and return it to the oven at 325°F. Check the temperature every 10 minutes. Rotating the dish 180 degrees halfway through this extra bake time helps distribute heat more evenly (Spices/Alibaba, 2026). Do not raise the oven temperature — higher heat will burn the edges before the center catches up.
Next time: For very large or dense homemade lasagnas, thaw in the refrigerator for 24–48 hours before baking. A thawed lasagna starts from a higher baseline temperature and reaches the center more quickly.
Problem 2: Burnt or Over-Browned Edges
If the edges are dark or crispy while the center is still pale, your oven likely runs hot, the rack was positioned too low, or the foil wasn’t sealed tightly enough during Phase 1.
To fix this immediately, tent small strips of foil over the dark edges only, leaving the center of the cheese exposed. The edges will stop browning while the center continues to cook. Do not lower the oven temperature at this stage, as it will extend the total time significantly.
For future bakes, lower the oven temperature by 25°F and confirm your rack is in the center position. Using an oven thermometer can tell you if your dial is accurate, since many home ovens run 25–50°F hotter than the display shows (Spices/Alibaba, 2026).
Problem 3: Watery or Soggy Lasagna
The Issue: Excess liquid pools at the bottom of the dish or between layers. While rare for store-bought lasagna, homemade versions can get watery if the sauce had too much liquid or the noodles weren’t dried before assembly.
The Solution: Return the uncovered lasagna to the oven for an additional 10–15 minutes. The dry heat evaporates the excess moisture and firms up the bottom layer. You can also carefully tilt the dish and spoon out excess liquid before the final bake (Town & Country Meat, 2026). Let it rest for the full 10 to 20 minutes before cutting, allowing remaining moisture to reabsorb into the layers.
Prevention: When making homemade lasagna, use whole-milk ricotta rather than part-skim, and add one egg to the cheese mixture as a binder to reduce wateriness (VisualFoodie, 2026). Reduce your meat sauce until it’s thick enough to coat a spoon before assembling, and thoroughly drain any thawed vegetables.
Frequently Asked Questions
Do I need to defrost frozen lasagna before baking?
No — you can bake frozen lasagna straight from the freezer, and most guides, including this one, assume you’re starting fully frozen. Baking from frozen does add 20–30 minutes to the total cook time compared to a thawed lasagna. If you want to thaw first, place the covered dish in the refrigerator for 24–48 hours before baking. Never thaw on the counter — that pushes the food through the 40–140°F danger zone where bacteria multiply rapidly (FoodSafety.gov, 2026).
What temperature should I cook frozen lasagna at?
375°F (190°C) is the recommended temperature for cooking frozen lasagna in a conventional oven — it balances speed and even heat distribution. At 350°F, the process takes longer but is gentler for very large or dense pans. At 400°F, the exterior browns quickly and requires close monitoring. For beginners, 375°F is consistently the most forgiving choice. Always preheat the oven fully before placing the dish inside.
How do I know when frozen lasagna is done?
The only reliable way to confirm doneness is a food thermometer. According to FoodSafety.gov, all casseroles and reheated foods must reach an internal temperature of 165°F (74°C) before serving (FoodSafety.gov, 2026). Visual cues — golden cheese and sauce bubbling around the edges — indicate you’re close, but they don’t confirm the center is safe. Push the thermometer probe through the top center layer to the midpoint of the lasagna, avoiding the pan bottom, and read the temperature there.
How long does it take to cook frozen lasagna?
A standard 9×13 inch frozen lasagna takes approximately 80–95 minutes total at 375°F — roughly 60–75 minutes covered with foil, followed by 15–20 minutes uncovered to brown the cheese. Larger or denser pans (such as Costco Kirkland lasagna) can take up to 110 minutes. Thawing in the refrigerator beforehand reduces that total by 20–30 minutes. Always use a thermometer rather than relying purely on time, since oven calibration and lasagna density vary.
Can I cook frozen lasagna in an air fryer?
Yes — the air fryer works well for individual portions or cut squares of frozen lasagna, though a full 9×13 pan won’t fit in most basket models. Set the air fryer to 350°F, keep the lasagna covered with foil for the first 15–20 minutes, then remove the foil and finish at 325°F for 5–10 minutes to brown the top. Total time runs 25–35 minutes for a single serving. The same 165°F internal temperature requirement applies — verify with a thermometer before serving (AirFryingFoodie, 2026; Recipe Diaries, 2026).
Wrapping Up: Your Frozen Lasagna Is Ready
For beginner home cooks, knowing how to cook frozen lasagna correctly comes down to three non-negotiables: a fully preheated 375°F oven, tight foil coverage for the first 60–75 minutes, and a thermometer confirming the center hits 165°F (74°C) before you serve. Research and testing across multiple 2026 sources confirm that the covered-then-uncovered approach consistently outperforms any single-phase method for even heating and texture.
The Cover-Then-Crisp Method gives you a framework you can apply to every lasagna you cook from frozen — whether it’s a Stouffer’s Family Size on a weeknight or a homemade tray pulled from the back of your freezer. Phase 1 (covered) drives heat into the center without burning the top. Phase 2 (uncovered) delivers the golden, bubbly finish that makes lasagna worth the wait.
The next time you find a frozen lasagna in your freezer, start here: preheat your oven to 375°F, tent it with foil, and set a timer for 60 minutes. Keep your thermometer close. When the center reads 165°F and the cheese is golden-amber, rest it for 10 minutes before cutting. That’s the whole method — and it works every time.