
What’s in this guide
- What You'll Need Before You Start
- Step 1: Gather and Prepare Your Ingredients
- Step 2: Make the Classic Baked Keebler Cheesecake
- Step 3: Make the Easy No-Bake Keebler Cheesecake
- Step 4: Add Toppings and Flavor Variations
- Step 5: Make Mini Keebler Cheesecakes
- Verify Your Results
- Troubleshooting: Crack Prevention and Common Fixes
- Advanced Tips: Ingredient Swaps and Upgrades
- Frequently Asked Questions
- Wrapping Up Your Perfect Keebler Cheesecake
You bought the Keebler Ready Crust, gathered your cream cheese, and followed what seemed like a simple recipe. Then the cheesecake cracked down the middle, overflowed the crust, or never quite set up firm. Sound familiar? The frustrating truth is that most cheesecake recipes online were written for a 9-inch springform pan with twice the filling capacity of the 9 oz Keebler Ready Crust. That mismatch — too much filling, the wrong temperature, the wrong technique — is why things go wrong.
“Simple, classic, and no water bath required! The texture is smooth, rich, and creamy, served over a crisp homemade graham cracker crust.” — Home baker review
This Keebler cheesecake recipe guide fixes every one of those failure points. You’ll get two complete methods — a classic baked version and an easy no-bake version — each scaled precisely for the 9 oz crust, with food-science reasoning built into every step so you understand not just what to do, but why it works. A dedicated troubleshooting section rounds out the guide so that even your first attempt produces clean, crack-free slices.
What You’ll Need Before You Start
Before you start this Keebler cheesecake recipe, gather these tools and ingredients — having everything ready and at room temperature is the most important prep step. The Keebler Crust Method begins here: all ingredient quantities in this guide are scaled specifically for the 9 oz Keebler Ready Crust, not a standard springform pan.
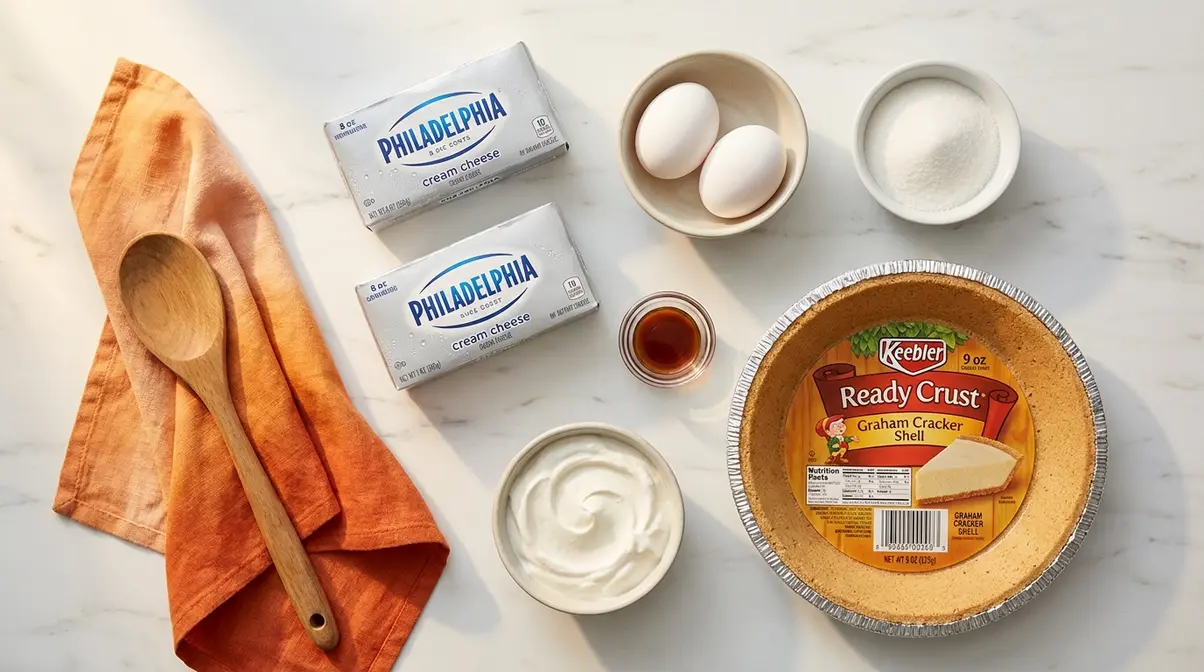
- Tools you’ll need:
- 9 oz Keebler Ready Crust (a pre-made graham cracker crust in an aluminum foil pan — no crust-making required)
- Hand mixer or stand mixer (for blending the filling smoothly; a fork works but takes much longer)
- Large mixing bowl (needs to hold at least 4 cups of batter)
- Measuring cups and spoons (for precise ingredient scaling — eyeballing leads to overflow)
- Rubber spatula (for folding and scraping the bowl; unlike a wooden spoon, it flexes to reach every corner)
- Oven (for the baked version) or refrigerator (for the no-bake version)
- Core ingredients for both versions:
- Philadelphia cream cheese (full-fat, not whipped or reduced-fat — more on why below)
- Granulated sugar (baked) or sweetened condensed milk (no-bake — not evaporated milk, which is unsweetened and thinner)
- Vanilla extract, eggs (baked only), sour cream (baked only), fresh lemon juice (no-bake only)
Full ingredient quantities appear in each step. Time estimates: the baked version needs about 75 minutes of active prep and baking plus a 4-hour minimum chill; the no-bake version takes about 15 minutes of mixing plus a 4–8-hour chill. No baking experience is required for either version.
Room-temperature cream cheese is non-negotiable. The science behind room-temperature cream cheese explains it clearly: cold cream cheese resists blending, creating lumps that cannot be smoothed out during mixing and that directly cause a grainy texture (Dickinson College, 2023). “Room temperature” means about 65–70°F — or simply left on the counter for 60 minutes before you start.
Once everything is laid out and your cream cheese has softened, you’re ready to begin — let’s move to Step 1.
Step 1: Gather and Prepare Your Ingredients
The single most important principle in The Keebler Crust Method is using exactly the right amount of ingredients for the 9 oz crust — no more, no less. Using 16 oz (2 full blocks) of Philadelphia cream cheese is the maximum for the baked version; anything more will overflow the crust during baking. This is the most common beginner mistake, and it’s entirely preventable with precise measuring.
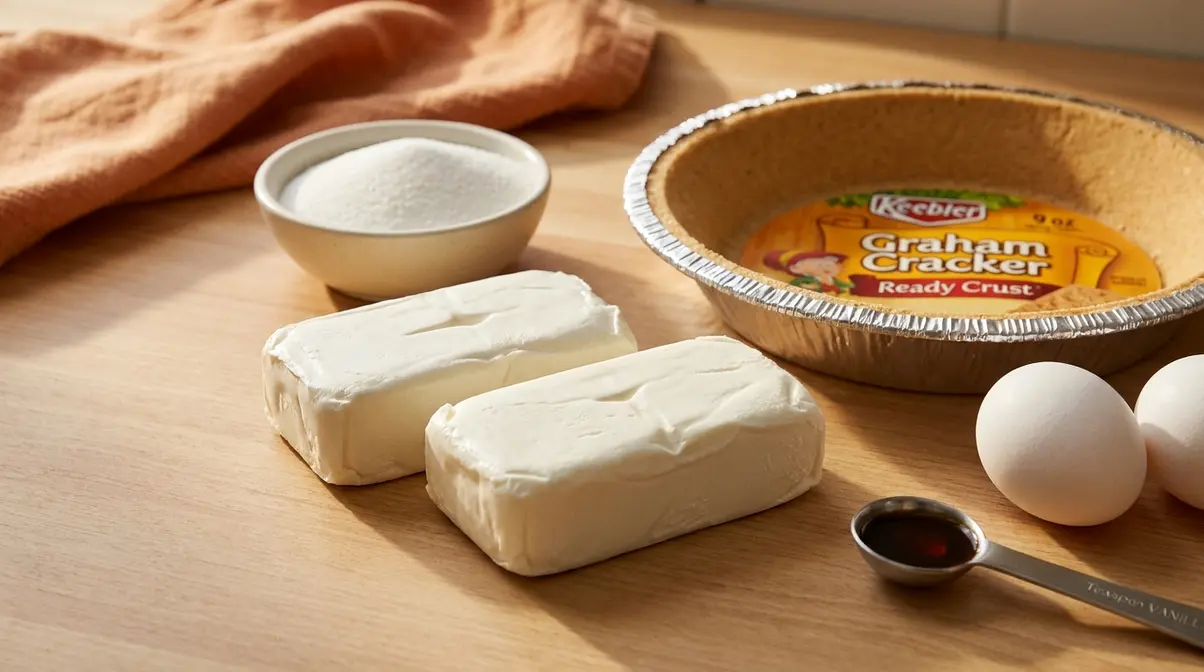
1.1 — Baked Version Ingredients
According to FDA requirements for cream cheese milkfat, authentic cream cheese must contain a minimum of 33% milkfat and a maximum of 55% moisture by weight (FDA CFR § 133.133). That fat-to-moisture ratio is what allows the cheesecake to set firm and slice cleanly when baked. Whipped cream cheese and reduced-fat “cream cheese spreads” have higher moisture content and will produce a soft, runny result — do not substitute them.
| Ingredient | Quantity | Notes |
|---|---|---|
| Philadelphia cream cheese (full-fat) | 16 oz (2 blocks) | Softened to room temp — maximum for 9 oz crust |
| Granulated sugar | ½ cup | Measure level, not heaped |
| Large eggs | 2 | Room temperature (30 min on counter) |
| Vanilla extract | 1 tsp | Pure extract preferred over imitation |
| Sour cream | ½ cup | Room temperature; adds tang and silky texture |
1.2 — No-Bake Version Ingredients
For the no-bake cheesecake filling, sweetened condensed milk (Eagle Brand or similar) replaces the eggs and sugar. Sweetened condensed milk is a thick, intensely sweet canned product made by removing most of the water from whole milk and adding sugar — look for a label that says “sweetened condensed milk” in large text with sugar listed as a main ingredient. Do not substitute evaporated milk, which is unsweetened and watery and will not set the filling.
| Ingredient | Quantity | Notes |
|---|---|---|
| Philadelphia cream cheese (full-fat) | 16 oz (2 blocks) | Softened to room temp |
| Sweetened condensed milk | 1 can (14 oz) | NOT evaporated milk |
| Fresh lemon juice | ¼ cup | Fresh squeezed, not bottled — see Step 3 for why |
| Vanilla extract | 1 tsp | — |
1.3 — Room-Temperature Timing
Getting your dairy to the right temperature before mixing is the single prep step most beginners skip — and the one that causes the most failures.
| Ingredient | Counter Time Needed |
|---|---|
| Cream cheese | 60 minutes |
| Eggs | 30 minutes |
| Sour cream | 30 minutes |
“Softened” means the cream cheese gives easily when pressed with a finger but still holds its shape — it should not be greasy, melted, or warm to the touch. If you’re short on time, you can microwave the cream cheese for 10–15 seconds, but do not let it melt.
Checkpoint: You should now have all ingredients measured, at room temperature, and laid out. Your cream cheese should press easily with a finger without being greasy or wet.
With your ingredients prepped and measured, you’re ready to make the filling — start with the classic baked version in Step 2, or jump to Step 3 for the no-bake version.
Step 2: Make the Classic Baked Keebler Cheesecake
This is where The Keebler Crust Method is fully demonstrated. The original Keebler cheesecake recipe, baked version, requires a lower and steadier oven temperature than most cheesecake recipes you’ll find online. That’s because the Keebler Ready Crust is already baked — exposing it to high heat scorches the graham cracker shell before the filling has time to set. Baking at a steady 325°F gently sets the custard filling without burning the crust (Science Buddies, 2023). Preheat your oven now, before you start mixing.
Mix the Cream Cheese Filling
For the cheesecake filling, the mixing technique matters as much as the ingredients. The goal is a smooth, lump-free batter — and the enemy is air.
- Place 16 oz of softened Philadelphia cream cheese in a large bowl. Beat with a hand mixer on low speed for 2 minutes, until smooth and slightly glossy. Low speed is critical — high speed whips air bubbles into the batter. Those bubbles expand in the oven’s heat and then collapse as the cheesecake cools, pulling the surface apart and causing cracks (CheesecakeMax, updated 2025).
- Add ½ cup granulated sugar gradually — about 2 tablespoons at a time — mixing on low for about 30 seconds total until just combined. Add the 2 eggs one at a time, mixing for exactly 15 seconds after each. Stop mixing as soon as each egg disappears into the batter. Overmixing after the eggs go in is the second most common cause of cracking.
- Add ½ cup sour cream and 1 tsp vanilla extract. Fold these in gently with a rubber spatula — do not use the mixer for this step. “Fold” means turning the batter over slowly with the spatula, like turning pages of a book, rather than stirring in circles. The sour cream adds tang and a silkier texture; it also acts as a buffer against surface cracks by keeping the filling moist during baking.
Think of the finished batter consistency like thick yogurt — it should pour slowly, not splash. According to University of Wisconsin dairy research on cream cheese moisture, U.S. standards require cream cheese to contain a maximum of 55% moisture — the fat-to-moisture ratio is what allows cream cheese to set firm when baked (UW Center for Dairy Research, 2003).
The batter should look smooth and slightly glossy — that sheen is your visual cue that the cream cheese is fully incorporated and no dry lumps remain.
Checkpoint: Your filling should be smooth, glossy, and lump-free. If you see white lumps, your cream cheese was too cold — warm the bowl briefly by placing it over a pot of hot (not boiling) water for 60 seconds, then re-mix on low.
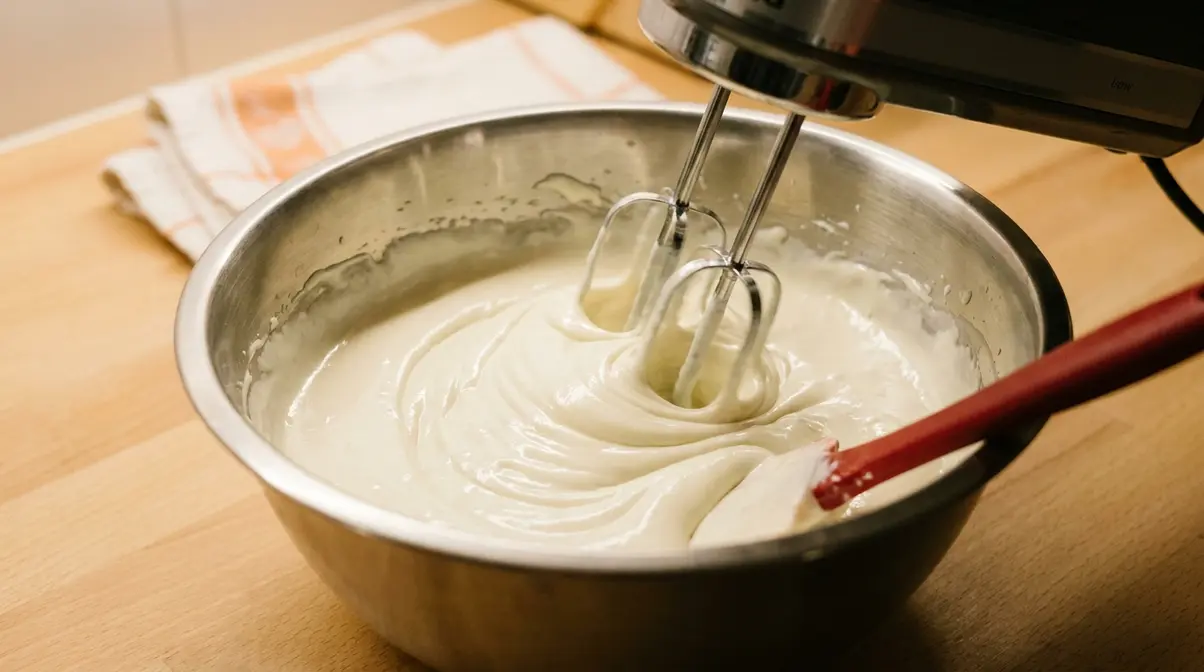
Once the filling is smooth, pour it into the Keebler Ready Crust and get it into the oven.
Assemble and Bake the Cheesecake
For this Keebler cheesecake recipe, the baking setup is straightforward — no water bath, no foil wrapping, no special pan. The 9 oz Keebler Ready Crust goes directly onto the center oven rack.
- Pour the filling into the 9 oz Keebler Ready Crust. Use your rubber spatula to spread it evenly to the edges. Leave at least ¼ inch of space at the top of the crust rim. If any filling remains after the crust is full, discard it — do not overfill. This overflow-prevention rule is the heart of The Keebler Crust Method.
- Place the crust on the center rack of your preheated 325°F oven. Set a timer for 60 minutes. Do not open the oven door during the first 45 minutes. Every time the door opens, the oven temperature drops suddenly — and sudden temperature changes are the number one cause of surface cracks (King Arthur Baking, 2024).
- At 60 minutes, perform the jiggle test: gently shake the oven rack back and forth once. The outer 2 inches of the cheesecake should be firm and set; the center 2-inch circle should jiggle like Jell-O — a gentle wobble, not a wave. If the entire surface moves like water, bake for 5 more minutes and recheck. The traditional New York cheesecake baking method uses a two-temperature approach, but for the Keebler Ready Crust, a steady 325°F is more appropriate to prevent scorching (Science Buddies, 2023).
Quick baking reference:
| Oven Temp | Bake Time | Doneness Cue |
|---|---|---|
| 325°F | 60–65 minutes | Center jiggles like Jell-O; edges are set and firm |
The center jiggle should look like a gentle wobble, not a wave — if you’ve ever watched Jell-O move in a bowl, that’s exactly the motion you’re looking for.
Checkpoint: You should now see a slightly puffed cheesecake with golden-tan edges and a center that jiggles gently when shaken. The surface should not have any liquid pooling or wet spots.
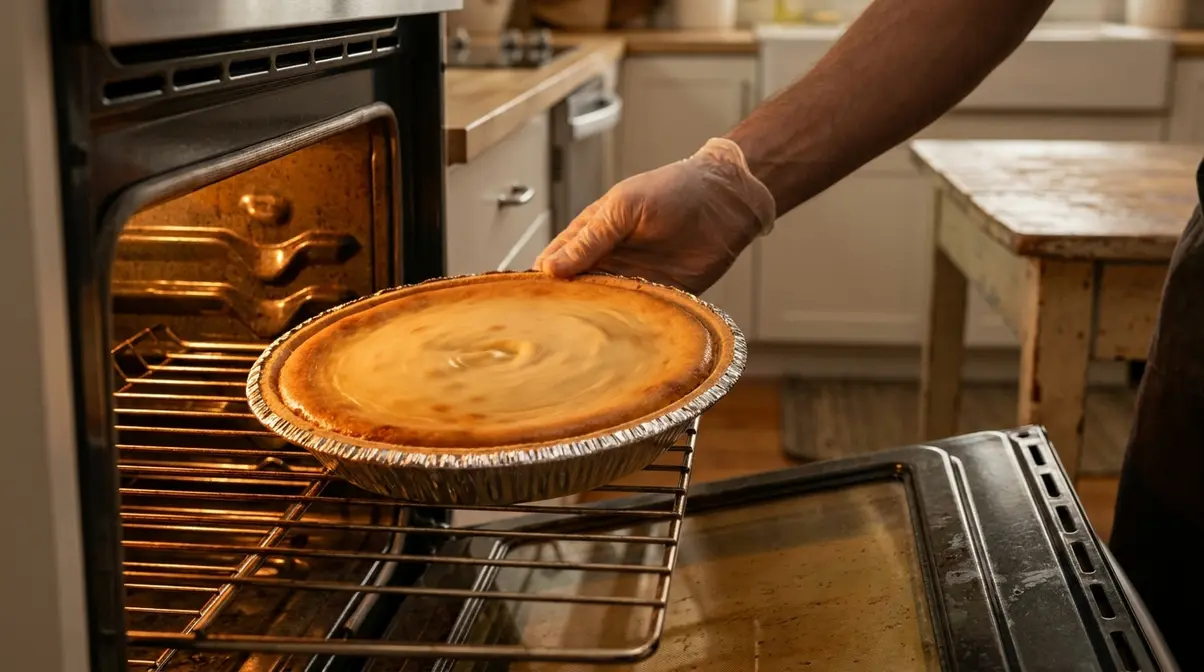
The hard part is done — now comes the most important (and most skipped) step: cooling.
Cool and Chill the Cheesecake
Gradual cooling is where most cracks happen — or don’t. A cheesecake that goes from a hot oven to a cold counter contracts rapidly on the outside while the inside is still warm, and that tension tears the surface. The solution is a slow, controlled temperature descent.
- Turn off the oven. Prop the oven door open about 2 inches — a wooden spoon works perfectly for this. Leave the cheesecake inside for a full 60 minutes. This lets the internal temperature drop slowly, giving the protein structure time to set without stress (Sally’s Baking Addiction, updated 2026).
- After 60 minutes, run a thin knife or offset spatula around the inside edge of the crust, between the filling and the foil pan rim. This releases any adhesion before the filling contracts during chilling — preventing it from pulling away from the crust and cracking at the edges.
- For a classic sour cream topping: mix ½ cup sour cream with 1 tbsp granulated sugar and spread over the warm cheesecake before refrigerating. This optional step covers any minor surface imperfections and adds a pleasant tang.
- Refrigerate for a minimum of 4 hours. Overnight (8–12 hours) is strongly recommended for clean, firm slices. According to USDA food safety guidelines, perishable dairy foods like cheesecake should not remain in the 40°F–140°F danger zone for more than 2 hours (USDA FSIS). Once it reaches room temperature after oven cooling, move it to the refrigerator promptly.
Checkpoint: You should now have a chilled cheesecake that is firm to the touch in the center, with no visible cracks on the surface. If there are small cracks, cover them with the sour cream topping or a fruit topping — they won’t affect the taste at all.
****
No oven? No problem — Step 3 gives you a completely no-bake version that sets up just as creamy in the refrigerator.
Step 3: Make the Easy No-Bake Keebler Cheesecake
A no-bake Keebler cheesecake is one of the easiest desserts you can make — no oven, no water bath, no eggs, and no timing anxiety. The secret to a filling that actually sets is the combination of full-fat Philadelphia cream cheese with sweetened condensed milk and fresh lemon juice. The citric acid in fresh lemon juice triggers acid-induced coagulation of the milk proteins in the condensed milk, forming a stable protein network that thickens and sets the filling without any heat (MyKitchenGallery, 2025). This is the food-science insight most no-bake cheesecake recipes never mention — and it’s why fresh lemon juice outperforms bottled.
The Keebler Crust Method applies here too: the no-bake filling quantity below is scaled to the 9 oz crust’s approximately 1.5-cup filling capacity, so you’ll get a full, even fill without overflow.
Prepare the No-Bake Filling
For the no-bake cheesecake filling recipe, start with the same low-speed mixing rule as the baked version.
- Place 16 oz of softened Philadelphia cream cheese in a large bowl. Beat on low speed for 2 minutes until completely smooth. The same principle applies: high-speed mixing traps air bubbles that prevent the filling from setting evenly.
- Add 1 can (14 oz) of sweetened condensed milk gradually — pour it in a slow, steady stream while the mixer runs on low. Mix until fully combined, about 1 minute. The filling will already look thicker and creamier at this stage.
- Add ¼ cup fresh lemon juice and 1 tsp vanilla extract. Mix on low for 30 seconds. Watch the bowl — the filling will visibly thicken within about 2 minutes of adding the lemon juice. This is the citric acid reacting with the cream cheese proteins to begin the setting process (My Culinary Chemistry, 2025). Fresh lemon juice from regular lemons (not Meyer lemons, which have lower citric acid) produces the firmest set. Bottled reconstituted lemon juice contains additives and diluted acidity that blunt this reaction, resulting in a softer filling after chilling.
Cool Whip variation: For a lighter, mousse-like texture, fold in 1 cup of thawed Cool Whip with a rubber spatula after mixing. Do not use the mixer — folding preserves the air in the Cool Whip that gives the cheesecake its lightness. This is an easy no-bake Keebler cheesecake variation that works especially well for summer gatherings when a denser filling feels too heavy.
The finished filling should look like a thick, pourable batter — slightly thicker than pancake batter but not as stiff as frosting.
Checkpoint: Your no-bake filling should be smooth, slightly thickened, and pourable. If it looks too thin, your cream cheese may not have been fully softened — refrigerate the filling for 30 minutes, then re-stir before pouring.
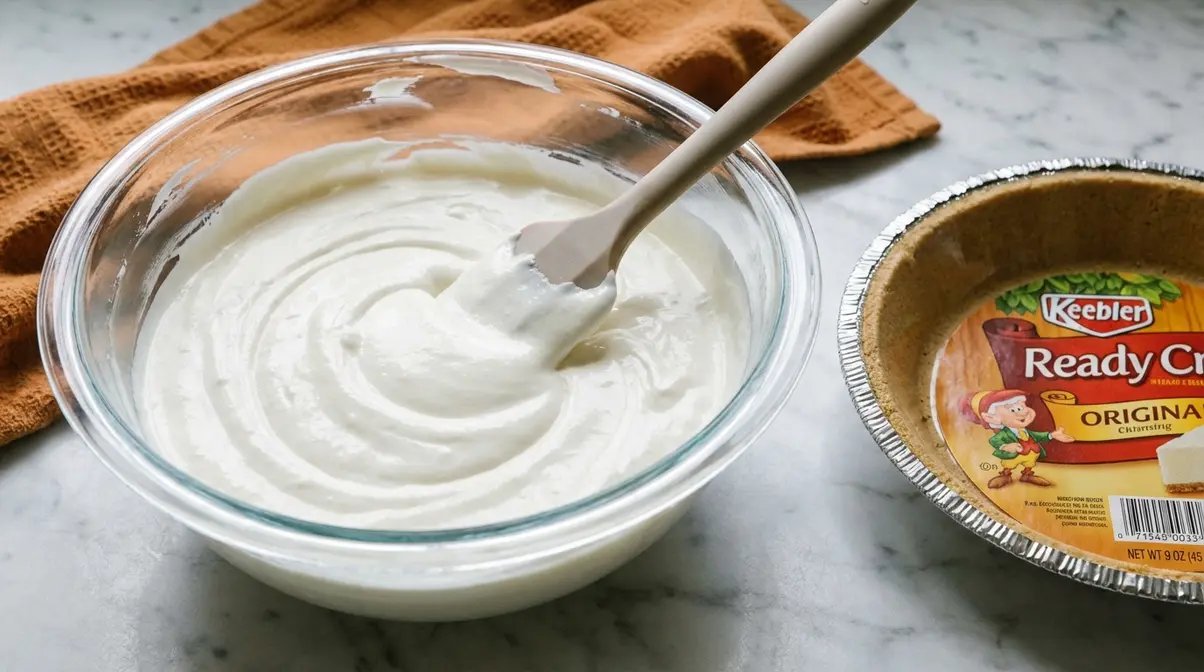
Now pour the filling into the crust and let the refrigerator do the rest.
Assemble and Refrigerate
Assembling the no-bake cheesecake takes about 3 minutes. Getting the chilling step right takes patience — but it’s entirely hands-off.
- Pour the filling into the 9 oz Keebler Ready Crust. Use a rubber spatula to spread it evenly to the edges. The filling should come to within ¼ inch of the crust rim — do not overfill.
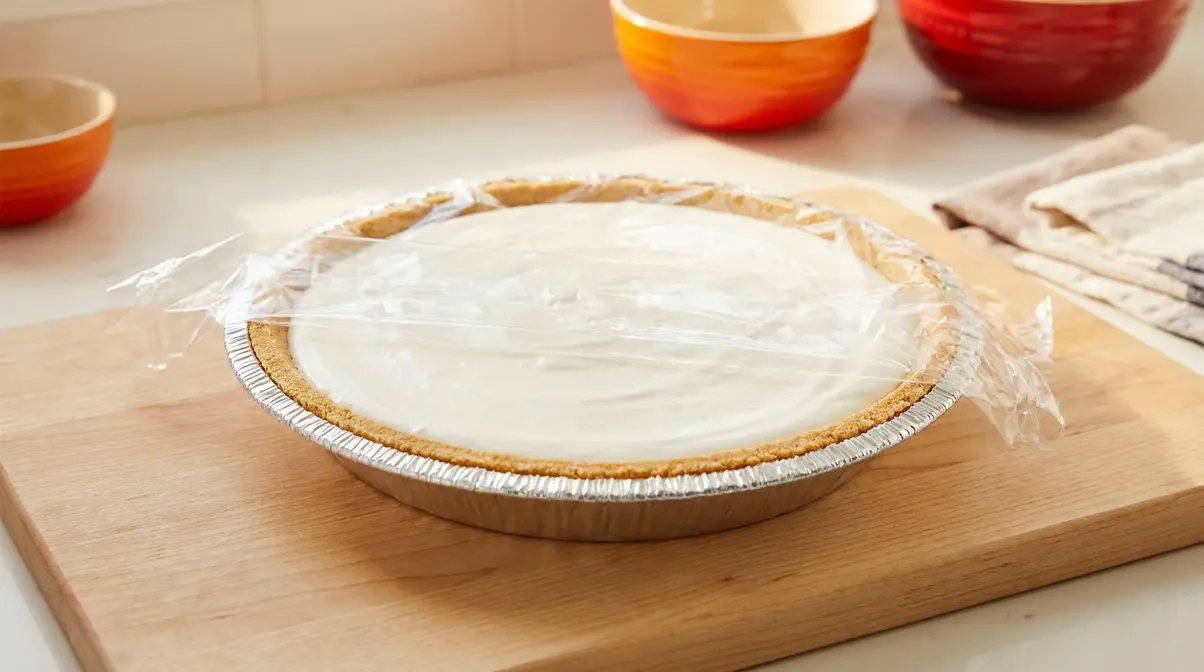
- Cover loosely with plastic wrap. Do not press the wrap against the filling surface — it will leave an imprint on the finished cheesecake. Tent the plastic wrap slightly above the surface instead.
- Refrigerate for a minimum of 4 hours. For the best texture and cleanest slices, chill overnight (8–12 hours). When our team prepared both versions for this guide, we found the no-bake version set most reliably after a full overnight chill — 4-hour cheesecakes sliced cleanly but were noticeably softer in the center.
- Do not place in the freezer to speed up setting. Freezing changes the cream cheese texture from creamy to grainy and watery when thawed — it’s a shortcut that ruins the result.
According to the two-hour room temperature rule for cheesecake, cheesecake should not be left at room temperature for more than 2 hours, as bacteria multiply rapidly between 40°F and 140°F (Crown College, food safety guidelines). Refrigerate within 2 hours of assembly and keep cold until serving.
Checkpoint: You should now have an assembled no-bake cheesecake, covered and chilling in the fridge. After 4 hours, the center should feel firm (not liquid) when gently pressed through the plastic wrap.
****
Once your cheesecake — baked or no-bake — is set and chilled, it’s time for the most fun part: toppings and variations.
Step 4: Add Toppings and Flavor Variations
A plain cheesecake is already delicious. But the right topping transforms it into something that looks like it came from a bakery — and it takes about 5 minutes. Both the baked and no-bake versions work equally well with every topping and variation below. These Keebler cheesecake flavor variations are where you can personalize the recipe for any occasion or season.
Classic Toppings
These four toppings require zero cooking and can be added right before serving:
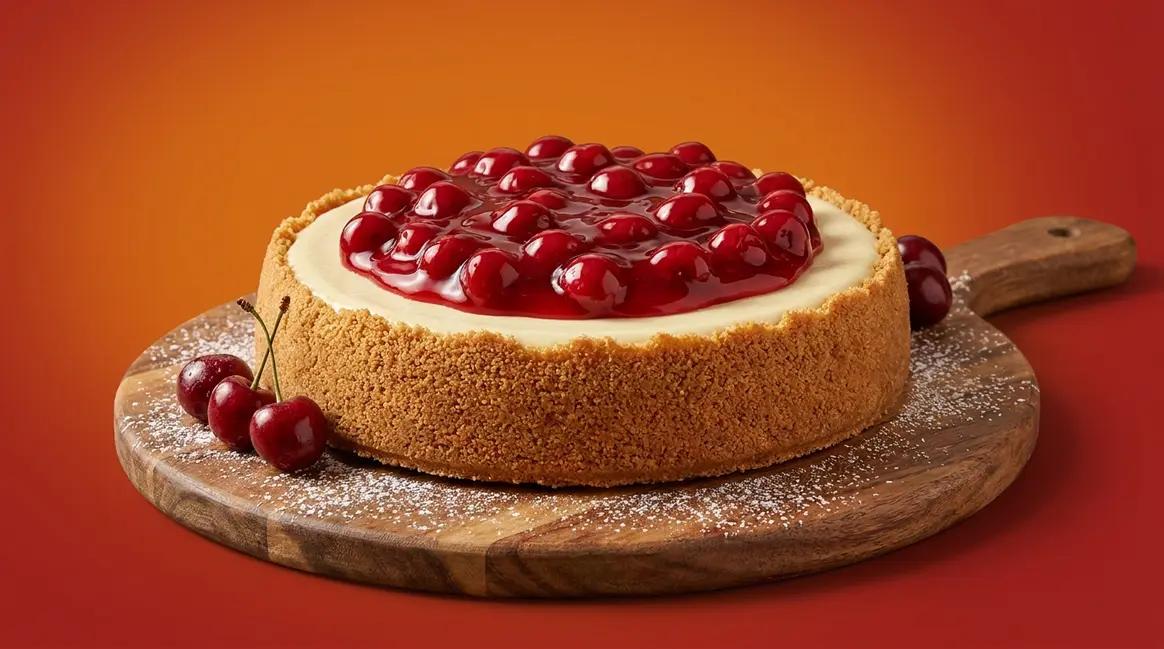
- Cherry pie filling: Spoon 1 can (21 oz) of cherry pie filling directly over the chilled cheesecake. This is the most classic pairing with a graham cracker crust — the tart cherries balance the rich, creamy filling perfectly.
- Strawberry sauce: Hull and slice 1 cup of fresh strawberries, toss with 2 tbsp granulated sugar, and let sit for 15 minutes until syrupy. Spoon over individual slices rather than the whole cheesecake to keep the crust crisp.
- Whipped cream: Pipe or spoon store-bought whipped topping (or fresh whipped cream) around the edges. This works especially well to cover any minor cracks on a baked cheesecake.
- Blueberry topping: Use 1 cup fresh or frozen blueberries simmered with 2 tbsp sugar and 1 tsp lemon juice for 5 minutes until thickened. Cool completely before spooning over the cheesecake.
For a clean presentation, add toppings after the cheesecake has fully chilled and is sliced — not before. Wet toppings spread over an un-sliced cheesecake can soak into the graham cracker crust and make it soggy.
Seasonal Flavor Variations
These variations modify the filling itself — mix them into the base recipe before pouring into the crust.
Pumpkin Cheesecake (Fall/Thanksgiving):
This variation adapts the baked recipe specifically for the 9 oz Keebler Ready Crust. Reduce the cream cheese to 8 oz (1 block) and add ½ cup canned pumpkin purée (not pumpkin pie filling, which is pre-sweetened), ½ tsp cinnamon, ¼ tsp nutmeg, and a pinch of cloves to the filling. Keep all other baked version quantities the same. The pumpkin adds moisture, so bake at 325°F for 55–60 minutes and check the jiggle test at 55 minutes. Top with whipped cream and a dusting of cinnamon before serving.
Chocolate Swirl:
Melt 2 oz of semi-sweet chocolate chips and let cool for 5 minutes. After pouring the standard cheesecake filling into the crust, drizzle the melted chocolate over the surface and use a toothpick to swirl it gently in figure-eight motions. Bake or chill as directed.
Lemon Cheesecake:
Add 1 tbsp fresh lemon zest and an extra 1 tbsp fresh lemon juice to the baked filling (reduce sour cream to ¼ cup to compensate for the added moisture). For the no-bake version, increase the lemon juice to ⅓ cup for a brighter, more pronounced citrus flavor.
Checkpoint: You should now have a fully dressed cheesecake that is ready to serve or store. Refrigerate any topped cheesecake immediately and serve within 3 days.
Step 5: Make Mini Keebler Cheesecakes
Mini cheesecakes are one of the most practical applications of this recipe — they serve individual portions without slicing, they chill faster than a full-size cheesecake, and they’re ideal for parties, potlucks, and holiday dessert tables. Keebler also makes mini Ready Crust shells in 4 oz individual sizes, which are confirmed by Amazon product listings as being “perfect for cheesecake, pumpkin pie, and more” (Amazon, 2024).
Adapt the Recipe for Mini Crusts
The standard 9 oz Keebler Ready Crust recipe scales down cleanly to 6 individual mini crusts (4 oz each). Use the same ingredient ratios — the key difference is filling volume per crust.
Mini baked cheesecake ingredients (makes 6):
| Ingredient | Full 9 oz Recipe | Mini (÷ 6 per crust) |
|---|---|---|
| Philadelphia cream cheese | 16 oz | ~2.7 oz per crust |
| Granulated sugar | ½ cup | ~1.5 tsp per crust |
| Eggs | 2 large | ~⅓ egg per crust |
| Vanilla extract | 1 tsp | ~¼ tsp total batch |
| Sour cream | ½ cup | ~1.5 tsp per crust |
In practice, make the full batch of filling and divide it evenly among the 6 mini crusts — about 3 tablespoons of filling per crust. Do not overfill; leave ¼ inch of space at the rim, exactly as with the full-size crust.
Place all 6 mini crusts on a baking sheet before filling — this makes them easy to move in and out of the oven without spilling.
Bake or Chill Times for Mini Cheesecakes
Mini cheesecakes bake and chill significantly faster than full-size ones, because the filling is shallower and heat penetrates more quickly.
Baked mini cheesecakes: Bake at 325°F for 22–28 minutes. Check at 22 minutes using the jiggle test — the center should wobble gently. Because the filling layer is thin, the jiggle test window is narrow; check every 3 minutes after the 22-minute mark. Cool in the oven with the door cracked for 30 minutes (not the full 60 minutes needed for the full-size version), then refrigerate for 2 hours minimum.
No-bake mini cheesecakes: Fill the mini crusts with the no-bake filling, cover loosely, and refrigerate for 2–3 hours minimum — or overnight for cleanest results. The shallower fill sets more quickly than a full-size cheesecake.
Checkpoint: You should now have 6 individual cheesecakes that are firm to the touch and ready to top and serve. Add toppings immediately before serving to keep the crust crisp.
Verify Your Results
Before slicing and serving, do a quick visual and texture check on your finished cheesecake. These cues confirm the cheesecake is properly set and ready:
- Surface: Flat and smooth, with no visible liquid pooling. A slight dome in the center is normal for baked versions.
- Texture (pressed gently through plastic wrap): Firm throughout, with just a slight give in the very center — like pressing a ripe peach.
- Color: The baked version should be pale ivory to light golden, not dark brown or cracked. The no-bake version will be bright white.
- Edges: For the baked version, the filling should be pulling very slightly away from the crust edge — this is a sign of a properly set cheesecake, not a problem.
If the center still feels liquid after the minimum chill time, return it to the refrigerator for another 2 hours and recheck. A no-bake cheesecake that hasn’t set after 8 hours likely had cream cheese that wasn’t fully softened before mixing — see the troubleshooting section below.
Troubleshooting: Crack Prevention and Common Fixes
Even careful bakers encounter problems. The five issues below cover nearly every Keebler cheesecake failure our team has seen — along with the food-science explanation for why each happens and exactly how to prevent or fix it.
Common Problems and Solutions
Problem 1: The cheesecake cracked on top.
Cause: The most common causes are overmixing (which traps air bubbles that expand and collapse), opening the oven door too early, or cooling the cheesecake too quickly. According to Jack & Beyond’s analysis of cheesecake cracking science (2024), high-speed mixing creates large air bubbles that expand during baking and then deflate as the cake cools, physically tearing the surface.
Fix: Always use low speed; never open the oven door in the first 45 minutes; and follow the gradual cooling protocol (oven off, door cracked, 60 minutes). If cracks appear anyway, spread the sour cream topping or fruit topping over the surface — the flavor is completely unaffected.
Problem 2: The filling overflowed the crust.
Cause: Too much filling for the 9 oz crust. This is the most common scaling error — most online recipes were written for a 9-inch springform pan, which holds roughly 3 times as much filling as the Keebler Ready Crust.
Fix: Use exactly 16 oz (2 blocks) of cream cheese and the quantities in this guide. If any filling remains after the crust is full to ¼ inch from the rim, discard it. Overflow is not recoverable once it happens.
Problem 3: The no-bake cheesecake didn’t set.
Cause: Cream cheese that was too cold before mixing, insufficient lemon juice (which is the acid that triggers the protein coagulation setting process), or not enough chilling time.
Fix: Ensure cream cheese is fully softened (60 minutes at room temperature). Use fresh lemon juice from regular lemons — not Meyer lemons, which have lower citric acid (Cookies or Biscuits, updated 2024). Chill overnight for the firmest result.
Problem 4: The texture is grainy or lumpy.
Cause: Cold cream cheese that was never fully blended. Cold cream cheese resists mixing, so lumps form early and cannot be smoothed out later, no matter how long you mix.
Fix: Prevention only — always start with fully softened cream cheese. If you notice lumps during mixing, place the bowl over a pot of hot water for 60 seconds to warm the batter slightly, then re-mix on low. Once baked, a grainy texture cannot be corrected.
Problem 5: The crust is soggy.
Cause: Wet toppings added too early, or the cheesecake was stored uncovered in a humid refrigerator. The pre-baked Keebler crust absorbs moisture over time.
Fix: Add wet toppings (cherry filling, strawberry sauce) immediately before serving, not hours in advance. Store covered with loosely tented plastic wrap rather than pressed-down wrap. Consume within 3 days for the best crust texture.
When to Choose Alternatives
When to use a springform pan instead: If you want to make a larger cheesecake serving 8–10 people, a 9-inch springform pan with a homemade graham cracker crust (1½ cups graham cracker crumbs + ⅓ cup melted butter + ¼ cup sugar) is the better choice. The Keebler Ready Crust is ideal for 6–8 servings with minimal prep; for larger gatherings, the springform pan gives you more flexibility on filling volume and toppings. Resources like Sugar Spun Run’s baked cheesecake guide offer excellent springform pan recipes if you want to scale up.
When a no-bake version is the better choice: If you’re baking in summer heat, feeding guests with egg allergies, or simply need a dessert ready in under 20 minutes of active time, the no-bake version is the smarter pick. The texture is slightly softer and creamier — less dense than the baked version — which many people actually prefer.
Advanced Tips: Ingredient Swaps and Upgrades
Once you’ve made the base recipe successfully, these swaps and upgrades let you customize without compromising the structure.
Cream cheese: Philadelphia full-fat cream cheese is the benchmark — it meets the FDA’s 33% milkfat minimum and produces the most reliable set. Generic store-brand full-fat cream cheese (check the label for ≥33% milkfat) works as a budget alternative. Never use whipped, spreadable, or reduced-fat varieties.
Sugar: Granulated white sugar is standard. For a warmer, more caramel-like flavor, substitute an equal amount of light brown sugar in the baked version. The brown sugar’s molasses content adds depth without affecting the set.
Sour cream: Full-fat sour cream is ideal. Greek yogurt (plain, full-fat) is a reliable substitute — it has a similar fat content and acidity. Do not use non-fat yogurt, which adds too much moisture.
Vanilla: Pure vanilla extract is always preferable to imitation vanilla, which can taste slightly medicinal when baked. Vanilla bean paste (same quantity) is an upgrade that adds visible flecks and a more pronounced flavor.
The crust itself: The 9 oz Keebler Ready Crust comes in graham cracker, chocolate, and butter flavors. The chocolate crust pairs especially well with the pumpkin and chocolate swirl variations. The butter crust is milder and works well with citrus-forward fillings. All crust varieties have the same capacity and baking properties — swap freely.
Philadelphia cream cheese cheesecake note: For the richest, densest result, use Philadelphia brand specifically. Classic baked Keebler cheesecake recipes consistently perform best with full-fat Philadelphia because its consistent fat content and low moisture produce a reliably firm, sliceable result.
Frequently Asked Questions
How do I prevent my Keebler cheesecake from cracking?
Cracking in a Keebler cheesecake is caused by three things: overmixing (which traps air), opening the oven door too early, and cooling too quickly. Mix the filling on low speed only, and stop as soon as each ingredient is incorporated. Never open the oven door during the first 45 minutes of baking. When the cheesecake is done, turn off the oven, crack the door 2 inches, and leave it inside for a full 60 minutes before moving it. According to King Arthur Baking’s 2024 crack prevention research, gradual cooling is the single most effective method for preventing surface cracks. Room-temperature ingredients (cream cheese, eggs, sour cream) reduce the need for extended mixing and minimize internal temperature stress during baking.
Can I make a no-bake Keebler cheesecake with sweetened condensed milk?
Yes — sweetened condensed milk is actually the preferred ingredient for a no-bake Keebler cheesecake. It provides both sweetness and the structural foundation for the filling to set without eggs or heat. Combined with fresh lemon juice, the citric acid in the lemon triggers protein coagulation in the condensed milk, thickening the filling within minutes of mixing (MyKitchenGallery, 2025). Use 1 can (14 oz) of sweetened condensed milk per 16 oz of cream cheese. Do not substitute evaporated milk — it is unsweetened and lacks the sugar concentration needed to stabilize the set. Chill for a minimum of 4 hours; overnight produces the firmest, cleanest-slicing result.
How long does a Keebler cheesecake need to chill before serving?
A baked Keebler cheesecake needs a minimum of 4 hours of refrigeration before slicing — overnight (8–12 hours) is strongly recommended for the cleanest cuts and firmest texture. The no-bake version also requires a minimum of 4 hours, with overnight being ideal. Chilling allows the protein structure to fully set: cutting too early results in a soft center that falls apart on the plate. If you’re in a hurry, 4 hours produces acceptable results; for a holiday or special occasion, always chill overnight. According to USDA food safety guidelines, cheesecake must be refrigerated within 2 hours of baking or assembly and kept cold until serving.
Why does my Keebler cheesecake overflow the crust?
Overflow happens because the 9 oz Keebler Ready Crust holds significantly less filling than a standard springform pan recipe. Most cheesecake recipes online are written for a 9-inch springform pan with roughly 3× the filling capacity of the Keebler crust. Using those quantities directly causes overflow and cracking. The maximum for the baked version is exactly 16 oz (2 blocks) of Philadelphia cream cheese with the quantities listed in this guide. Leave at least ¼ inch of space at the crust rim when filling. If any batter remains after the crust is full, discard it — never overfill.
Can I use a Keebler Ready Crust for mini cheesecakes?
Yes — Keebler makes mini Ready Crust shells in individual 4 oz sizes, which are ideal for single-serving cheesecakes. One full batch of filling (baked or no-bake) fills approximately 6 mini crusts. Place all 6 on a baking sheet before filling for easy handling. Mini baked cheesecakes take 22–28 minutes at 325°F; check the jiggle test starting at 22 minutes. Mini no-bake cheesecakes set in 2–3 hours (versus 4+ hours for a full-size crust). Both versions are perfect for parties and holiday dessert tables where individual portions are more practical than slicing a full cheesecake.
Wrapping Up Your Perfect Keebler Cheesecake
For beginner home bakers, a Keebler cheesecake recipe delivers an impressive, bakery-quality result with minimal equipment and no special skills. The key is precision: using exactly 16 oz of full-fat Philadelphia cream cheese for the 9 oz crust, mixing on low speed to avoid air incorporation, and chilling for the full recommended time. Both the baked version (325°F, 60–65 minutes, gradual cooling) and the no-bake version (sweetened condensed milk + fresh lemon juice, overnight chill) produce a rich, creamy filling over a crisp graham cracker crust — no water bath required.
The Keebler Crust Method is the framework behind every successful result in this guide: scale your ingredients to the crust, not to a generic recipe, and the cheesecake practically makes itself. Room-temperature ingredients, low-speed mixing, and a patient cooling process are the three pillars that eliminate every common failure before it starts.
Start with the classic baked version if you want the denser, more traditional texture — or try the no-bake version tonight for a result that’s ready by morning. Pick your toppings from Step 4, review the troubleshooting section in Step 6 if anything looks off, and check out Keebler cheesecake ingredients for a full printable ingredient reference. Your first crack-free cheesecake is one recipe away.

Dave King
Recipe developer and writer at Quick Dish Cookbook.