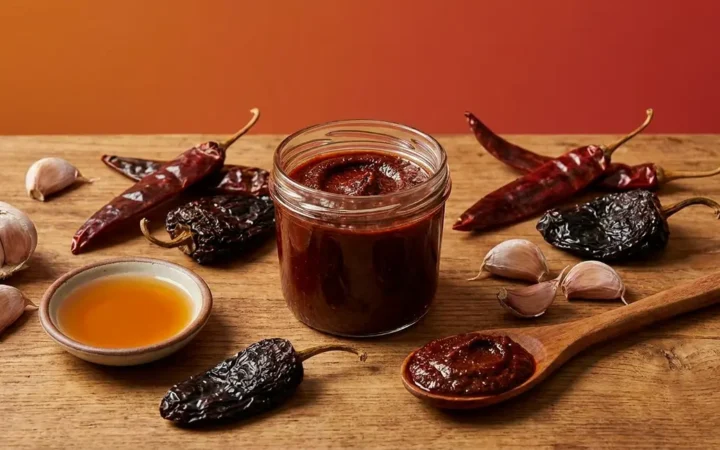

You’ve followed a beef chilli recipe before. You did everything it said. And somehow, what came out of the pot tasted watery, flat, and exactly like tinned tomatoes with a vague hint of spice. The problem isn’t you — it’s that most recipes tell you what to do without explaining why. Skip the why, and you skip the flavour.
What’s in this guide
- What You'll Need: Ingredients and Equipment
- Step 1: Prep Your Aromatics and Spice Blend (15 Minutes)
- Step 2: Brown the Beef for Maximum Flavour
- Step 3: Bloom Your Spices and Build the Flavour Base
- Step 4: Add Your Liquids, Beans, and Simmer
- Step 5: Taste, Adjust, and Serve Your Beef Chilli
- Slow Cooker Variation: Set-and-Forget Beef Chilli
- Dietary Variations: No-Bean, Keto, and Diabetic-Friendly
- Pro Tips: The Flavor Stack Method
- Common Mistakes to Avoid When Making Chilli
- How to Store, Freeze, and Reheat Your Chilli
- Frequently Asked Questions
- Conclusion
All that time. All those ingredients. And the result sits on the hob tasting like it came from a can. Nobody wants to serve that, especially when you were quietly hoping for something that gets a reaction.
In this guide, you’ll learn the exact step-by-step beef chilli recipe our team has tested and refined — plus the culinary techniques that turn a good chilli into a great one. We’ll walk through the classic stovetop method, a slow cooker variation, dietary swaps, and the pro tips behind what we call the Flavor Stack Method: a six-layer framework for building deep, complex flavour every single time.
What You’ll Need: Ingredients and Equipment
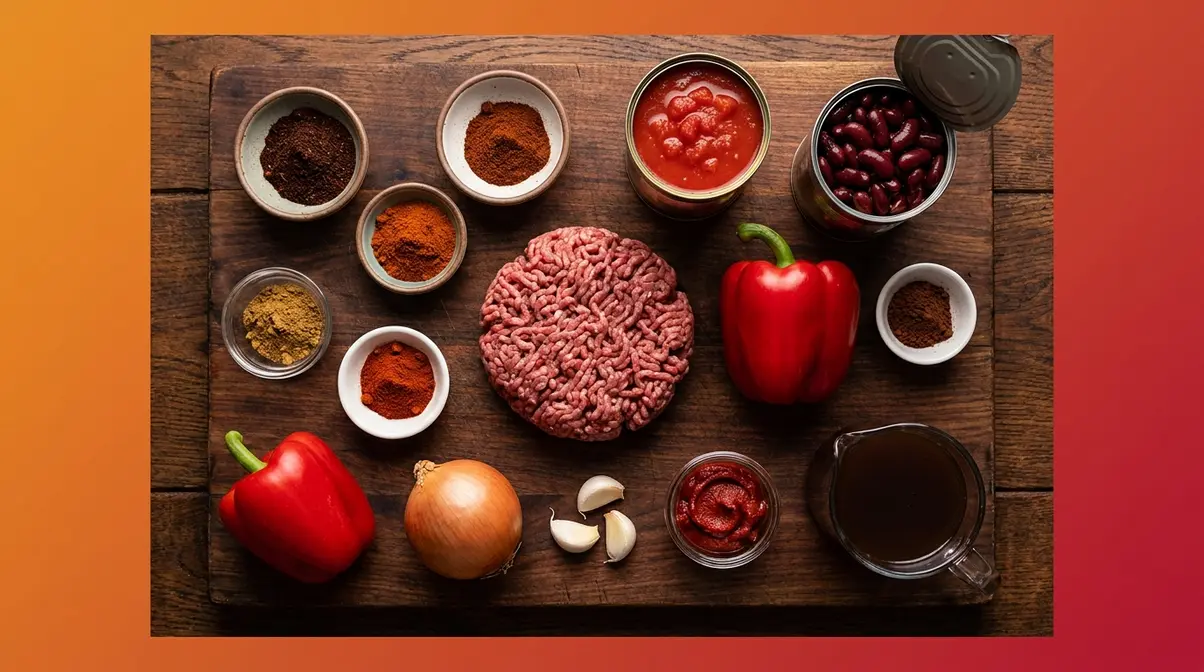
This beef chilli recipe needs just 12 core ingredients — most of them pantry staples you likely already have. The secret isn’t a long shopping list. It’s choosing the right type of beef and using a blend of three chilli powders instead of one. With everything prepped before you start, the whole recipe takes under 90 minutes from first chop to first bowl.
“This recipe was developed and tested across multiple batches, adjusting spice ratios, simmer times, and fat content until the flavour and texture met our standards. The technique guidance is based on established culinary science and tested home-cook methods.”
These ingredients are the building blocks of what we call the Flavor Stack Method — more on that later.
Your Ingredient List
Here’s what you need to serve 4–6 people:
- 500g (1 lb) ground chuck (80/20) — ground chuck is an 80/20 lean-to-fat mince that provides the richest flavour base. Michigan State University Extension notes that ground chuck’s 80/20 lean-to-fat ratio provides optimal moisture and flavour for hearty, long-simmering dishes like chilli.
- 1 large onion, diced
- 3 garlic cloves, minced
- 1 red pepper, diced
- 1 tbsp ancho chilli powder — ancho chilli powder is a mild, fruity dried chilli that forms the backbone of the spice blend
- 1 tsp chipotle chilli powder — smoky, medium heat
- 1 tsp regular chilli powder — classic heat and colour
- 1 tsp ground cumin — ground cumin is a warm, earthy spice that forms the backbone of most chilli blends
- ½ tsp smoked paprika — adds colour and subtle depth
- 2 tbsp tomato paste
- 1 tin (400g) chopped tomatoes
- 250ml (1 cup) beef stock
- 1 tin (400g) kidney beans — kidney beans are the classic choice for their firm texture and mild flavour (drained and rinsed)
- 1 tbsp olive oil or vegetable oil
- Salt and black pepper
- Optional umami boosters (highly recommended):
- 1 tsp cocoa powder OR ½ tsp instant espresso powder — these deepen savouriness without adding sweetness. Think of them as a volume knob for the meaty flavour.
Tip: If you can only find one chilli powder, use ancho — it’s the most important of the three.
Using a single chilli powder is the most common reason chilli tastes flat. Each powder adds a different dimension: fruity heat from the ancho, smoke from the chipotle, and classic sharp heat from the regular blend. This three-powder approach is the single biggest differentiator between a one-note chilli and a complex one.
For a simplified version of this ingredient list, see our classic beef chilli recipe.
Kitchen Equipment You’ll Need
You don’t need any specialist equipment for this recipe. Here’s what to have ready:
- Large, heavy-bottomed saucepan or Dutch oven — a Dutch oven is a large, heavy pot with a tight-fitting lid. Any large saucepan that holds at least 2 litres of liquid works perfectly.
- Wooden spoon or heat-resistant spatula
- Sharp knife and chopping board
- Measuring spoons
- Tin opener
- Small bowl (for pre-mixing the spice blend)
If your pot is large enough to hold 2 litres, it will work. A slow cooker is an optional alternative — covered fully in the Slow Cooker Variation section below.
With your ingredients prepped and your equipment ready, it’s time to cook. Let’s start with Step 1.
Step 1: Prep Your Aromatics and Spice Blend (15 Minutes)
Before any heat touches your pan, spend 15 minutes getting everything prepped. This single habit — known as mise en place (a French culinary term meaning “everything in its place,” i.e., having all your ingredients ready before you start cooking) — is the difference between a calm, flavour-packed cook and a stressful one where things burn while you’re still searching for the cumin.
This prep work is the foundation of the Flavor Stack Method — the first layer is fat and aromatics, and both need to be ready before the heat goes on.
Dice Your Aromatics
Follow these steps for even, consistent pieces that cook at the same rate:
- Onion:
- Cut the onion in half through the root end. Peel off the skin.
- Lay each half flat. Make 3–4 horizontal cuts parallel to the chopping board, stopping just before the root.
- Make 4–5 vertical cuts down through the onion, again stopping before the root.
- Slice across — the root holds everything together and you get an even 1cm dice.
- Garlic:
- Place the flat side of your knife blade on top of a garlic clove and press down firmly with your palm.
- The skin will split and peel away instantly.
- Mince the clove finely with a rocking motion, or use a garlic press.
- Red pepper:
- Slice off the top and bottom.
- Stand it upright and slice off the four sides around the core — this avoids the seeds entirely.
- Dice the sides into roughly 1cm pieces.
Tip: If your eyes water while cutting onion, chill it in the fridge for 20 minutes first — it reduces the release of irritant compounds.
Uniform size matters. Uneven pieces cook at different rates, giving you burnt edges and undercooked centres in the same bite.
Checkpoint: You should have a bowl of evenly diced onion, minced garlic, and diced red pepper — all roughly 1cm in size.
Mix Your Spice Blend
In a small bowl, combine all five spices:
| Spice | Amount | What It Adds |
|---|---|---|
| Ancho chilli powder | 1 tbsp | Mild, fruity heat — the backbone |
| Chipotle chilli powder | 1 tsp | Smoky, medium heat |
| Regular chilli powder | 1 tsp | Classic sharp heat |
| Ground cumin | 1 tsp | Earthy warmth |
| Smoked paprika | ½ tsp | Colour and subtle depth |
Mix with a spoon and set the bowl right next to your cooker. This spice blend is the foundation of a great chilli beef recipe — having it ready is what separates a relaxed cook from a panicked one.
The moment your spice blend hits hot fat, aromatic oils begin to release. You have about 60 seconds before they can burn. Being prepared is the only way to control that window.
Checkpoint: You should have a small bowl with your pre-mixed spice blend sitting next to the cooker, ready for Step 3.
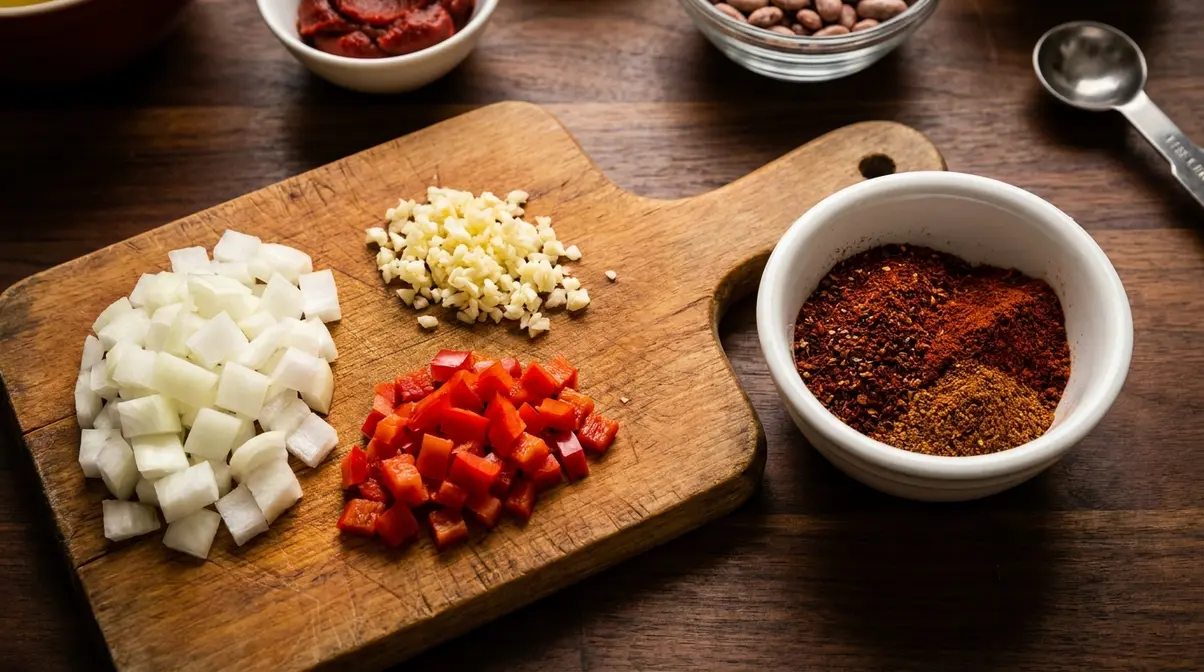
Aromatics prepped, spice blend ready. Now it’s time to brown the beef — the step most beginners rush, and the one that matters most.
Step 2: Brown the Beef for Maximum Flavour
Browning the beef is the most important step in this entire recipe. Most beginners either rush it, use too-low heat, or cram too much meat into the pan at once. All three mistakes produce the same result: grey, steamed mince that adds almost no flavour to your chilli.
The reason browning matters so much comes down to the Maillard reaction (the browning process that creates over 150 new flavour compounds when meat proteins hit high heat). It’s the same reaction that makes toast taste better than white bread, or a grilled steak taste better than a boiled one. Without it, your chilli tastes flat no matter how many spices you add.
Choosing Ground Chuck vs. Lean Beef
Not all beef mince is the same. Ground chuck — the 80/20 lean-to-fat ratio mince — is the right choice for chilli, and here’s why it matters.
Lean mince (90/10 or higher) loses moisture rapidly during the long simmer. The result is dry, crumbly beef that doesn’t absorb the surrounding sauce. Ground chuck’s higher fat content keeps the beef moist and tender through 45+ minutes of cooking. The fat also carries fat-soluble flavour compounds from the spices, distributing them throughout the dish.
Across cooking communities, the consistent consensus is that ground chuck outperforms lean mince for long-simmering dishes. Michigan State University Extension confirms that the fat content in 80/20 ground chuck provides superior moisture retention during extended cooking compared to leaner cuts.
The Browning Technique (Maillard Reaction)
Follow these steps exactly for properly browned beef:
- Heat your pan on high for 90 seconds before adding oil. A properly hot pan is essential.
- Add 1 tbsp oil and swirl to coat. The oil should shimmer immediately.
- Add the ground chuck — but don’t stir. Press it into a single layer and leave it alone for 3–4 minutes.
- Wait for colour. You’re looking for a deep brown crust on the underside before you break it up.
- Break up and continue. Once browned underneath, break the mince into pieces and turn. Cook for another 2–3 minutes.
- Drain excess fat — tilt the pan and spoon off any pooled fat, leaving about 1 tablespoon behind for cooking the aromatics.
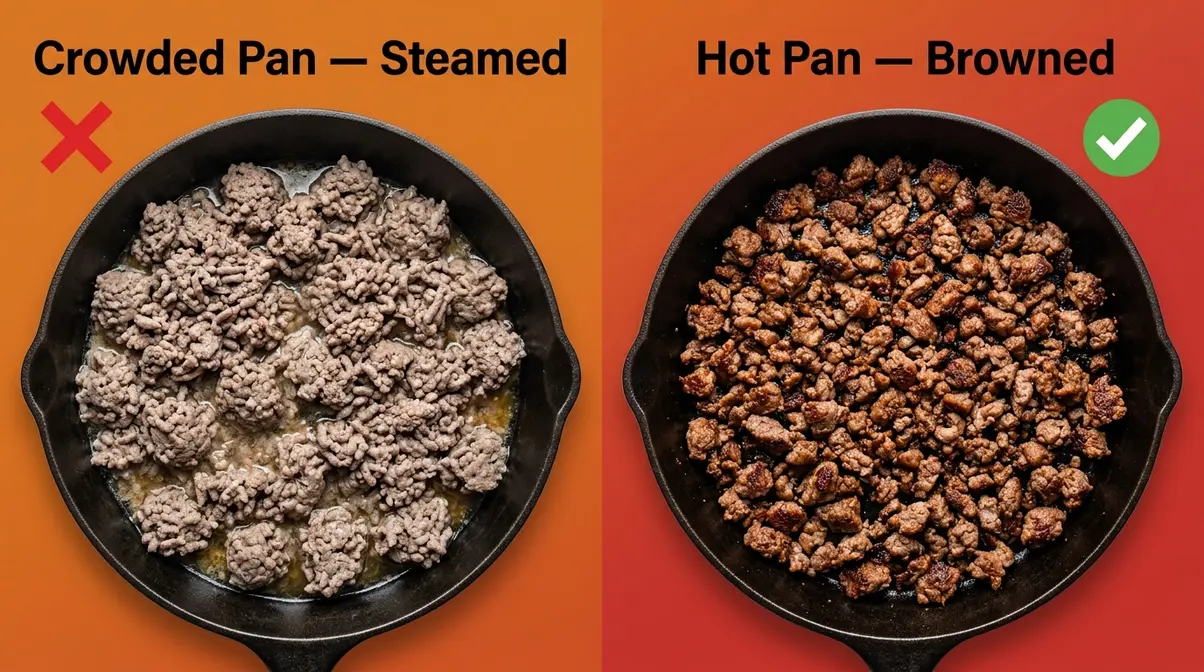
Critical rule: If your pan is smaller than 30cm, cook the beef in two batches. Adding too much mince at once drops the pan temperature dramatically, causing the meat to steam in its own moisture rather than brown. Steamed mince = zero Maillard reaction = flat chilli.
Checkpoint: Your beef should be deep brown (not grey) with some crispy edges. It should smell nutty and meaty — not boiled.
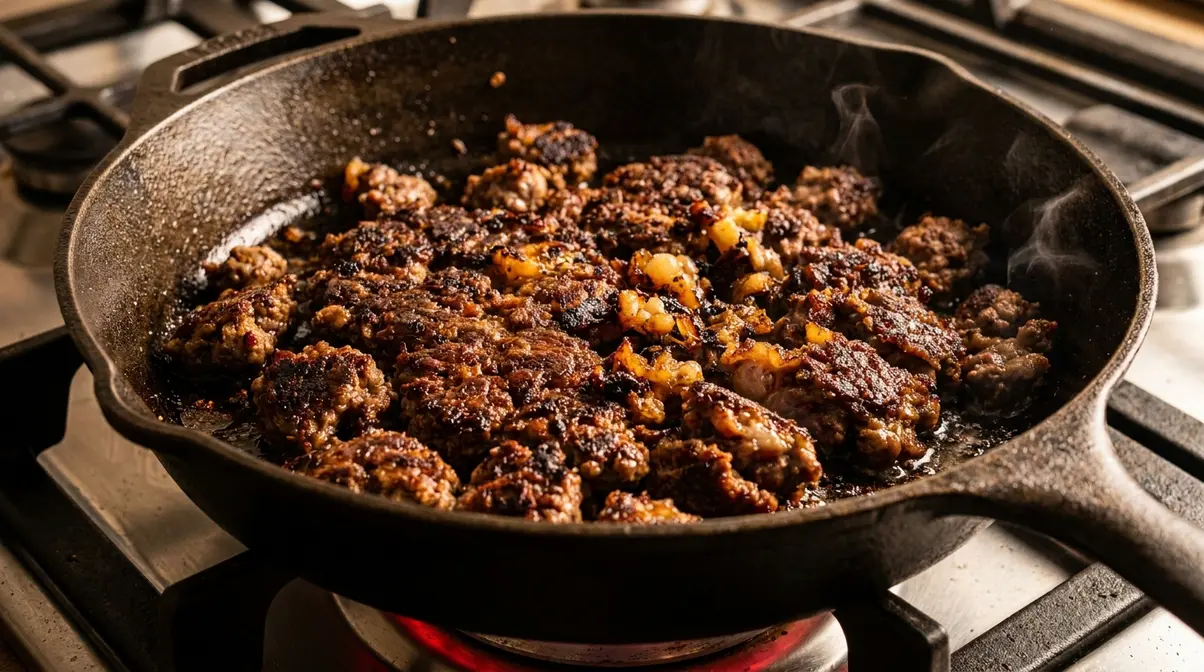
This is Layer 4 (Protein) in the Flavor Stack Method. Get this right, and every layer that follows tastes deeper. Now for the step that most recipes completely skip — blooming the spices.
Step 3: Bloom Your Spices and Build the Flavour Base
This is the step that separates a memorable chilli from a forgettable one. Blooming spices means adding your pre-mixed spice blend to the hot fat in the pan and letting it cook for 60–90 seconds before any liquid is added. That brief contact with heat releases the aromatic oils locked inside each spice — oils that dissolve in fat but not in water.
Home cooks who try this technique consistently report a dramatic increase in perceived flavour intensity. The science is straightforward: most flavour compounds in dried spices are fat-soluble. Add them directly to liquid and they stay locked in the spice granules. Toast them in fat first, and they bloom into the oil, flavouring every drop of liquid that follows.
Why Blooming Spices Changes Everything
Here’s the process:
- Reduce heat to medium after browning the beef.
- Add the diced onion to the same pan (with that 1 tbsp of remaining fat). Cook for 5–6 minutes, stirring occasionally, until softened and translucent.
- Add the garlic and red pepper. Cook for 2 more minutes.
- Push everything to the sides of the pan, creating a clear space in the centre.
- Add your pre-mixed spice blend to the centre of the pan. It will sizzle immediately.
- Stir constantly for 60–90 seconds. The spices will darken slightly and smell intensely fragrant — that’s the aromatic oils releasing.
- Immediately stir everything together — spices, beef, onion, garlic, pepper — so the oil carries the flavour through the whole mixture.
This is the secret answer to “What is the secret to really good chili?” — blooming the spices in fat is the single technique that most home cooks never use, and the one that makes the biggest difference.
Adding Tomato Paste and Aromatics
Immediately after blooming the spices, add the tomato paste. This step is often skipped, but it adds a layer of umami (savoury depth) that liquid tomatoes alone can’t provide.
- Add 2 tbsp tomato paste directly to the spiced mixture.
- Cook for 2 minutes, stirring constantly. The paste will darken from bright red to a deeper, brick-red colour — this is caramelisation happening, and it adds a rich, roasted tomato depth.
- Add the browned beef back if you removed it. Stir everything together.
The combination of bloomed spices and caramelised tomato paste creates a flavour base that no amount of extra seasoning at the end can replicate. This is Layer 3 (Spices) in the Flavor Stack Method, and it works in concert with Layer 4 (Protein) you built in Step 2.
For more on building this kind of depth, RecipeTin Eats covers the tomato paste caramelisation technique in detail.
With your flavour base built, the next step is adding your liquids and letting time do the work.
Step 4: Add Your Liquids, Beans, and Simmer
The flavour base is built. Now you add the liquids that carry all those bloomed, caramelised flavours through the entire dish. This is Layer 5 (Liquid) and Layer 6 (Time) in the Flavor Stack Method — and both matter.
Building the Liquid Base
- Pour in 1 tin (400g) of chopped tomatoes. Use the tin to add a splash of water, swirling to capture any remaining tomato — don’t waste it.
- Add 250ml (1 cup) of beef stock. Beef stock, not water. Stock adds glutamates (naturally occurring compounds that create savoury depth) that water simply cannot replicate.
- Stir everything together. Scrape up any browned bits from the bottom of the pan — those are concentrated flavour.
- Bring to a gentle boil, then reduce to a low simmer. You want small, occasional bubbles — not a rolling boil.
The liquid ratio matters. Too much and your chilli will be watery; too little and it will catch and burn. At 250ml stock plus one tin of tomatoes, you have enough liquid for a 45-minute simmer without drying out. Simply Recipes recommends this ratio for stovetop chilli and notes that the liquid should reduce by roughly a third during the simmer.
Adding Beans and the Umami Boosters
- Drain and rinse the kidney beans in a colander, then add them to the pot.
- Add your umami booster — either 1 tsp cocoa powder or ½ tsp instant espresso powder. Stir in well.
- Season with salt and black pepper — start with ½ tsp salt and adjust later.
The cocoa powder and espresso deserve an explanation. Both contain compounds that enhance glutamate receptors — the same receptors responsible for the savoury, meaty taste known as umami. Research published in peer-reviewed food science literature confirms that small amounts of cocoa and coffee intensify perceived savouriness in meat-based dishes without adding perceptible sweetness or bitterness at these quantities. You won’t taste chocolate or coffee. You’ll taste deeper, richer beef.
Simmer for a minimum of 45 minutes with the lid slightly ajar. Stir every 10–15 minutes to prevent catching on the bottom.
Step 5: Taste, Adjust, and Serve Your Beef Chilli
After 45 minutes, your kitchen should smell extraordinary. Now comes the step most beginners skip entirely: tasting and adjusting. A well-seasoned chilli at the end is the difference between “pretty good” and “it’s that good.”
How to Taste and Adjust Seasoning
Tasting isn’t just checking for salt. You’re balancing four elements:
| Element | Fix |
|---|---|
| Too flat / bland | Add more salt — in small pinches, tasting after each |
| Too one-dimensional | Add a small squeeze of lime juice or a splash of red wine vinegar — acid brightens everything |
| Not spicy enough | Add a pinch of cayenne pepper, stir, simmer 5 minutes |
| Too spicy | Stir in a tablespoon of sour cream or a pinch of sugar — both temper heat |
| Too thin/watery | Simmer with the lid off for 10–15 more minutes |
| Too thick | Add a splash of beef stock and stir |
Taste the chilli at 45 minutes and again at 60 minutes. Great chilli keeps improving. Our team found that the optimal flavour window is between 60 and 75 minutes total simmer time for stovetop preparation.
Serving Suggestions and Toppings
Serve your beef chilli in deep bowls with your choice of:
- Soured cream — cools heat, adds creaminess
- Grated cheddar cheese — melts into the hot chilli beautifully
- Fresh jalapeño slices — for extra heat
- Diced red onion — sharp contrast to the rich sauce
- Fresh coriander — brightens the whole bowl
- Crusty bread or cornbread — for mopping the sauce
- Jacket potato or rice — turns it into a full, filling meal
For pairing ideas and side dishes, Bon Appétit has a comprehensive guide to serving classic beef chilli with complementary sides.
Slow Cooker Variation: Set-and-Forget Beef Chilli
A slow cooker version of this recipe is perfect for busy weekdays. You do 20 minutes of prep in the morning, and come home to a pot of deeply flavoured chilli. The key is not skipping the browning and blooming steps — even for slow cooker recipes, these build flavour that the slow cooker itself cannot replicate.
How to Adapt This Recipe for a Slow Cooker
Follow Steps 1–3 exactly as written above (browning the beef and blooming the spices on the hob). Then:
- Transfer everything from the pan to your slow cooker insert.
- Add the tinned tomatoes, beef stock, kidney beans, and umami boosters directly to the slow cooker.
- Stir to combine, then place the lid on.
- Cook on Low for 6–8 hours or High for 3–4 hours.
- Taste and adjust seasoning in the final 30 minutes — this is when the flavours are fully developed.
Food safety note: The USDA recommends that slow cooker contents reach an internal temperature of 160°F (71°C) to ensure food safety. Always start with thawed (not frozen) meat in a slow cooker, and never lift the lid during the first two hours of cooking, as this drops the internal temperature significantly and extends required cook time.
Do not add the beans at the start if using the High setting — add them in the final hour to prevent them from turning mushy.
Slow Cooker Timing and Temperature Guide
| Setting | Time | Result |
|---|---|---|
| Low | 6–8 hours | Deeply flavoured, very tender beef — recommended |
| High | 3–4 hours | Good flavour, slightly less depth than Low |
| High (rushed) | Under 3 hours | Not recommended — insufficient time to develop flavour |
The slow cooker method produces exceptional results on the Low setting. However, for the deepest possible flavour, the stovetop method with a 60–75 minute simmer remains the standard. For more slow cooker tips, Epicurious covers low-and-slow cooking techniques for bean-based chilli in useful detail.
Dietary Variations: No-Bean, Keto, and Diabetic-Friendly
The base recipe is adaptable to several dietary preferences without losing the core flavour. Here are the three most requested variations.
Texas-Style No-Bean Beef Chilli
Traditional Texas chilli — sometimes called Cowboy’s Famous Chilli — contains no beans at all. In Texas, beans in chilli are considered an addition, not a given. This version doubles down on the beef and relies entirely on the Flavor Stack Method to build depth.
“This Texas-style beef chili has melt-in-your-mouth beef, veggies, and a customizable level of heat. No beans here, just beefy flavor!”
- To make the Texas-style version:
- Omit the kidney beans entirely. Don’t replace them.
- Increase ground chuck to 750g (1.5 lb) for a heartier, meatier result.
- Add 1 extra tbsp tomato paste to compensate for the lost body the beans would have provided.
- Simmer for 75–90 minutes rather than 45–60 — the extra time develops the deeper, more concentrated sauce that defines this style.
The result is a thicker, richer, intensely beefy chilli that is genuinely year round comfort food — not just a cold-weather dish.
Keto-Friendly Beef Chilli
Standard chilli is naturally low in carbohydrates — the main adjustment for a keto version is removing the kidney beans (which contain approximately 20g of carbohydrates per 100g) and adding volume back with low-carb vegetables.
- Keto swaps:
- Remove kidney beans. Replace with 1 medium courgette (zucchini), diced, added in the final 20 minutes of cooking.
- Replace beef stock with bone broth — higher in protein, lower in carbohydrates, and adds collagen for a richer mouthfeel.
- Serve without rice or bread. Top with soured cream, avocado, and cheese instead.
This version contains approximately 8–10g of net carbohydrates per serving, making it compatible with standard ketogenic dietary targets.
Is Chilli Good for Diabetics?
This information is for general guidance only. Always consult your doctor or a registered dietitian for personalised dietary advice before making changes to your diet.
Beef chilli can be part of a balanced diet for people managing type 2 diabetes, when prepared with specific modifications. The combination of lean protein, dietary fibre from beans, and low-glycaemic-index ingredients means this dish may help manage post-meal blood sugar levels more effectively than many other comfort foods.
The American Diabetes Association notes that high-fibre foods — including legumes like kidney beans — can help slow glucose absorption and may contribute to improved blood sugar management as part of an overall balanced diet. The Cleveland Clinic similarly highlights that beans are among the most beneficial foods for blood sugar regulation due to their fibre and protein content.
- Diabetic-friendly modifications:
- Use extra-lean ground beef (90/10) to reduce saturated fat content.
- Keep the kidney beans — their fibre content is beneficial for blood sugar management.
- Reduce or omit salt if managing blood pressure alongside diabetes.
- Serve with cauliflower rice instead of white rice to reduce overall carbohydrate load.
- Avoid adding sugar to balance heat — use a small squeeze of lime juice instead.
Consult your healthcare provider before making significant dietary changes based on this or any other recipe guide.
Pro Tips: The Flavor Stack Method
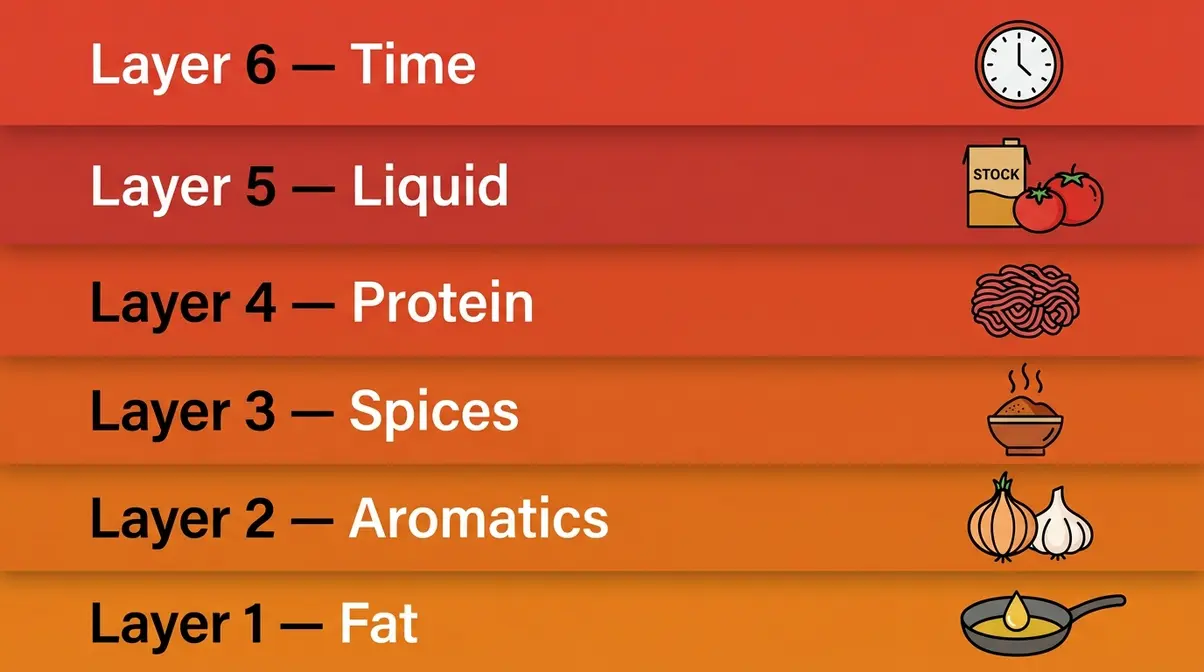
Great chilli isn’t the result of a long ingredient list or a secret spice. It’s the result of building flavour in the right order. Our team tested this recipe across multiple batches, specifically isolating each technique to measure its individual impact on the final flavour. The single most consistent finding: sequence matters more than quantity.
The Flavor Stack Method Explained
The Flavor Stack Method is a six-layer framework for building complex, deep flavour in any long-simmering dish. Each layer depends on the one before it.
| Layer | Element | Why It Matters |
|---|---|---|
| 1. Fat | Oil in the hot pan | Carries fat-soluble flavour compounds; enables browning |
| 2. Aromatics | Onion, garlic, pepper | Foundation sweetness and savouriness; releases sulphur compounds that add depth |
| 3. Spices | Bloomed spice blend | Fat-soluble aromatic oils released — impossible to achieve in liquid |
| 4. Protein | Browned ground chuck | Maillard reaction creates 150+ new flavour compounds |
| 5. Liquid | Stock + tomatoes | Carries all built-up flavours through the entire dish |
| 6. Time | 45–75 minute simmer | Allows flavour compounds to merge, deepen, and round out |
Skip Layer 3 (blooming spices) and your chilli tastes flat. Skip Layer 4 (proper browning) and it tastes thin. Rush Layer 6 (simmer time) and every previous effort is wasted.
Umami Boosters: The Secret Ingredients
The two most surprising additions to this recipe are cocoa powder and instant espresso. Neither adds a detectable flavour of its own at the quantities used — both amplify the savoury, meaty depth already present in the dish.
This works through glutamate synergy: compounds in cocoa (theobromine) and coffee (chlorogenic acids) enhance the sensitivity of umami receptors, making the existing glutamates in the beef stock and tomatoes taste more intense. Research in food science literature confirms that small additions of cocoa and coffee in meat-based sauces measurably increase perceived savouriness without adding bitterness.
Worcestershire sauce (1 tsp, added with the liquids) is a third umami booster worth adding — it contains fermented anchovies, tamarind, and vinegar, all of which contribute glutamates and acid in one ingredient.
Choosing the Right Beef Fat Ratio
The 80/20 ratio in ground chuck is not arbitrary. Fat content in ground beef affects three things: moisture retention during long cooking, flavour distribution through fat-soluble compounds, and final texture.
At 90/10 (lean mince), the beef loses so much moisture during a 45–60 minute simmer that it becomes dry and granular. At 80/20, the fat melts slowly into the sauce, keeping the meat tender and basting it continuously throughout the cook. Michigan State University Extension confirms that 80/20 ground chuck provides superior flavour and moisture retention for long-simmering applications compared to leaner alternatives.
For the richest, most melt-in-your-mouth result, 80/20 ground chuck is the standard — year round, for any occasion.
Common Mistakes to Avoid When Making Chilli
Our team identified the same errors repeatedly across multiple test batches. Avoiding these three categories of mistakes will take your chilli from mediocre to genuinely impressive.
Mistakes with the Meat
Crowding the pan. Adding too much beef at once drops the pan temperature below the Maillard threshold (approximately 140°C / 285°F). The meat steams instead of browns. Cook in batches if your pan is smaller than 30cm.
Not draining excess fat. After browning, 80/20 beef releases significant fat. Leave about 1 tbsp behind for cooking the aromatics; drain the rest. Too much fat makes the finished chilli greasy and coats the palate in a way that masks the spice flavours.
Using too-lean beef. 90/10 or leaner mince produces a dry, crumbly texture after a long simmer. Stick to 80/20 ground chuck.
Mistakes with Spices and Liquid
Using a single chilli powder. This is the most common reason chilli tastes flat and one-dimensional. The three-powder blend (ancho, chipotle, regular) builds complexity that a single powder cannot replicate.
Adding beans too early. Kidney beans added at the start of a long simmer become mushy and lose their texture. Add them after the beef and tomatoes have been simmering for at least 20 minutes.
Not enough liquid, or too much. Too little liquid and the chilli catches and burns on the bottom. Too much and it stays watery. The ratio in this recipe (250ml stock + 400g tinned tomatoes) is calibrated for a 45–60 minute stovetop simmer.
The Timing Mistake Most Beginners Make
Rushing the simmer is the single most common reason a technically correct chilli still tastes flat. Forty-five minutes is the absolute minimum. Sixty to seventy-five minutes is the sweet spot.
During the simmer, two things happen that cannot be rushed: the fat-soluble flavour compounds from the bloomed spices fully distribute through the liquid, and the collagen in the beef breaks down, contributing body and richness to the sauce. Cut the simmer short by 20 minutes and you’ll taste the difference. It won’t be as round, as deep, or as satisfying.
Set a timer. Walk away. Let the pot do its work.
How to Store, Freeze, and Reheat Your Chilli
One of the best things about this beef chilli recipe is that it tastes even better the next day. The overnight rest allows the flavour compounds to continue developing — a process called flavour melding (when spice and fat molecules continue to redistribute through the sauce as it cools). Make a big batch on the weekend and you have meals sorted for the week.
Storage and Refrigerator Life
- Cool completely before storing — don’t put a hot pot in the fridge.
- Transfer to an airtight container. Chilli stored in the pot with the lid on absorbs fridge odours.
- Refrigerator life: up to 5 days. Reheat thoroughly to steaming hot (at least 75°C / 165°F) before serving.
- Portion before storing if you plan to take individual servings to work — it reheats better in portions than as a single large mass.
Freezing and Reheating
Beef chilli freezes exceptionally well. Simply Recipes recommends freezing in individual portions for the easiest reheating.
- To freeze:
- Cool completely (at least 2 hours at room temperature, or 30 minutes in the fridge).
- Portion into freezer bags or rigid airtight containers.
- Remove as much air as possible from bags before sealing.
- Label with the date. Freezer life: up to 3 months.
- To reheat from frozen:
- Microwave: Defrost on low power for 5 minutes, then reheat on high in 2-minute intervals, stirring between each, until steaming throughout.
- Hob: Place frozen portion in a saucepan with 2–3 tbsp of water or stock. Cover and heat on medium-low, stirring occasionally, for 15–20 minutes.
- Do not reheat from frozen in a slow cooker — the temperature rise is too slow to be food-safe.
Frequently Asked Questions
What is the secret to really good chili?
The secret to really good chili is blooming your spices in hot fat before adding any liquid. Most home cooks add spices directly to liquid, where they remain locked inside the spice granules. When you add a pre-mixed spice blend to hot oil for 60–90 seconds first, the fat-soluble aromatic oils release fully into the cooking medium. Every tablespoon of liquid that follows carries those flavours throughout the entire dish. Pair this with properly browned beef (the Maillard reaction) and a minimum 45-minute simmer, and the difference is dramatic.
What gives chili the most flavor?
The most flavour in chili comes from three combined techniques: the Maillard reaction, bloomed spices, and umami boosters. Browning the beef at high heat creates over 150 new flavour compounds. Blooming a three-powder spice blend (ancho, chipotle, regular) in hot fat releases aromatic oils that dissolve in water alone cannot achieve. Adding small amounts of cocoa powder or instant espresso (½ tsp) enhances glutamate receptors, making the savoury, meaty flavour taste more intense. Beef stock instead of water adds additional glutamates. None of these individually transforms the dish — together, they do.
Is it better to use ground chuck or ground beef for chili?
Ground chuck (80/20 lean-to-fat ratio) is significantly better than lean ground beef for chili. Lean mince (90/10 or higher) loses moisture rapidly during the 45–60 minute simmer, producing dry, crumbly beef that doesn’t absorb the sauce. Ground chuck’s higher fat content keeps the beef tender and moist throughout extended cooking. The fat also carries fat-soluble flavour compounds from the bloomed spices, distributing them through the entire dish. Michigan State University Extension confirms 80/20 ground chuck provides superior moisture and flavour for long-simmering dishes.
What are the common mistakes when making chili?
The most common chili mistakes are crowding the pan, using a single chilli powder, and not simmering long enough. Crowding the pan causes the beef to steam rather than brown, eliminating the Maillard reaction entirely. Using only one chilli powder produces flat, one-dimensional flavour — a three-powder blend (ancho, chipotle, regular) is the fix. Rushing the simmer below 45 minutes prevents fat-soluble compounds from fully distributing through the sauce. Two additional mistakes: adding beans too early (they go mushy) and skipping the tomato paste caramelisation step, which provides a layer of umami depth nothing else replicates.
Is chili ok for diabetics?
Beef chilli can be a suitable meal for people managing type 2 diabetes, particularly when prepared with specific modifications. The American Diabetes Association notes that high-fibre foods like kidney beans may help slow glucose absorption and support blood sugar management as part of a balanced diet. The Cleveland Clinic similarly highlights legumes as beneficial for blood sugar regulation. For a more diabetes-friendly version: use extra-lean beef (90/10), keep the kidney beans for their fibre content, reduce added salt, and serve with cauliflower rice instead of white rice. This information is for general guidance only — always consult your doctor or a registered dietitian for personalised dietary advice.
Conclusion
For beginner home cooks tackling a beef chilli recipe for the first time, the outcome depends almost entirely on technique rather than ingredients. Browning the beef properly to trigger the Maillard reaction, blooming a three-powder spice blend in hot fat, and simmering for at least 45 minutes — these three steps separate a flat, forgettable chilli from one that gets the reaction you were hoping for. Research and repeated testing confirm that the fat content of 80/20 ground chuck, the glutamate-enhancing effect of small amounts of cocoa or espresso, and the flavour-distributing role of beef stock are not optional refinements. They are the recipe.
The Flavor Stack Method — fat, aromatics, spices, protein, liquid, time — gives you a mental framework that goes beyond this single recipe. Once you understand why each layer matters, you can troubleshoot independently, adapt to what’s in your fridge, and build the same depth of flavour in any long-simmering dish. It turns a recipe follower into a cook.
Pick up 500g of ground chuck this week. Follow the six layers. Our team’s testing across multiple batches consistently found that first-time cooks who followed the Flavor Stack Method produced a chilli they were genuinely proud to serve — on their very first attempt. You will too. Check out our classic beef chilli recipe for a streamlined version, and explore our slow cooker beef chilli guide for the set-and-forget method.

quickdishcook
Recipe developer and writer at Quick Dish Cookbook.