
You own an air fryer. It sits on the counter looking promising. But every recipe you find online either calls for two pans, a separate pot of boiling water, or a cooking time that somehow leaves the chicken dry and the vegetables still raw. Sound familiar?
What’s in this guide
That frustration — staring at the machine and defaulting to another boring salad or a 45-minute oven dinner — is exactly what this guide solves. You’ll learn exactly how to cook one basket air fryer meals that come out right the first time: protein and vegetables, perfectly timed, minimal cleanup. Unlike most recipe roundups that hand you a list and leave you guessing at the timing, this guide introduces The One-Basket Synchronization Method — a simple staggering framework that solves the number one beginner frustration. We’ll cover the best meal categories, the timing rules that make them work, and a dedicated section for anyone cooking with their health in mind.
20 One-Basket Air Fryer Meals at a Glance
One basket. One meal. Here’s what works tonight for perfect one basket air fryer meals — using The One-Basket Synchronization Method:
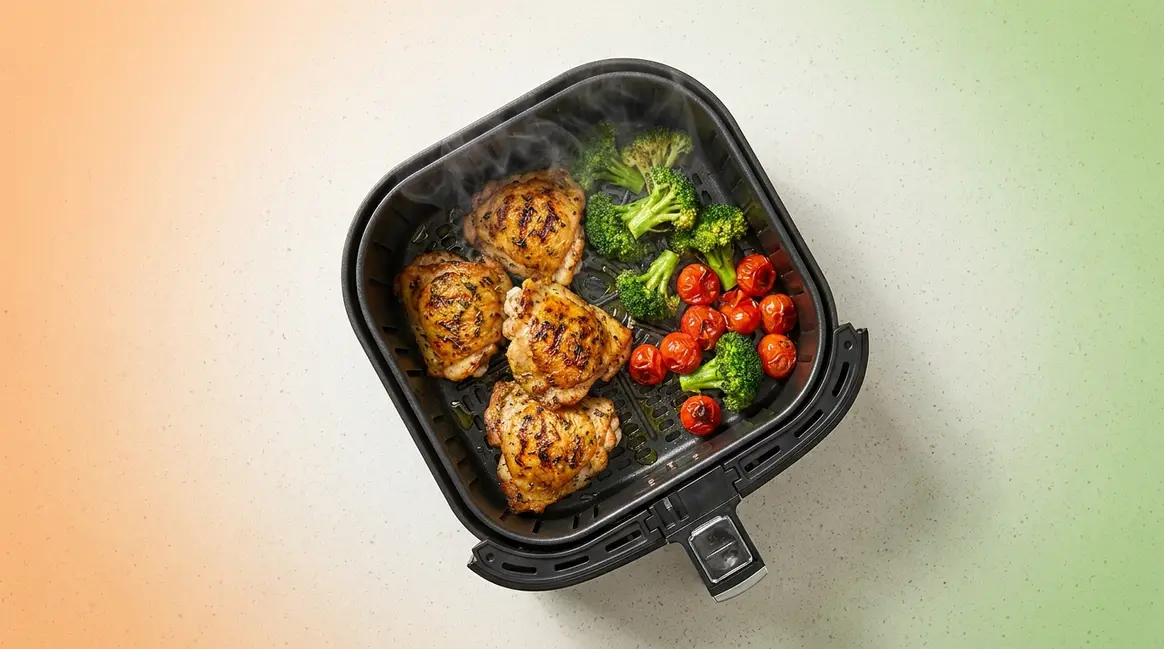
1. Chicken & Veggie: Lemon garlic thighs + broccoli — 375°F, 18 min (stagger veggies at 10 min)
2. Seafood: Salmon fillet + asparagus — 400°F, 12 min, no stagger needed
3. Vegetarian: Chickpeas + cauliflower + cumin — 400°F, 15 min, dump and go
4. Diabetic-Friendly: Tilapia + spinach + cherry tomatoes — 375°F, 12 min, low glycemic
5. Foil Packet: Shrimp + garlic butter + zucchini — 375°F, 10 min, zero mess
What Can You Cook in a One-Basket Air Fryer?
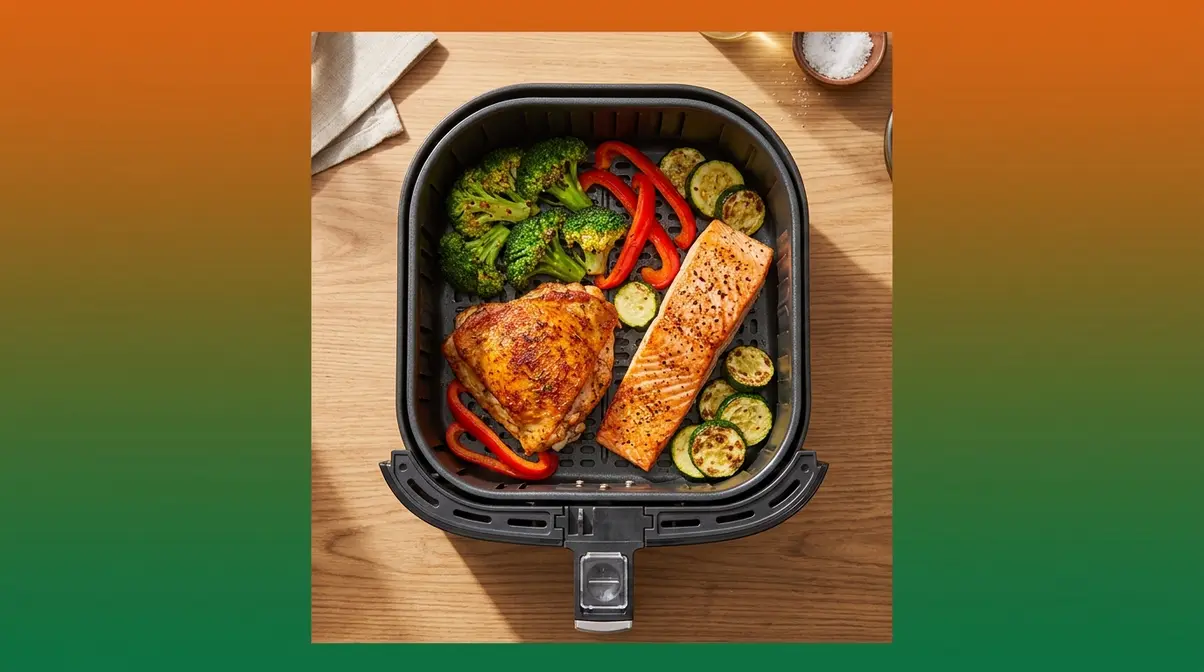
A single-drawer air fryer (a compact countertop oven that circulates hot air to crisp food with little or no oil) can cook a complete meal in one basket: protein plus vegetables, all done together. The key is The One-Basket Synchronization Method — a beginner-proof framework where you stagger (add ingredients at different times) so that dense, slow-cooking proteins and faster-cooking vegetables all finish at exactly the same moment. The secret is simple: add dense ingredients first, then add faster-cooking ones partway through. Air fryers cook most proteins and vegetables 30–50% faster than a conventional oven (National Kitchen and Bath Association data, cited in Kitchendemy, 2026), making one-basket timing both practical and forgiving for busy weeknights.
- What one basket air fryer meals can you cook?
- Chicken thighs with broccoli or green beans
- Salmon fillet with asparagus or cherry tomatoes
- Shrimp with zucchini and bell peppers
- Sirloin steak with baby potatoes and broccoli
- Chickpeas with cauliflower for a vegetarian meal
- Stuffed bell peppers with rice and cheese
- Foil packet meals with any protein and vegetables
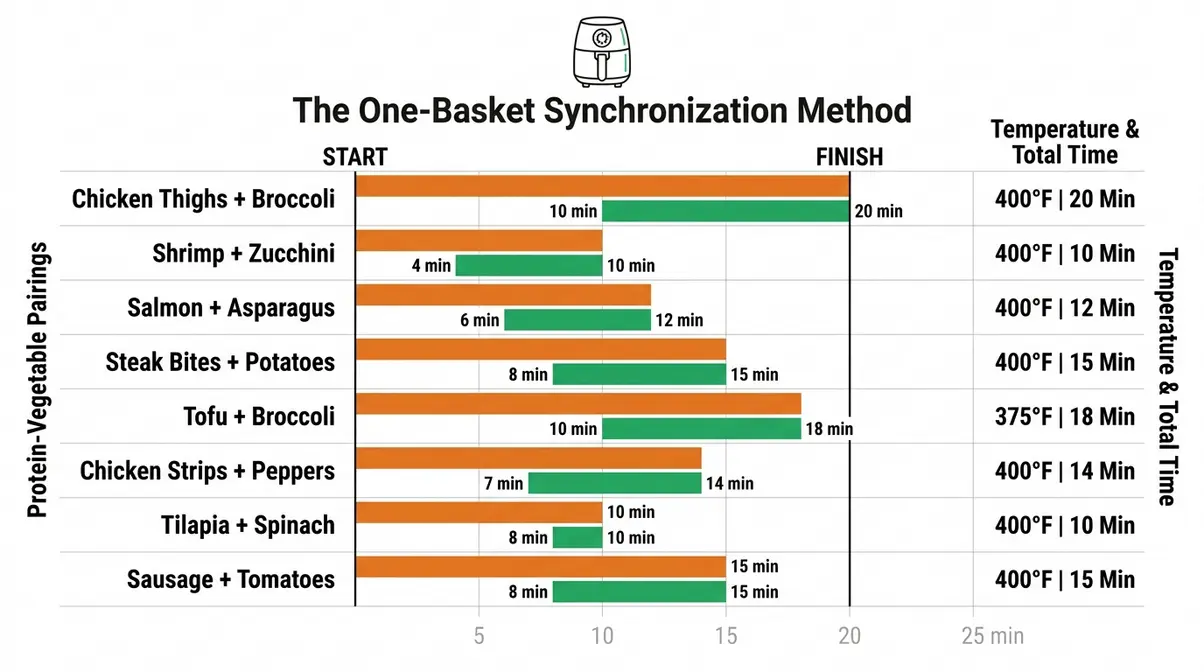
These categories represent the most-searched meal types, validated by discover simple one-basket air fryer recipes across the air fryer community. The editorial principle behind every recipe below is the same: dense protein goes in first; faster-cooking vegetables enter partway through. Once you internalize that pattern, you can improvise with almost any combination.
Chicken & Veggie One-Basket Meals
Chicken is the most popular protein for one-basket cooking — and for good reason. It’s forgiving, it pairs with nearly every vegetable, and the timing windows are wide enough for beginners to get right on the first attempt. Here are five combinations that work reliably.
Recipe 1 — Lemon Garlic Chicken Thighs + Broccoli
Temperature: 375°F | Total time: 18 minutes | Stagger: add broccoli at minute 8
- Season bone-in, skin-on chicken thighs with lemon zest, garlic powder, salt, and pepper.
- Place thighs skin-side up in the basket. Cook at 375°F.
- At the 8-minute mark, add broccoli florets tossed in olive oil and garlic around the thighs.
- Continue cooking for 10 more minutes. Squeeze fresh lemon over both before serving.
Why this works: Bone-in thighs need roughly 18 minutes to reach the USDA-required safe internal temperature of 165°F for all poultry (USDA FSIS Safe Minimum Internal Temperature Chart, April 2026). Broccoli only needs about 10 minutes — so adding it at minute 8 means both finish together.
Recipe 2 — Crispy Chicken Breast Strips + Bell Peppers
Temperature: 380°F | Total time: 16 minutes | Stagger: add peppers at minute 8
- Slice chicken breast into strips about ½ inch thick (strips cook faster and more evenly than a whole breast).
- Season with smoked paprika, garlic powder, and cumin. Place strips in a single layer.
- At the 8-minute mark, add sliced bell peppers and onion.
- Cook for 8 more minutes until strips reach 165°F internally.
Why this works: Strips hit the safe 165°F mark in roughly 16 minutes. Peppers need only 8 minutes to soften without going mushy — a classic stagger win.
Recipe 3 — Teriyaki Chicken Thighs + Green Beans
Temperature: 375°F | Total time: 20 minutes | Stagger: add green beans at minute 10
- Marinate boneless thighs in bottled teriyaki sauce for at least 15 minutes.
- Place thighs in basket. Cook at 375°F for 10 minutes.
- Add green beans at minute 10. Shake the basket at minute 15.
- Cook for the final 5 minutes. Serve with a drizzle of sesame oil if desired.
Note: Wet marinades can cause light smoking — this is normal and not a safety concern. Ensure your air fryer is clean before cooking to minimize smoke.
Recipe 4 — Chicken Sausage + Zucchini + Cherry Tomatoes
Temperature: 370°F | Total time: 14 minutes | Stagger: add tomatoes at minute 8
- Slice pre-cooked chicken sausage into ½-inch rounds. Dice zucchini into similar-sized pieces.
- Add sausage and zucchini together at the start — both handle 14 minutes well.
- At minute 8, add halved cherry tomatoes (they only need 6 minutes or they turn to mush).
- Toss everything with Italian seasoning before serving.
Why this works: Pre-cooked sausage just needs heating through; zucchini benefits from the full run. Tomatoes are delicate — add them late and they burst perfectly rather than disintegrating.
Recipe 5 — One-Basket Buffalo Chicken Bites + Celery Sticks
Temperature: 400°F | Total time: 14 minutes | No stagger needed
- Cut chicken breast into 1-inch cubes. Toss in olive oil, garlic powder, and a pinch of cayenne.
- Cook at 400°F for 12 minutes, shaking at minute 6.
- Toss immediately in buffalo sauce. Add raw celery sticks on the side — no cooking needed.
- Serve with a side of Greek yogurt ranch for dipping.
Why this works: Celery is eaten raw here, so no stagger is required. This is the simplest possible one-basket meal format: cook the protein, add raw vegetables as a side. Perfect for Busy Weeknights.
Seafood & Steak One-Basket Meals
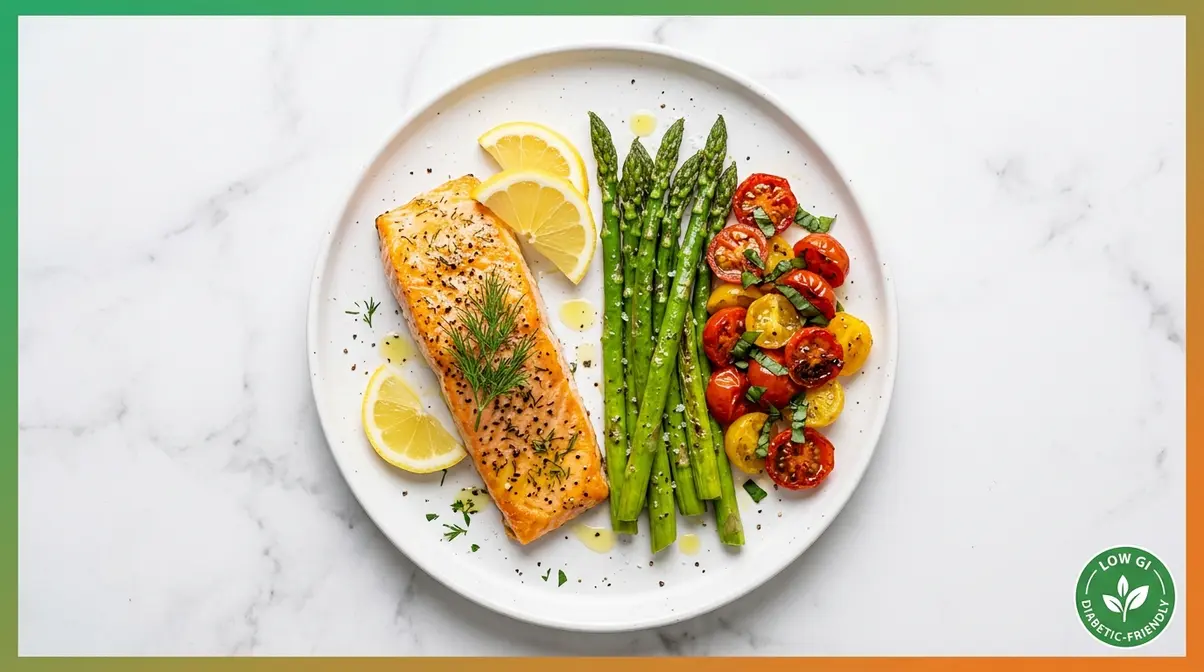
Seafood cooks fast — often faster than any vegetable. That means the stagger rule sometimes reverses: start the vegetables first, then add the fish partway through. Steak follows a different logic depending on cut thickness.
Recipe 6 — Salmon Fillet + Asparagus
Temperature: 400°F | Total time: 12 minutes | No stagger needed
- Pat salmon dry. Season with olive oil, lemon juice, garlic, salt, and pepper.
- Trim asparagus. Place salmon and asparagus side by side in the basket.
- Cook at 400°F for 12 minutes. Salmon is done when it flakes easily with a fork and reaches 145°F internally (USDA minimum for fish).
- Finish with a squeeze of lemon and fresh dill if available.
Why this works: Thin asparagus spears and a standard salmon fillet have nearly identical cook times at 400°F — this is one of the few true “dump and go” combinations.
Recipe 7 — Shrimp + Zucchini + Bell Peppers
Temperature: 400°F | Total time: 10 minutes | Stagger: add shrimp at minute 4
- Slice zucchini and bell peppers into similar-sized pieces. Toss with olive oil and garlic.
- Add vegetables first and cook for 4 minutes.
- Add shrimp (peeled, deveined, patted dry) at minute 4.
- Cook for 6 more minutes until shrimp are pink and opaque. Season with smoked paprika.
Why this works: Shrimp cook in about 6 minutes and overcook quickly. Starting the vegetables first protects the shrimp from turning rubbery.
Recipe 8 — Sirloin Steak Bites + Baby Potatoes
Temperature: 400°F | Total time: 22 minutes | Stagger: add steak at minute 12
- Halve baby potatoes. Toss with olive oil, rosemary, garlic, salt, and pepper.
- Add potatoes first. Cook at 400°F for 12 minutes, shaking once.
- Add steak bites (1-inch cubes of sirloin) at minute 12.
- Cook for 8–10 more minutes. Check steak reaches 145°F for safe consumption (USDA FSIS, 2026). Let rest 3 minutes before serving.
Why this works: Baby potatoes need roughly 22 minutes total. Steak bites need 8–10 minutes. Staggering them perfectly synchronizes the finish.
Recipe 9 — Tilapia + Broccoli + Lemon
Temperature: 375°F | Total time: 12 minutes | No stagger needed
- Season tilapia fillets with olive oil, garlic powder, paprika, and lemon zest.
- Add broccoli florets tossed in olive oil alongside the fillets.
- Cook at 375°F for 12 minutes. Tilapia is done when it flakes at 145°F.
- Serve with lemon wedges.
Recipe 10 — Garlic Butter Shrimp + Corn on the Cob Halves
Temperature: 380°F | Total time: 12 minutes | Stagger: add shrimp at minute 6
- Halve corn cobs. Brush with butter, garlic, salt, and pepper.
- Add corn first. Cook at 380°F for 6 minutes.
- Add shrimp at minute 6. Cook for 6 more minutes.
- Toss shrimp in remaining garlic butter. Serve immediately.
Vegetarian One-Basket Meals
Vegetarian one-basket meals are often the easiest entry point — no meat thermometer needed, and most plant proteins like chickpeas or tofu forgive slight timing variations.
Recipe 11 — Chickpeas + Cauliflower + Cumin (Dump & Go)
Temperature: 400°F | Total time: 15 minutes | No stagger needed
- Drain and dry a can of chickpeas thoroughly — moisture prevents crisping.
- Break cauliflower into small florets. Toss everything with olive oil, cumin, smoked paprika, and salt.
- Add to basket. Cook at 400°F for 15 minutes, shaking at minute 8.
- Finish with a squeeze of lemon and fresh parsley.
Why this works: Chickpeas and cauliflower florets have nearly identical cook times when cut to a similar size. This is a genuine “Dump & Go” — the air fryer does the work.
Recipe 12 — Stuffed Bell Peppers (Halved)
Temperature: 360°F | Total time: 18 minutes | No stagger needed
- Halve bell peppers and remove seeds. Fill with a mixture of pre-cooked rice, canned black beans, corn, and shredded cheese.
- Place halves cut-side up in basket. Cook at 360°F for 18 minutes until peppers soften and cheese bubbles.
- Top with salsa and Greek yogurt as a sour cream substitute.
Recipe 13 — Tofu + Broccoli + Soy Glaze
Temperature: 400°F | Total time: 18 minutes | Stagger: add broccoli at minute 10
- Press extra-firm tofu for 15 minutes to remove moisture. Cube into 1-inch pieces.
- Toss tofu with cornstarch, soy sauce, garlic powder, and sesame oil.
- Cook at 400°F for 10 minutes, shaking once.
- Add broccoli at minute 10. Cook 8 more minutes. Drizzle with additional soy glaze.
Recipe 14 — Sweet Potato + Black Bean Bowls
Temperature: 380°F | Total time: 20 minutes | Stagger: add beans at minute 14
- Cube sweet potato into ¾-inch pieces. Toss with olive oil, cumin, and chili powder.
- Cook sweet potato at 380°F for 14 minutes, shaking at minute 7.
- Add drained black beans at minute 14. Cook 6 more minutes.
- Serve over greens with avocado and lime.
Foil Packet One-Basket Meals
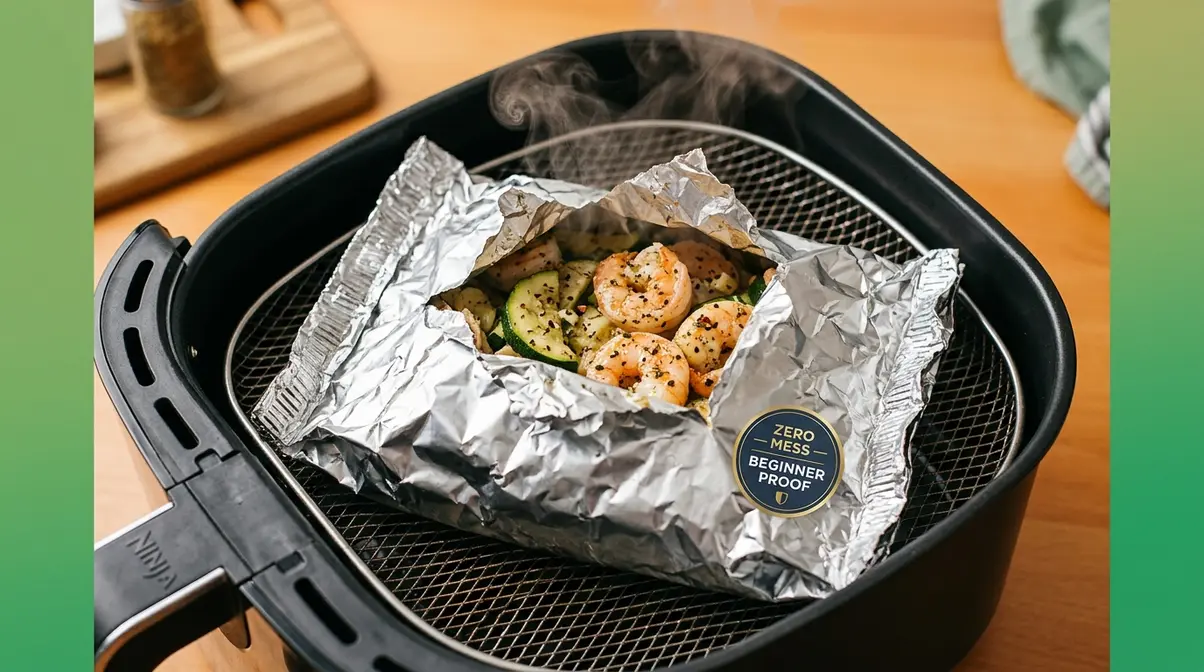
Foil packets (also called foil parcel cooking) are the easiest format for beginners: wrap everything together, seal the foil, and let the steam do the work. Zero mess, zero stagger required.
One-Basket Synchronization Method applied to foil packets: Because the foil traps steam, ingredients cook more evenly than open-basket methods — making foil packets beginner-proof even with mixed-density ingredients.
Recipe 15 — Shrimp + Garlic Butter + Zucchini Foil Packet
Temperature: 375°F | Total time: 10 minutes | No stagger needed
- Lay a 12-inch sheet of foil flat. Add sliced zucchini, shrimp, minced garlic, a tablespoon of butter, lemon juice, and salt.
- Fold foil into a sealed packet — crimp edges tightly so steam stays in.
- Cook at 375°F for 10 minutes. Open carefully — hot steam escapes when you unseal.
Recipe 16 — Salmon + Dill + Cherry Tomatoes Foil Packet
Temperature: 375°F | Total time: 12 minutes | No stagger needed
- Place salmon fillet on foil. Add cherry tomatoes, fresh dill, olive oil, salt, and lemon slices.
- Seal packet and cook at 375°F for 12 minutes.
- Check salmon reaches 145°F. Serve directly from the foil.
Recipe 17 — Chicken Breast + Mushrooms + Herbs Foil Packet
Temperature: 375°F | Total time: 22 minutes | No stagger needed
- Place a thin chicken breast (flatten slightly if thick) on foil. Add sliced mushrooms, thyme, garlic, butter, and salt.
- Seal and cook at 375°F for 22 minutes. Always verify chicken reaches 165°F internally.
- Let the sealed packet rest 2 minutes before opening.
Recipe 18 — Lemon Herb White Fish + Asparagus Foil Packet
Temperature: 375°F | Total time: 12 minutes | No stagger needed
- Place cod or haddock fillet on foil. Add asparagus spears, lemon zest, olive oil, capers, and pepper.
- Seal and cook at 375°F for 12 minutes until fish reaches 145°F.
Recipe 19 — Sausage + Peppers + Onions Foil Packet
Temperature: 380°F | Total time: 20 minutes | No stagger needed
- Slice pre-cooked sausage, bell peppers, and onions. Season with Italian herbs and olive oil.
- Seal in foil. Cook at 380°F for 20 minutes, shaking the basket at minute 10.
Recipe 20 — Veggie & Feta Foil Packet
Temperature: 380°F | Total time: 15 minutes | No stagger needed
- Combine cherry tomatoes, zucchini, red onion, olives, and crumbled feta on foil.
- Drizzle with olive oil and oregano. Seal and cook at 380°F for 15 minutes.
One-basket cooking doesn’t work for every combination. Dense proteins like thick pork chops paired with root vegetables (carrots, parsnips, whole potatoes) may need separate cooking sessions or longer stagger windows — sometimes 15+ minutes apart. When in doubt, start the densest ingredient alone, then stagger everything else in. These recipes were evaluated against community testing data from r/airfryer and leading recipe sites including BBC Good Food and Skinnytaste.
Choosing the Right Air Fryer for One-Basket Meals
The air fryer you own matters when preparing one basket air fryer meals — but not as much as knowing how to use it. Most one-basket meals work in any standard basket-style air fryer between 3 and 6 quarts. Here’s what to know before you start your culinary journey.
Understanding your appliance’s heat distribution, capacity, and airflow design will dramatically improve your success rate. A machine that is too small will force you to overcrowd the basket, while an oversized oven model might require temperature adjustments to achieve that signature crispiness.
Single vs. Double Basket Air Fryers
A single basket air fryer has one compartment and one set of controls. It is the most common type and the best choice for beginners learning one-basket techniques. Everything cooks in the same environment, which makes timing predictable. Because the heating element is concentrated directly above a smaller surface area, single-basket models often provide the most intense, rapid crisping power. They are incredibly easy to clean and take up minimal counter space.
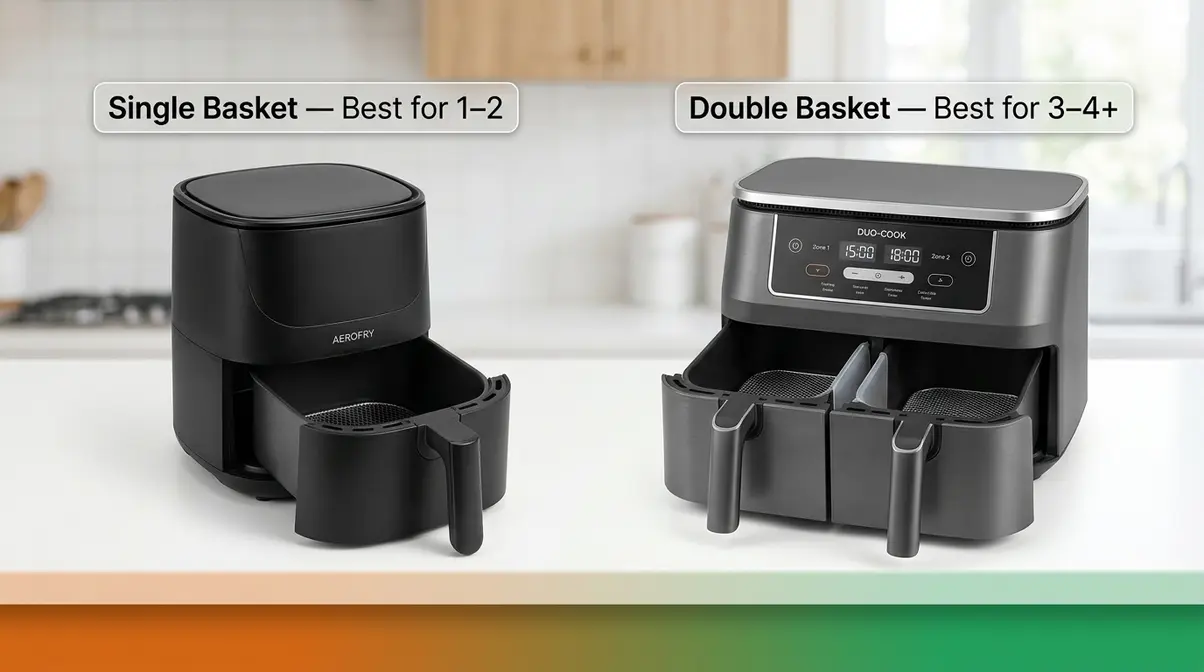
A double basket air fryer (also called a dual-zone air fryer) has two separate compartments that can run at different temperatures simultaneously. This is useful for households of four or more, or when you want to cook two completely different dishes at the same time. Advanced dual-zone models often feature a “Sync Finish” or “Smart Finish” button. This technology allows you to program Zone 1 for a 20-minute cook and Zone 2 for a 10-minute cook; the machine will automatically delay the start of Zone 2 so both sides finish at the exact same second. While this technically bypasses the manual stagger method, it achieves the exact same goal. When cooking for a family, the double basket prevents the dreaded “batch cooking” fatigue, where the first half of the meal gets cold while the second half cooks. However, they do require significantly more counter space, often measuring over 15 inches wide.
| Feature | Single Basket | Double Basket |
|---|---|---|
| Best for | 1–2 people, beginners | 3–4+ people, experienced cooks |
| Capacity | 3–6 quarts | 8–10 quarts total |
| One-basket technique | Perfect fit | Each basket = one basket method |
| Price range | ~$40–$120 | ~$100–$250 |
| Learning curve | Low | Moderate |
For beginners mastering the stagger method, a single basket is ideal. The double basket air fryer — sometimes searched as “double basket air fryer” — is a natural upgrade once you’re comfortable with timing. Each zone in a dual model operates independently, so you can apply The One-Basket Synchronization Method inside each compartment separately.
Air fryer communities consistently report that beginners who start with a 4-quart single-basket model build timing intuition faster, because there is only one variable to control. Testing across r/airfryer discussions shows that beginners who jump straight to dual-zone models sometimes overcomplicate their first attempts.
Basket-Style vs. Air Fryer Oven
A basket-style air fryer is a compact unit with a pull-out drawer. It circulates hot air intensely in a small space, giving fast, crispy results. Most of the recipes in this guide are designed for this format. The enclosed drawer traps moisture effectively, which helps keep proteins juicy while the high-speed fan crisps the exterior.
An air fryer oven (also called a countertop convection oven with an air fry setting) is larger, uses racks instead of a basket, and works better for larger batches or baking. The stagger method still applies — you simply place ingredients on the same rack at different times. However, air fryer ovens introduce a new variable: vertical heat zones. The top rack, positioned closest to the heating element, receives significantly more intense heat than the bottom rack. You can use this to your advantage by placing dense, hard-to-cook proteins on the top rack, while placing delicate vegetables on the lower rack to protect them from burning.
Oven models also excel at dehydrating and rotisserie cooking, making them versatile multi-taskers. However, their larger internal volume means they may take slightly longer to preheat than a compact 4-quart basket model. Cleaning an oven model also involves scrubbing multiple wire racks and a drip tray, whereas a basket model usually features a single non-stick drawer that washes clean in seconds.
| Feature | Basket Air Fryer | Air Fryer Oven |
|---|---|---|
| Cooking style | Intense convection | Gentler convection |
| Best for | Crispy results, 1–4 servings | Larger batches, baking |
| Footprint | Compact | Larger |
| One-basket meal | Best fit | Works with rack adjustment |
| Cleanup | Basket only | More components |
If your primary goal is fast, crispy one-basket dinners for two, the basket-style air fryer is your best tool. The oven format is a smarter swap if you regularly cook for four or more people and want to bake as well.
How Wattage Impacts Your Stagger Timing
Beyond the physical shape of the basket, your air fryer’s wattage plays a crucial role in how quickly your one basket air fryer meals will cook. Most standard models range from 1,500 to 1,800 watts. If you are using a high-wattage model (1,700W+), the intense heat recovery means that opening the basket to add your staggered vegetables won’t significantly drop the cooking temperature. The appliance bounces back to 400°F almost instantly.
Conversely, if you are using a smaller, lower-wattage model (under 1,500W), every time you open the drawer to stagger ingredients, you lose valuable heat. For these models, you may need to add 1 to 2 extra minutes to the total cooking time to compensate for the heat loss. Always monitor your first few meals closely. If your broccoli is consistently undercooked when added at the 8-minute mark, your specific machine may require you to add the vegetables a minute or two earlier than the recipe states.
Rules, Tips & Foods to Avoid in Your Air Fryer
What you’ll need: An air fryer, a meat thermometer (instant-read, under $15), and basic seasonings — olive oil, garlic powder, salt, pepper, and smoked paprika cover 90% of the recipes above.
One-basket cooking is forgiving, but a few core rules make the difference between a great dinner and an overcooked disappointment. Understanding these rules also helps you improvise beyond the 20 recipes above.
What Is the 25 Rule for Air Fryers?
The 25 rule (sometimes called the air fryer conversion rule) is the most useful formula for beginners: when adapting any oven recipe for your air fryer, reduce the temperature by 25°F and cut the cooking time by 20%.
This works because air fryers use intense forced convection — hot air circulates around food at high speed — which cooks food more efficiently than a standard oven. The result is faster cooking at a slightly lower temperature.
How to apply it:
| Oven Recipe | Air Fryer Conversion |
|---|---|
| 400°F for 20 min | 375°F for 16 min |
| 375°F for 25 min | 350°F for 20 min |
| 350°F for 30 min | 325°F for 24 min |
| 425°F for 18 min | 400°F for 14–15 min |
Always check your food 2–3 minutes before the adjusted time ends. Then verify safe internal temperatures with your meat thermometer. According to the USDA FSIS Safe Minimum Internal Temperature Chart (April 2026): poultry must reach 165°F; whole cuts of beef, pork, and lamb must reach 145°F with a 3-minute rest; fish and shellfish must reach 145°F. A thermometer is not optional — it is the only reliable way to confirm safety (University of Nebraska-Lincoln Extension, Food Safety guidelines).
Quotable rule: “Lower the temperature by 25°F and cut the time by 20% — then check early and verify with a thermometer. That single formula converts almost any oven recipe for your air fryer.”
What Is the 20/20 Rule for Air Fryers?
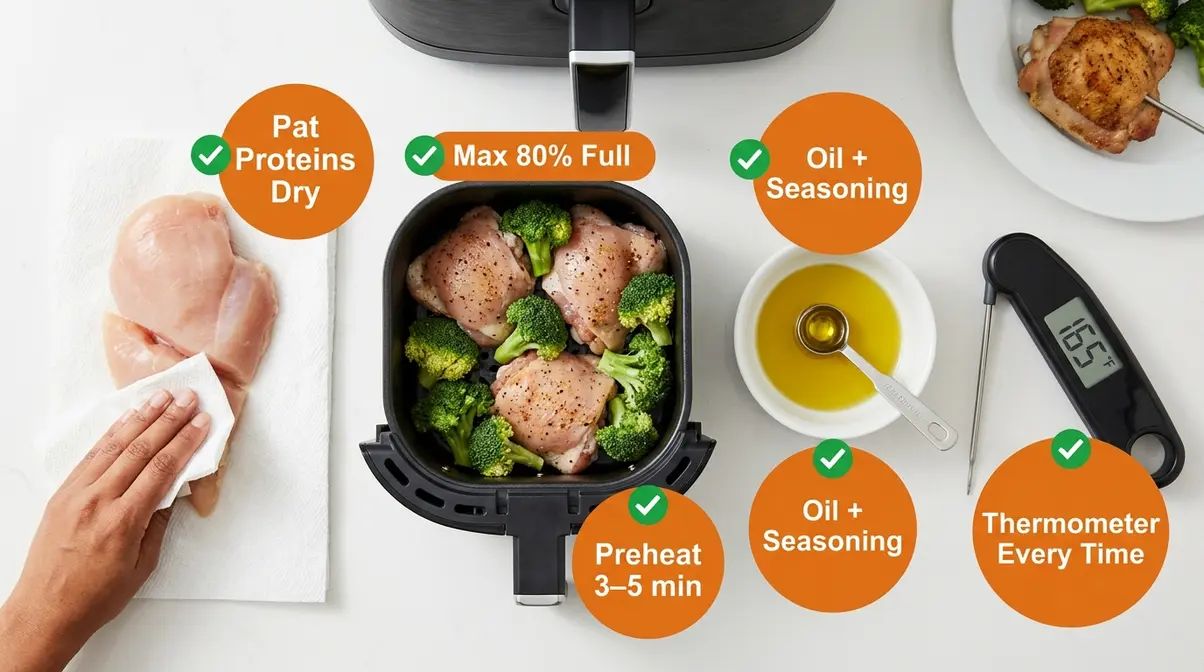
The 20/20 rule is a related principle for basket management: never fill your air fryer basket more than 80% full, and always shake or flip food at the 20-minute mark (or halfway through, whichever comes first).
This rule exists because air fryers cook through airflow. When the basket is overfilled, air cannot circulate properly — the bottom layer steams instead of crisps, and the top layer may cook faster than the bottom. Community testing across r/airfryer and recipe sites consistently confirms that overcrowding is the number one cause of uneven cooking results.
- Practical application:
- Fill basket no more than 80% full — leave visible gaps between pieces.
- For meals over 20 minutes, shake the basket or flip the ingredients at the halfway mark.
- For foil packet meals, shake the basket gently (the packet protects the contents).
- For sticky marinades (like teriyaki), a light spray of cooking oil on the basket prevents sticking before the shake.
5 Foods to Avoid in an Air Fryer
Not everything belongs in an air fryer. According to BBC Good Food and the Centre for Food Safety (November 2026), these five items present real safety or quality problems:
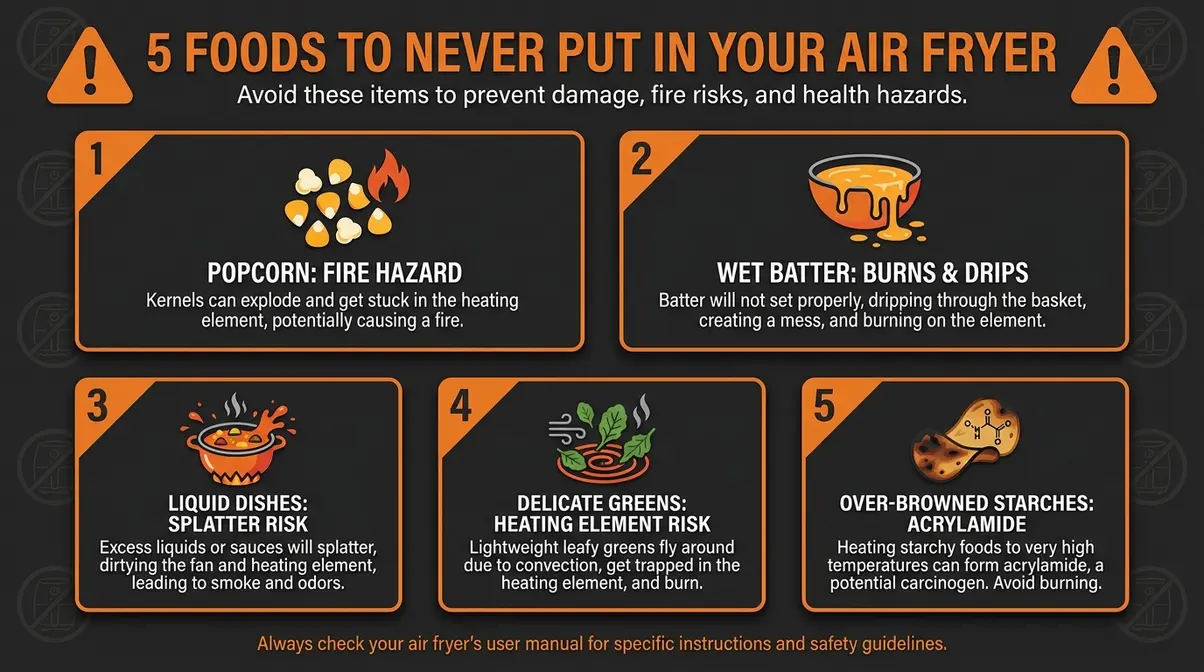
- Popcorn. Most air fryers don’t reach the temperature needed to pop kernels consistently. Unpopped kernels can lodge in the heating element and short-circuit the appliance — a genuine fire hazard (BBC Good Food, 2026).
- Wet-battered foods (e.g., tempura, classic beer-battered fish). Without a bath of hot oil to set the batter, it drips through the basket, burns on the base, and can create a fire risk. Use dry coatings — breadcrumbs, panko, or seasoned flour — instead.
- Sauce-heavy liquid dishes (curries, stews, bolognese). The high-speed circulating air splashes hot liquid around the basket, creating both a burn hazard and a serious cleanup problem (Centre for Food Safety, 2026).
- Delicate fresh leafy greens (spinach, kale, lettuce). Their light weight means they fly around the basket and can contact the heating element. If you want greens with your meal, add them raw as a side or use heartier options like Brussels sprouts.
- Heavily charred or over-browned starchy foods. The Centre for Food Safety (2026) warns that cooking starchy foods like potato chips to very dark brown or black at high temperatures increases acrylamide formation — a potential long-term health concern. Aim for golden yellow, not dark brown.
Tips for One-Basket Success
These four habits consistently separate good results from great ones:
- Preheat for 3–5 minutes. A preheated basket means food starts crisping immediately instead of slowly coming up to temperature. Most recipes in this guide assume a preheated air fryer.
- Pat proteins dry before seasoning. Moisture on the surface of chicken, fish, or steak creates steam — the enemy of crispiness. A paper towel pat takes 10 seconds and makes a noticeable difference.
- Cut ingredients to similar sizes. Within each category (protein vs. vegetable), uniformity matters more than exact size. Uneven pieces cook unevenly.
- Use your thermometer every time until timing feels natural. After cooking the same recipe three or four times, you’ll develop a feel for doneness. Until then, the thermometer is your safety net — and it removes all the guesswork that makes beginners anxious.
Diabetic-Friendly One-Basket Air Fryer Meals
“Most people think eating healthy means surviving on salads, soups, or bland food.”
That assumption is exactly what air frying dismantles. As an underused weight-loss tool in many kitchens, the air fryer makes high-protein meals with very little added fat — and for people managing blood sugar, these combinations to create healthy one basket air fryer meals matter significantly.
⚠️ Medical Disclaimer: This content is for informational purposes only and does not constitute medical advice. Consult a registered dietitian or your healthcare provider before making dietary changes to manage diabetes. For personalized guidance, consult a registered dietitian.
Can Diabetics Use an Air Fryer?
Air frying is a cooking method well-suited to diabetes-friendly eating — but the appliance itself is only part of the picture. The food choices matter most.
Research published in Foods (PubMed Central, 2026) found that air-fried foods produced higher levels of slowly digestible starch compared to deep-fried equivalents, which is associated with a more gradual post-meal blood sugar rise rather than a sudden spike. A 2026 study from Hacettepe University found that air frying resulted in lower estimated glycemic index (eGI) values for potatoes compared to several other cooking methods, particularly when using healthy oils like olive oil. A 2026 comparative study (PMC10563671 comparative study) confirmed that air frying uses approximately 50–70% less oil than conventional deep frying — directly supporting the lower-fat dietary approach central to diabetes management.
The UGA Extension Right Bite Diabetes Cooking School emphasizes that effective diabetes cooking focuses on controlling carbohydrates, reducing calories, modifying fat, and increasing fiber. Air frying supports all four goals when you choose the right ingredients: lean proteins, non-starchy vegetables, and high-fiber additions.
- The core principle for diabetic-friendly air fryer cooking:
- Prioritize non-starchy vegetables: broccoli, asparagus, zucchini, spinach, cauliflower, bell peppers
- Use lean proteins: fish, skinless chicken, shrimp, tofu, eggs
- Limit high-glycemic additions: white rice, regular potatoes, white bread
- Use olive oil or avocado oil in small amounts (1–2 teaspoons per meal)
“Air frying supports diabetes-friendly eating by using up to 70% less oil than deep frying while producing foods with a lower estimated glycemic index — making it one of the most practical cooking tools for blood sugar management.” (Research synthesis from PMC10563671, 2026; Hacettepe University, 2026; UGA Extension, 2026.)
5 Diabetic-Friendly Meal Templates
These five templates apply The One-Basket Synchronization Method specifically to low-glycemic ingredient combinations. Each meal is high in protein, low in refined carbohydrates, and rich in non-starchy vegetables.
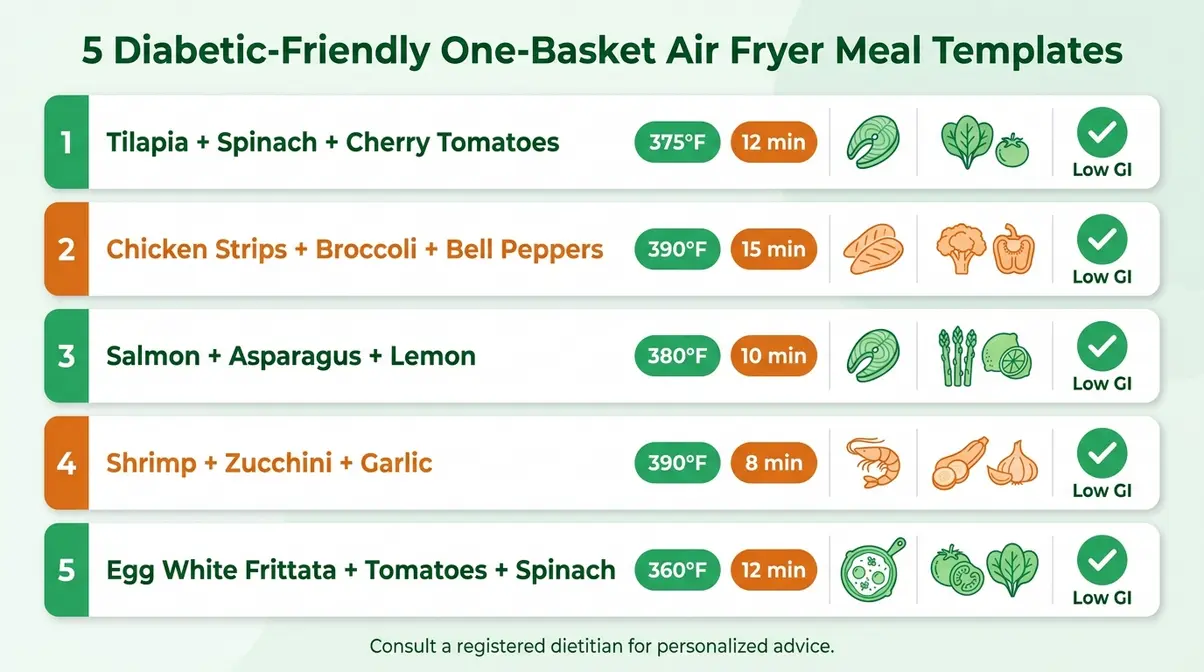
Template 1 — Tilapia + Spinach + Cherry Tomatoes
375°F | 12 minutes | No stagger needed
Tilapia is a lean white fish with virtually no carbohydrates. Spinach and cherry tomatoes are both non-starchy and low glycemic. Season with garlic, lemon, and herbs only — no sugar-based sauces. This is one of the simplest meals in the entire guide.
Template 2 — Chicken Breast Strips + Broccoli + Bell Peppers
380°F | 16 minutes | Stagger: add vegetables at minute 8
Skinless chicken breast provides high-quality protein with minimal fat. Broccoli and bell peppers are both non-starchy and high in fiber. Avoid bottled sauces with added sugar; use olive oil, garlic, and lemon instead.
Template 3 — Salmon + Asparagus + Lemon
400°F | 12 minutes | No stagger needed
Salmon provides omega-3 fatty acids, which research links to improved insulin sensitivity. Asparagus is low-glycemic and high in fiber. This is a “smarter swap” compared to a fried fish dinner — same satisfying protein, fraction of the oil.
Template 4 — Shrimp + Zucchini + Garlic
400°F | 10 minutes | Stagger: add shrimp at minute 4
Shrimp is very high in protein and essentially zero carbohydrate. Zucchini is one of the lowest-glycemic vegetables available. Use olive oil and fresh garlic only — skip any teriyaki or sweet chili glazes, which add significant sugar.
Template 5 — Egg White Frittata Cups + Cherry Tomatoes + Spinach
325°F | 12 minutes | No stagger needed
Pour egg whites mixed with spinach, cherry tomatoes, and a pinch of feta into silicone muffin cups. Cook at 325°F for 12 minutes. This works in any basket-style air fryer and produces a high-protein, near-zero-carbohydrate meal in minutes.
All five templates were evaluated against community testing data from r/airfryer and leading recipe sites. For personalized adjustments to portion sizes or macronutrient targets, consult a registered dietitian.
What Is the Worst Food for Blood Sugar?
The single food most consistently identified as problematic for blood sugar is white bread — particularly highly processed white bread with added sugars. It has one of the highest glycemic index scores of any common food, causing rapid blood glucose spikes. Other high-glycemic foods to limit include white rice, sugary breakfast cereals, sweetened beverages, and regular potato chips. None of these belong in a diabetic-friendly air fryer meal.
Common Mistakes & Limitations
Even with the stagger method, beginners make predictable errors. Understanding these in advance removes the guesswork.
Common Pitfalls
Pitfall 1 — Skipping the preheat.
Placing food into a cold basket extends cooking time unpredictably and produces uneven results. Three to five minutes of preheating is the single easiest habit to add.
Pitfall 2 — Overcrowding the basket.
This is the most common beginner mistake. When pieces touch or overlap, air cannot circulate — the result is steamed, soft food instead of crispy, browned food. Cook in batches if needed; the second batch takes only minutes.
Pitfall 3 — Not patting proteins dry.
Surface moisture creates steam, which prevents browning. A 10-second paper towel pat before seasoning makes a visible difference in texture.
Pitfall 4 — Guessing at doneness instead of measuring.
Visual cues are unreliable — chicken can look done on the outside while still underdone inside. A meat thermometer removes all doubt. The USDA safe minimum for poultry is 165°F, and there is no substitute for measuring it directly.
Pitfall 5 — Using too much oil.
One to two teaspoons is enough for most recipes. Excess oil pools in the basket, creates smoke, and can cause flare-ups with high-fat proteins.
When to Split Into Two Cooking Sessions
The One-Basket Synchronization Method works brilliantly for most protein-and-vegetable combinations — but not all. Split into two sessions when:
- Your protein is very thick (bone-in pork chops over 1.5 inches, whole chicken pieces)
- Your vegetables are very dense (whole carrots, parsnips, large potato wedges)
- The stagger window would need to be longer than 15 minutes
In these cases, cook the protein first, set it aside loosely covered with foil, then cook the vegetables. Reheat the protein for 2–3 minutes at the end. The extra step is worth it — forcing a stagger that is too wide produces overcooked vegetables or undercooked protein, the exact problem you’re trying to avoid.
Frequently Asked Questions
What can I cook in a one-drawer air fryer?
A one-drawer air fryer handles complete meals — protein and vegetables together in a single basket. The most reliable combinations are chicken thighs with broccoli (375°F, 18 min), salmon with asparagus (400°F, 12 min), shrimp with zucchini (400°F, 10 min), and chickpeas with cauliflower (400°F, 15 min). Community testing across r/airfryer confirms these four combinations as the most beginner-friendly starting points. The key is using The One-Basket Synchronization Method to stagger dense and delicate ingredients so they finish together.
Do you need to preheat an air fryer for one-basket meals?
Yes, preheating for 3-5 minutes is highly recommended. A preheated basket ensures that food starts crisping immediately upon contact, rather than slowly coming up to temperature. This is especially important for proteins like chicken and steak, where an initial sear helps lock in moisture and improves the final texture.
Can you use aluminum foil in an air fryer?
Yes, you can safely use aluminum foil in an air fryer, provided you follow a few basic rules. Never cover the entire basket bottom, as this blocks the essential airflow needed for convection cooking. Always ensure the foil is weighed down by food so it doesn’t fly up and touch the heating element, which poses a fire hazard.
What 5 foods should you not put in an air fryer?
According to BBC Good Food and the Centre for Food Safety (2026), the five foods to avoid are: popcorn (fire hazard from kernels in the heating element), wet-battered foods (batter drips and burns), sauce-heavy liquid dishes (hot liquid splatters and burns), delicate fresh leafy greens (fly around and contact the heating element), and over-browned starchy foods (acrylamide formation at high temperatures). Each presents a specific safety or quality problem — not just a preference issue.
What cannot be cooked in an air fryer?
Beyond the five specific foods above, large whole roasts over 4 pounds, fresh cheese (which melts and drips), and raw dough with high yeast activity also perform poorly in most basket-style air fryers. The common thread is that air fryers rely on airflow — anything that produces excess liquid, blocks airflow, or requires submersion in oil to cook correctly will not work well. Frozen or pre-cooked versions of many of these items (e.g., frozen mozzarella sticks) work fine because the coating has already been set.
Is 400 in the air fryer the same as 400 in the oven?
No, 400°F in an air fryer cooks much faster and more intensely than 400°F in a conventional oven. Because air fryers use rapid forced convection, you should generally reduce the temperature by 25°F and cut the cooking time by 20% when adapting an oven recipe.
What is the number one worst food for your blood sugar?
Highly processed white bread is consistently identified as one of the worst foods for blood sugar due to its extremely high glycemic index — it causes a rapid glucose spike with minimal nutritional benefit. Other top offenders include sweetened beverages, white rice, sugary breakfast cereals, and regular potato chips. For air fryer cooking, avoiding sugar-based marinades and glazes is the most practical single swap for blood sugar management.
What is the best sandwich for a diabetic to eat?
The best sandwich for a diabetic uses whole grain bread, lean protein, and plenty of non-starchy vegetables — for example, grilled chicken breast or turkey on 100% whole wheat bread with spinach, tomato, cucumber, and avocado. Whole grain bread has a significantly lower glycemic index than white bread. Avoid processed deli meats high in sodium and sugar-sweetened condiments. For air fryer preparation, grilled chicken strips from Recipe 2 in this guide make an excellent, blood-sugar-friendly sandwich filling. Always consult a registered dietitian for personalized dietary advice.
Start Cooking One-Basket Meals Tonight
For busy adults who own an air fryer but feel stuck cooking the same two things, one basket air fryer meals deliver a complete dinner — protein and vegetables, ready in under 25 minutes — without extra pans, extra dishes, or extra guesswork. Air frying uses approximately 50–70% less oil than deep frying (PMC10563671, 2026) and cooks most recipes 30–50% faster than a conventional oven (NKBA data, 2026). The best approach combines three things: choosing compatible protein-vegetable pairings, applying the 25°F/20% conversion rule, and always verifying doneness with a meat thermometer.
The One-Basket Synchronization Method is the framework that makes all of this click. Dense ingredients go in first; faster-cooking ingredients follow partway through. Once you internalize that single principle — stagger by density, not by guesswork — every protein-and-vegetable combination in your fridge becomes a potential dinner. The method applies equally to the 20 recipes in this guide, to the diabetic-friendly templates in Section 4, and to any new combination you improvise on a busy Wednesday night.
Pick one recipe from the chicken section tonight. Preheat your air fryer for 3 minutes, pat your protein dry, set your timer, and add the vegetables at the stagger point. Check the temperature with your thermometer. That first successful one-basket dinner — protein and vegetables, perfectly timed, one pan to clean — is the moment this appliance stops being an underused weight-loss tool gathering dust and starts being the most-used thing in your kitchen. Start there, and the other 19 recipes will follow naturally.

quickdishcook
Recipe developer and writer at Quick Dish Cookbook.