
What’s in this guide
- Prerequisites: What You'll Need Before You Start
- Step 1: Understand Why Pie Crust Shrinks
- Step 2: Start With the Right Dough and Fat Ratio
- Step 3: Chill the Dough Disc for at Least 1 Hour
- Step 4: Roll and Fit the Dough Without Stretching
- Step 5: Chill the Shaped Crust for 30 Minutes
- Step 6: Blind Bake With Pie Weights
- Step 7: Prevent a Soggy Bottom After Blind Baking
- Verify Results: A Perfect Pie Crust
- Troubleshooting: When the Crust Still Shrinks
- Frequently Asked Questions
- Conclusion
You pull your pie out of the oven, and your heart sinks. The crust has slumped down the sides, snapped back from the edges, and completely lost its crimped design. It looked perfect when it went in. Now it looks like a disaster.
“I’d consider myself to be an intermediate and (maybe even advanced) home baker at this point, and every year around the holidays I make tons of…” — and yet the crust still shrinks. Sound familiar?
Following a recipe to the letter and still getting a shrunken, slipping crust is deeply confusing. Most guides online skip the science that explains exactly why it happens — which means you keep making the same mistake without knowing it. This guide fixes that. By the end, you’ll know the exact 7-step process — backed by university food science research — to keep your pie crust perfectly shaped every single time.
Here’s what you’ll learn: why gluten causes shrinkage, how to choose the right fat ratio, when and how to chill, how to roll and fit without stretching, and how to use weights correctly during blind baking. These are the 7 steps that solve the problem for good.
The exact phrase you searched — how to stop pie crust from shrinking — is what this entire guide answers, step by step.
Key Takeaways: How to Stop Pie Crust From Shrinking
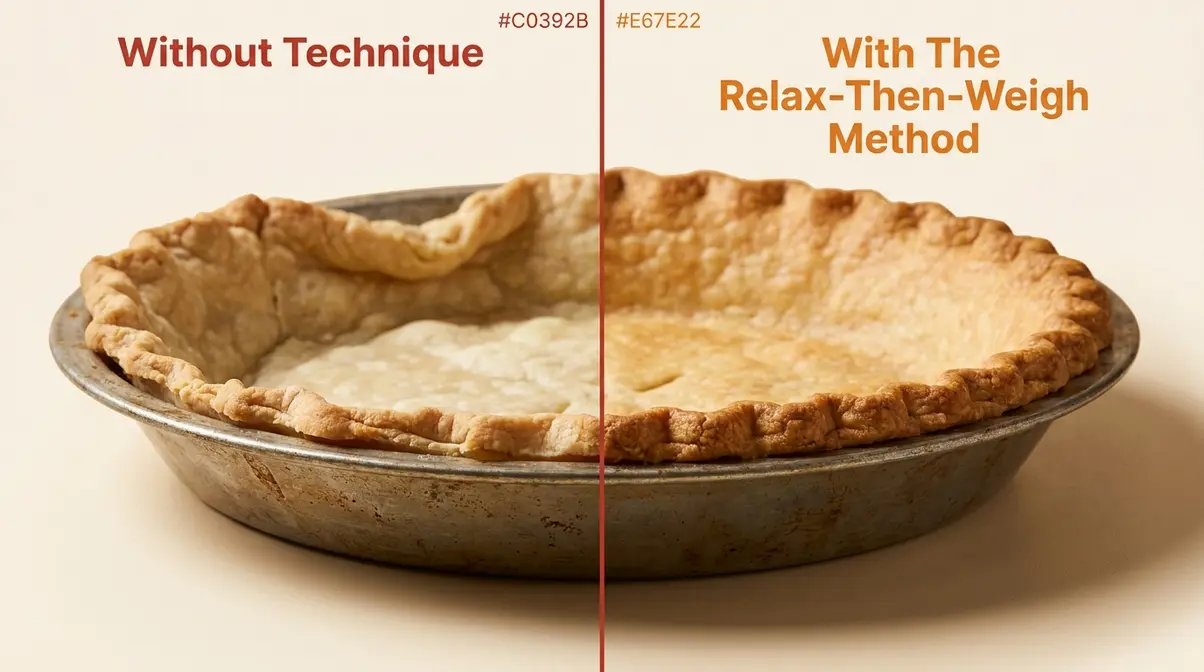
Pie crust shrinks because tight gluten strands contract when heated — chilling and proper weighting fix this in 7 steps using The Relax-Then-Weigh Method.
- Chill twice: Rest dough 1 hour before rolling, then 30 min after shaping
- Don’t stretch: Lay dough loosely into the pan; never pull it to fit
- Dock it: Poke holes with a fork to release steam before blind baking
- Use weights: Fill parchment all the way to the top with pie weights or dried beans
- Fat matters: A butter + shortening blend reduces shrinkage compared to all-butter dough
Prerequisites: What You’ll Need Before You Start
Before you can stop pie crust from shrinking, gather everything you need. Having it all ready makes the process much smoother — and prevents the rushed substitutions that cause problems.
- Tools:
- Rolling pin (for rolling dough to an even thickness)
- Metal pie pan (preferred over glass — conducts heat more evenly; more on this in Step 4)
- Pie weights (small ceramic or metal balls that hold the crust flat during blind baking), or dried beans, or plain white sugar as substitutes
- Parchment paper (goes between the crust and the weights so they don’t stick)
- Plastic wrap (for wrapping the dough disc during chilling)
- Bench scraper (a flat metal tool for lifting dough off the surface without tearing it)
- Fork (for docking — poking holes in the crust before blind baking)
- Ingredients/Optional:
- Pie dough (homemade or store-bought like Pillsbury)
- Cold butter and/or shortening (kept refrigerator-cold until use)
- Ice water (keeps fat solid and limits gluten activation)
- 1 tsp white vinegar (optional — helps relax gluten without affecting flakiness, a tip supported by Penn Medicine’s culinary science resources)
A metal pan is preferred over glass here. Glass slows heat transfer, which allows fat to melt before the crust structure sets — and a crust that softens before it firms is a crust that slides. You’ll get the full explanation in Step 4.
Now that you have everything ready, let’s start with the most important thing: understanding why your crust shrinks in the first place.
Step 1: Understand Why Pie Crust Shrinks
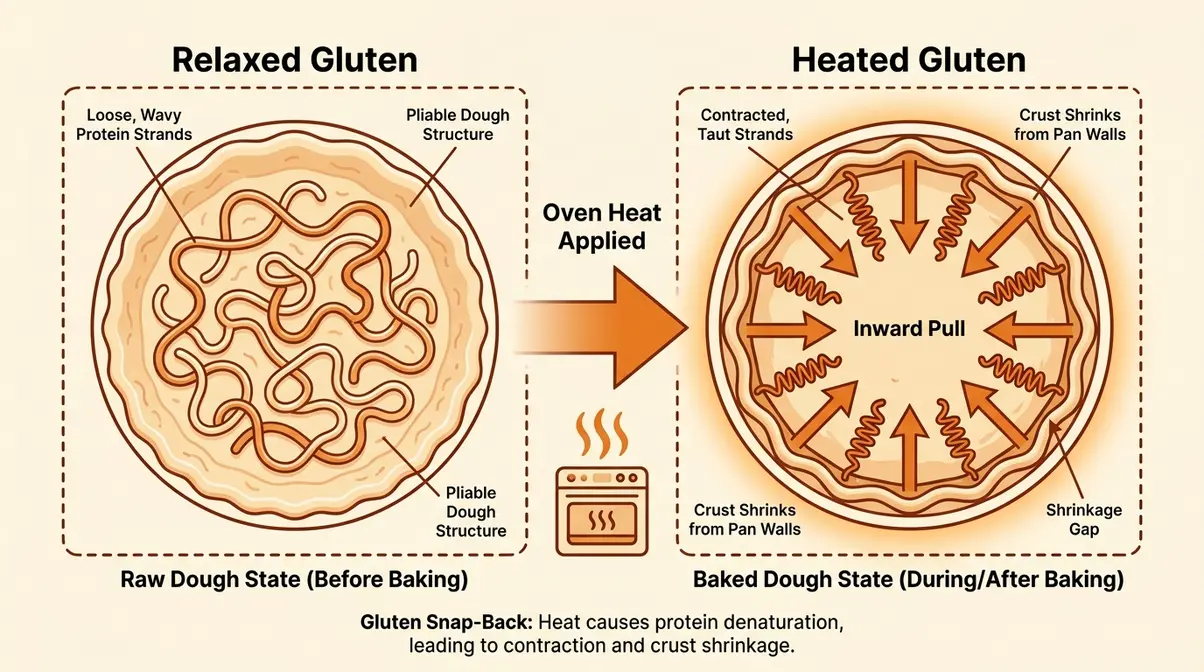
Pie crust shrinks because of gluten contraction. When you overwork dough or skip the chilling step, gluten strands tighten. Once the crust hits oven heat, those strands snap back — pulling the dough away from the pan’s edges and causing it to slump down. Cold rest and physical weight are the two fixes, and every step in this guide addresses one or both of them.
Gluten — the protein network that forms when flour meets water — is elastic by nature. The more you handle the dough, the more tightly that network develops. Think of gluten strands like a rubber band: the more you stretch it, the harder it snaps back. That’s exactly what happens inside your oven.
The 7 Root Causes of Crust Shrinkage
Utah State University Extension confirms that rerolling pie crust dough over-develops gluten, directly causing greater shrinkage during baking — and that over-stretching the pastry dough also results in excessive shrinkage (Utah State University Extension, 2024). Here are every cause, clearly named:
- Overworked dough develops too much gluten — mixing beyond the point of cohesion builds tension
- Dough not chilled before rolling — warm gluten is active and springy, not relaxed
- Dough stretched to fit the pan — the single most common mistake; stretched dough always contracts
- Shaped crust not chilled before baking — the gluten re-tightens between rolling and the oven
- No pie weights used during blind baking — nothing holds the sides in place as fat melts
- Too much water added to dough — more water means more gluten activation from the start
- Re-rolling scraps multiple times — each pass over the dough tightens gluten further
Most home bakers are guilty of two or three of these at once — often without realizing it. The rubber band analogy holds: every time you handle warm dough, stretch it into a pan, or skip the second chill, you’re winding that rubber band tighter.
This is where The Relax-Then-Weigh Method comes in. It addresses both root causes simultaneously: first relaxing the gluten through cold rest (Steps 3 and 5), then physically holding the crust in place with weights during baking (Step 6). Steps 3 through 6 walk through the full method in detail.
Even store-bought crusts aren’t immune. Pillsbury crusts shrink when over-stretched in a 9-inch pan — a specific problem covered in the Troubleshooting section below.
You can also learn how to prevent pie crust from shrinking with additional technique breakdowns on QuickDishCookbook.
Checkpoint: You should now understand that shrinkage is a gluten problem with a two-part solution: relax the gluten with cold, then hold it in place with weight.
The first place shrinkage problems start is actually in the dough itself — before you ever roll it out. Let’s fix that now.
Step 2: Start With the Right Dough and Fat Ratio
Whether you’re making pie crust from scratch or using store-bought dough, the fat-to-flour ratio directly controls how much your crust shrinks. The 3-2-1 rule — three parts flour, two parts fat, one part water by weight — gives you the right foundation. Fat type matters too: shortening develops less gluten than butter, meaning less shrinkage risk from the very first mix.
The Relax-Then-Weigh Method works best when the dough starts with the right formula. Even perfect chilling and weighting can’t fully compensate for a dough that was too wet or made with the wrong fat from the start.
What Is the 3-2-1 Rule for Pie Crust?
The 3-2-1 rule is the standard ratio for a reliable, flaky pie crust: 3 parts flour, 2 parts fat, and 1 part ice water, measured by weight. In practical terms: 3 cups of flour, 2 cups of fat (butter, shortening, or a blend), and roughly 1 cup of ice water — though you’ll rarely use the full cup.
The water quantity is the most critical variable. More water means more gluten activation, which means more shrinkage. Chowhound’s breakdown of the 3-2-1 pie crust ratio explains that this ratio provides a reliable starting point for flaky, tender pie crust — and experienced bakers know to treat the water measurement as a maximum, not a target.
Add water one tablespoon at a time until the dough just comes together. Stop the moment it holds. A dough made with 2 cups of fat and only ½ cup of water will shrink significantly less than the same recipe made with a full cup of water. Using ice-cold water — and keeping your fat cold — limits gluten activation from the very first touch.
You can also explore the best fat for pie crust in more detail for a deeper dive into ingredient choices.
Butter vs. Crisco for Pie Crust
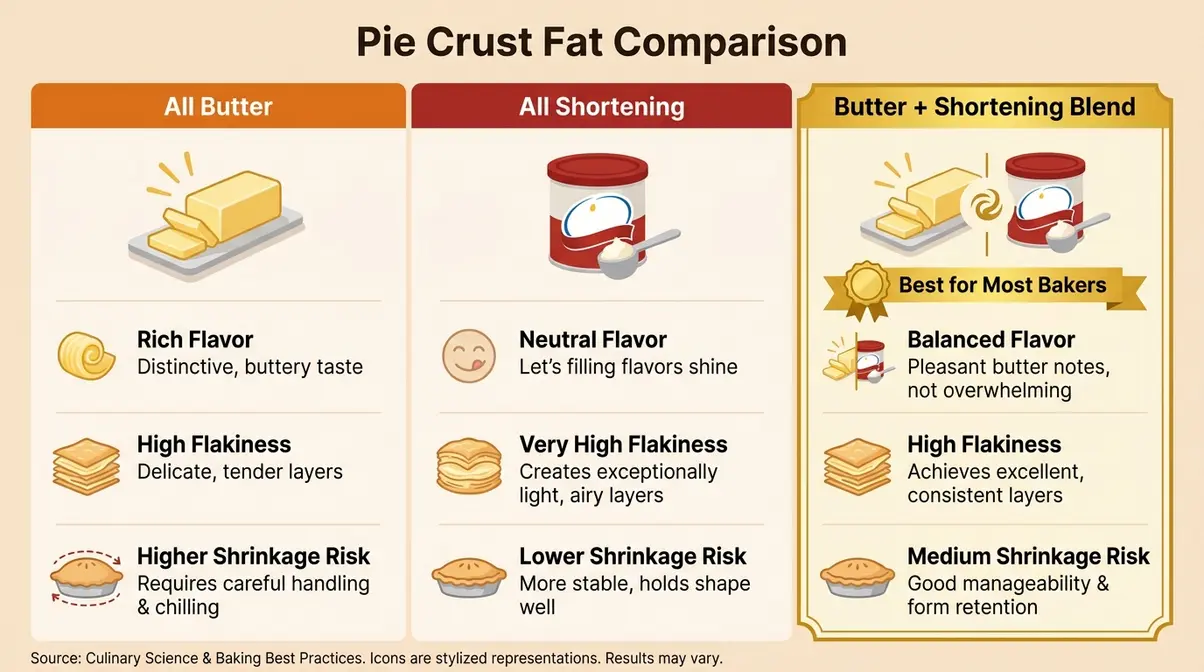
The direct answer: neither is universally better — a blend wins for most home bakers. Butter delivers rich flavor and crisp, golden color. Shortening (Crisco) delivers a more tender, forgiving crust that’s easier to handle and less likely to shrink. Together, they give you both.
According to the Texas A&M University review on lipid shortenings, fat prevents water-flour interaction by coating flour particles — developing less gluten in pie crust and directly reducing shrinkage risk (Texas A&M University, 2019). That’s the mechanism behind why shortening-heavy doughs are more forgiving: less gluten forms, so less gluten can snap back.
Additionally, Penn Medicine’s culinary science on relaxing dough notes that adding a small amount of vinegar relaxes dough without losing flakiness — a useful trick for all-butter bakers who don’t want to switch to shortening entirely.
| Fat Type | Flavor | Flakiness | Shrinkage Risk | Best For |
|---|---|---|---|---|
| All Butter | Rich, buttery | High | Higher | Flavor-first bakers |
| All Shortening (Crisco) | Neutral | Very high | Lower | Easy handling, beginner-friendly |
| Lard | Savory, rich | Very high | Lower | Traditional/savory pies |
| Butter + Shortening Blend | Balanced | High | Medium | Most home bakers |
For holiday pies where appearance matters most, a 50/50 butter-shortening blend gives you golden color, good flavor, and lower shrinkage risk. That’s the recommendation for beginners.
A quick note on Crisco: Many bakers ask why people seem to have moved away from it. The short answer is that Crisco was reformulated to remove trans fats in the early 2000s. Some bakers find the modern version produces slightly less flaky results than the original formula — or than lard, which remains a favorite for savory pies. It’s still a solid choice for beginners because of its ease of handling and lower shrinkage risk.
Checkpoint: You should now have a dough made with the correct 3-2-1 ratio, using cold fat and minimal ice water. If using store-bought, your Pillsbury dough is still in its package — don’t unroll it yet.
Now that your dough is made with the right formula, the most important thing you can do is give it time to rest in the refrigerator — and here’s exactly how long that needs to be.
Step 3: Chill the Dough Disc for at Least 1 Hour
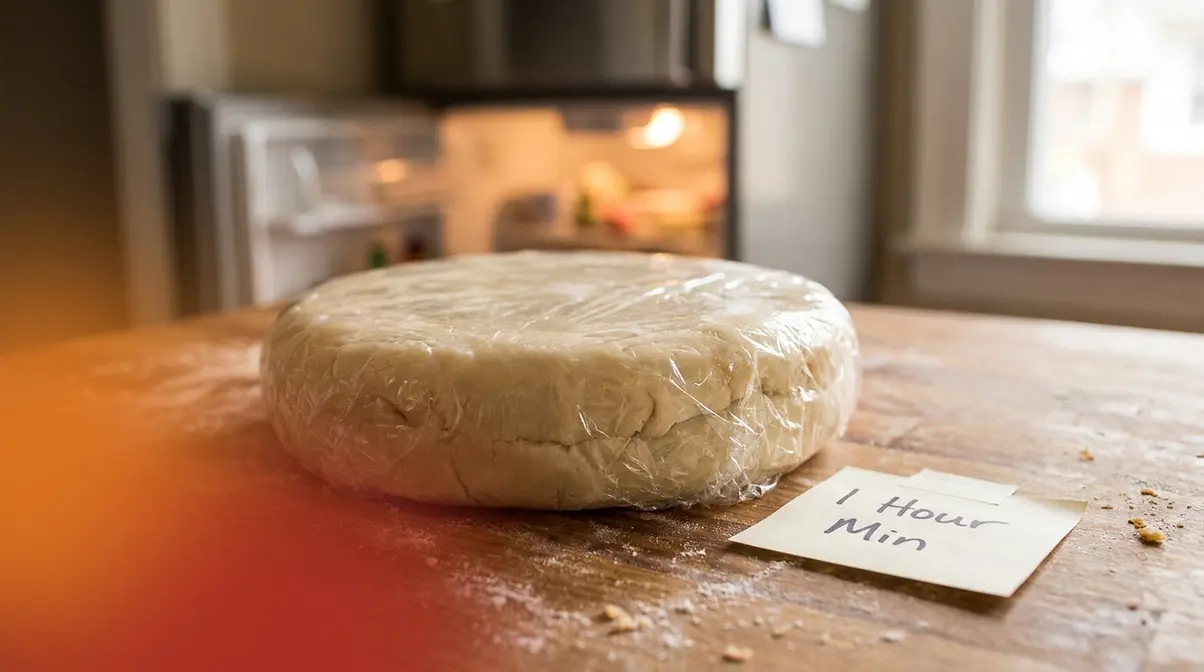
Chilling the dough disc is Stage 1 of The Relax-Then-Weigh Method — and the single most skipped step in home baking. After mixing, press the dough into a flat disc — not a ball — wrap it tightly in plastic wrap, and refrigerate for at least 1 hour. Overnight is even better. This rest period allows tight gluten strands to fully relax, so they won’t snap back when you roll and bake.
Iowa State University guidelines on pastry problems state directly that unchilled fat or improperly transferred dough causes crust to shrink (Iowa State University Extension, 2014). This is not a soft suggestion — it’s the most evidence-backed step in the entire process.
How Long Should You Chill Pie Dough?
The minimum is 1 hour. Overnight is ideal. You can safely refrigerate dough for up to 3 days, or freeze it for up to 3 months — just thaw overnight in the fridge before rolling.
Why a disc, not a ball? A disc chills evenly throughout. A ball stays warmer in the center, which means the gluten in the middle hasn’t fully relaxed when you start rolling. That uneven tension leads to uneven shrinkage. Flatten the dough to about 1 inch thick before wrapping — this is all it takes.
Think of a rested dough like a rubber band that’s been lying flat for an hour: the tension has released. It won’t snap back because it’s no longer under strain. Skipping the chill is functionally similar to overworking your dough — both result in tight gluten that snaps back in the oven.
For Pillsbury and other store-bought crusts: Let them sit at room temperature for about 15 minutes before unrolling — not longer. If too warm, they tear. If too cold, they crack and require re-rolling, which over-develops gluten. That 15-minute window is the sweet spot.
If you’re baking on a Saturday, mix your dough Friday evening and let it rest overnight. It will be noticeably easier to roll and will shrink far less than dough chilled for the minimum time.
Checkpoint: You should now have a flat dough disc, wrapped in plastic, resting in the refrigerator. Don’t touch it for at least 1 hour.
When your dough comes out of the fridge, how you roll and move it into the pan is just as important as how long you chilled it. Here’s how to do it without undoing all that rest.
Step 4: Roll and Fit the Dough Without Stretching
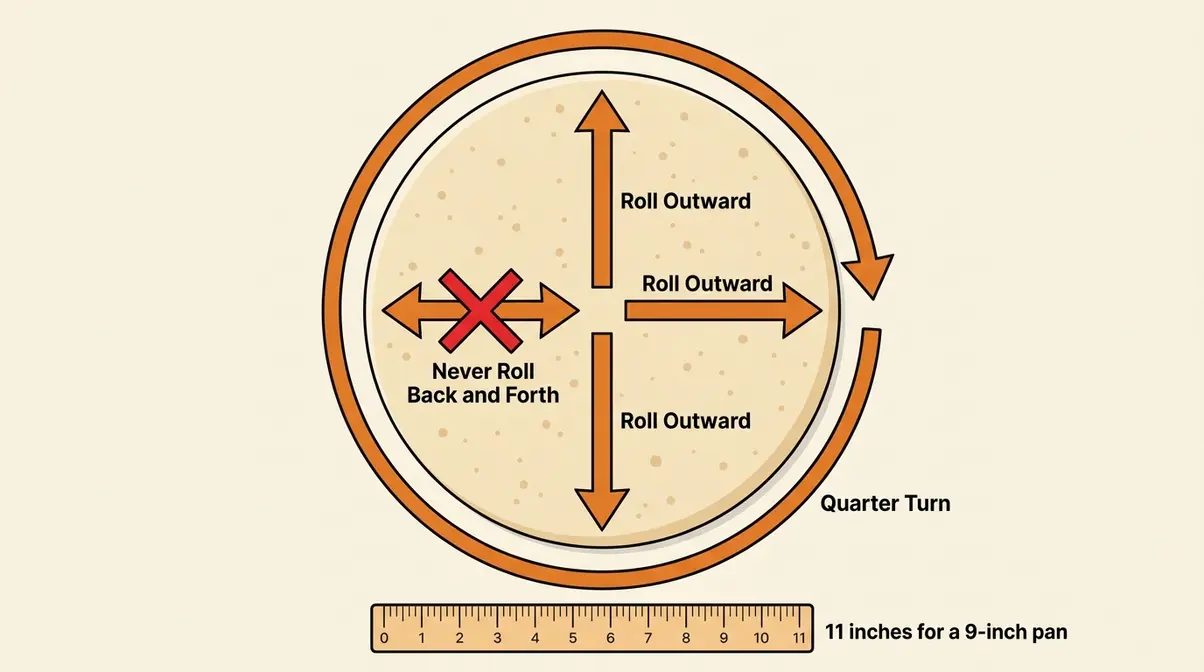
Stretching dough into the pan re-tightens every gluten strand you just spent an hour relaxing. Instead, roll the dough 2 inches wider than your pan, then drape it over using a rolling pin. Let gravity do the fitting — press gently into the corners with your fingers and leave 1 inch of overhang around the rim. Stretching is the most common cause of slipping and slumping during baking.
The No-Stretch Rolling Technique
Serious Eats’ recommendation for butter cube size notes that cutting butter into cubes no smaller than half an inch and smashing each piece once creates distinct flaky layers without over-developing gluten (Serious Eats, 2024). That same principle — minimal handling, maximum intentionality — applies to every step below.
- Flour the surface lightly — just enough to prevent sticking; too much flour dries the dough
- Place the chilled disc in the center of your work surface
- Roll from the center outward — one push away from you, lift the pin, rotate the dough 90°, repeat
- Never roll back and forth — back-and-forth motion re-tightens gluten with every pass
- Roll until 2 inches wider than your pan — for a 9-inch pan, you need an 11-inch round
- Fold the dough over your rolling pin to lift it without touching it with your hands
- Drape it centered over the pan — let it fall into place; do NOT pull it down
Once it’s draped, use your fingertips to press the dough gently into the corners and down the sides. Never pull it. Stretched dough snaps back in the oven — every time, without exception.
The overhang rule: Leave at least 1 inch of overhang all the way around the rim. Fold it under itself and crimp. This extra dough gives the crust something to grip — without it, there’s nothing to prevent the edges from sliding inward.
Why metal beats glass: Glass slows heat transfer, causing the fat to melt before the crust structure sets. When fat melts too early, the crust loses its rigidity and slides down the pan walls before it has time to firm up. A metal pan conducts heat more efficiently, setting the crust structure faster.
If your dough has already pulled back 1 inch from the edges after draping — before it goes anywhere near the oven — you’ve stretched it. Rewrap it, chill for 30 more minutes, and try again. It’s worth the wait.
Checkpoint: You should now have your dough draped loosely in the pan, with 1 inch of overhang all around, and no pulling or stretching. The dough should look relaxed — not taut against the rim.
Step 5: Chill the Shaped Crust for 30 Minutes
You’ve rolled and fitted the crust without stretching — but the handling itself generates a small amount of gluten tension. This is Stage 1, Part 2 of The Relax-Then-Weigh Method: a second, shorter chill that releases that tension before the crust ever sees oven heat.
Cover the fitted crust loosely with plastic wrap and refrigerate for at least 30 minutes. If you have time, 1 hour is better. Some bakers even pop the crust into the freezer for 15 minutes — the rapid cold is especially effective at setting the fat solid before baking.
Why does this second chill matter so much? During rolling and fitting, even careful hands warm the dough slightly. That warmth activates gluten. A second chill re-relaxes those strands before the oven’s heat has a chance to snap them back. King Arthur Baking recommends chilling the pastry until it feels cold all the way through but is still pliable — that’s your target (King Arthur Baking, 2023).
Many bakers skip this step because they’re eager to get the pie in the oven. That’s understandable — but this 30-minute wait is one of the highest-return investments in the whole process. The difference between a chilled, rested shaped crust and one that goes straight from rolling to the oven is visible: the chilled crust holds its crimp; the uncooled one slumps.
Checkpoint: You should now have a fitted, crimped crust resting in the refrigerator. The fat should feel firm to the touch when you remove it. If it feels soft or greasy, give it another 15 minutes.
Step 6: Blind Bake With Pie Weights
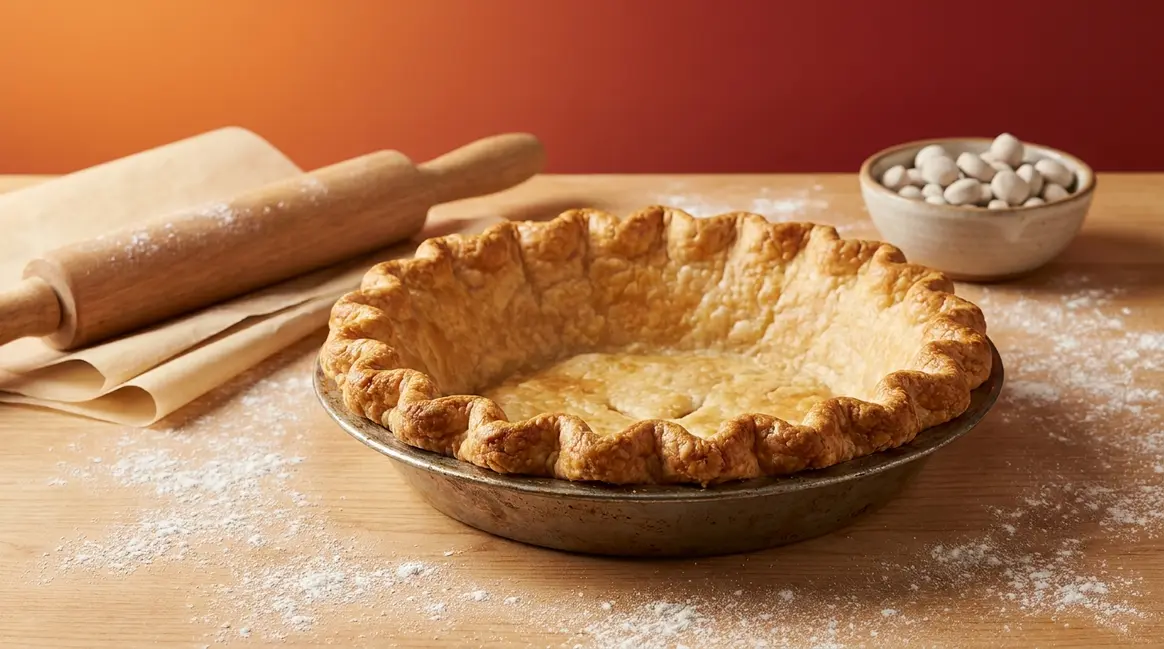
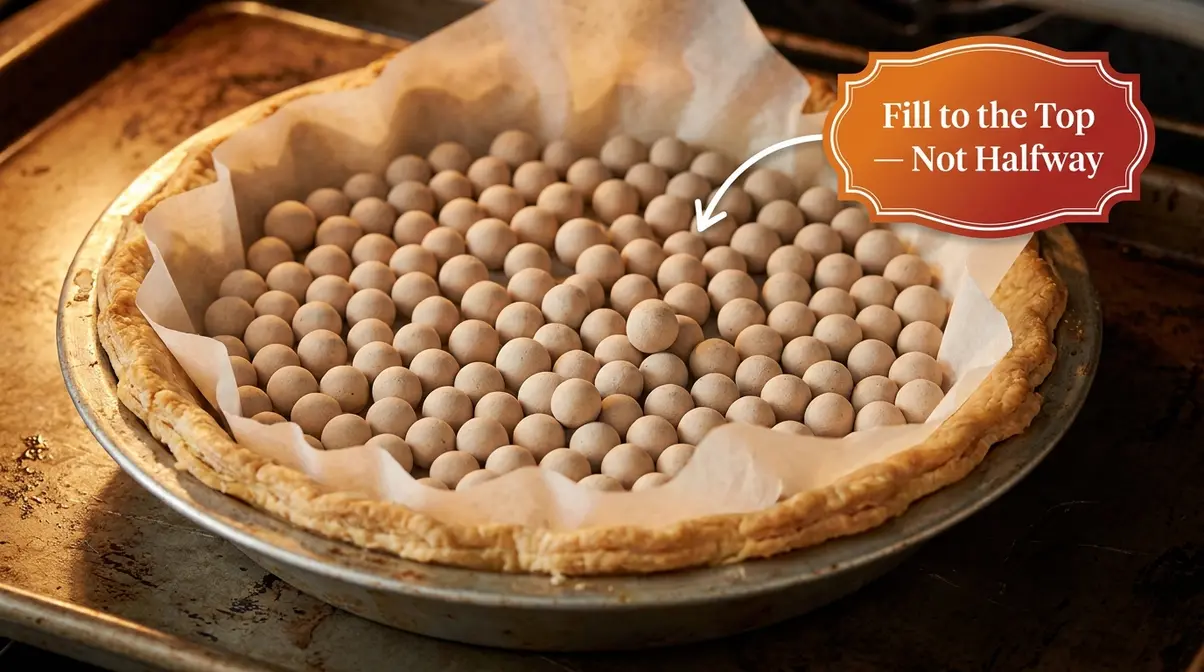
Blind baking — baking the crust before adding the filling — is the technique used whenever a recipe calls for a pre-baked shell. It’s essential for custard pies, cream pies, and quiches. Without weights, the crust puffs up from steam and slides down the sides as the fat melts. This is Stage 2 of The Relax-Then-Weigh Method: the physical hold that keeps every relaxed gluten strand in place.
According to Iowa State University’s AnswerLine on pie baking, as the pie dough bakes, the fat melts and creates steam — and without pricking and weighing the crust down, it shrinks down the sides and puffs up in the center (Iowa State University Extension, 2020). Weights are not optional. They are the mechanism.
Blind baking is defined simply as: baking an unfilled pie crust, using parchment and weights to hold its shape, before adding any filling.
How to Blind Bake Without Shrinkage
Here are the exact steps, in order:
- Preheat your oven to 375°F (190°C)
- Remove the chilled crust from the refrigerator — it should be cold and firm
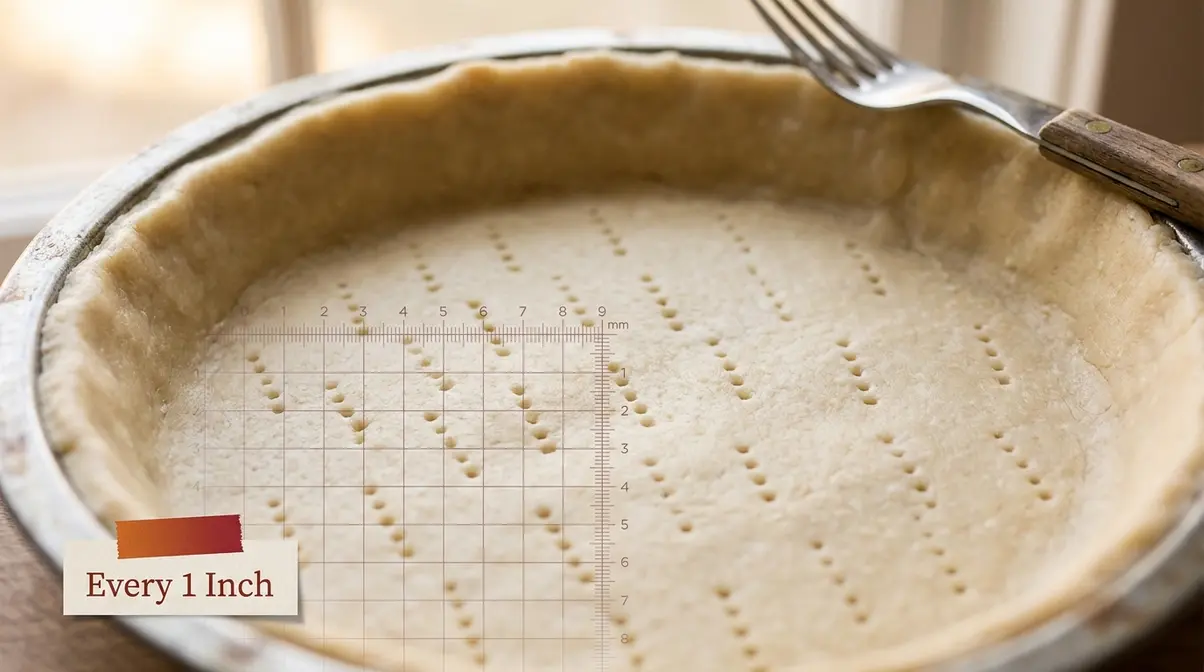
- Dock the crust: Use a fork to poke holes across the entire bottom and partway up the sides — about every inch. This releases steam and prevents puffy bubbles from forming beneath the crust
- Cut a large piece of parchment paper — larger than the pan. Crumple it once, then smooth it out (this makes it flexible and less likely to tear the dough)
- Press the parchment into the crust, fitting it snugly against the bottom and all the way up the sides
- Fill with pie weights, dried beans, or uncooked rice — fill all the way to the top of the crust walls, not just halfway. This is the most commonly under-done step: insufficient weights mean the sides have nothing to lean against and will slide inward
- Bake for 15–20 minutes, until the edges are lightly golden and the parchment lifts away cleanly
- Remove parchment and weights carefully — the weights will be very hot
- Return the crust to the oven for 5–10 more minutes to dry and lightly brown the base
- For custard or very wet fillings: Brush the hot crust with a thin layer of lightly beaten egg white, then bake for 2–3 more minutes. This creates a protein barrier that prevents liquid from soaking through — the key to avoiding a soggy bottom
Par-baking (also called partial blind baking) means stopping after step 8 — the crust is set but not fully browned. Use this when your filling will continue cooking in the oven (like a fruit pie with a top crust). Full blind baking (through step 10) is for fillings that won’t be baked further, like pastry cream or lemon curd.
Checkpoint: You should see a lightly golden, firm crust with no puffed bubbles and no slumped sides. The bottom should look dry and set, not pale and soft.
Step 7: Prevent a Soggy Bottom After Blind Baking
A perfectly shaped crust that then turns soggy underneath the filling is its own kind of disappointment. Fortunately, the same chilling and baking discipline that prevents shrinkage also sets you up to prevent sogginess — you just need one or two extra steps.
Why does a soggy bottom happen? When wet filling contacts an underbaked or unprotected crust, the moisture migrates into the pastry. The crust absorbs liquid faster than the oven can dry it out, and the bottom goes from flaky to dense and wet.
How to Keep the Bottom Crisp
- Always fully blind bake before adding wet fillings — the base must be dry and lightly browned before any liquid touches it
- Use the egg white barrier (from Step 6): brush the hot, just-baked crust with egg white and return to the oven for 2–3 minutes. The protein seals the surface. This is especially important for custard pies, quiches, and lemon curd tarts
- Choose metal over glass — a metal pan conducts heat directly to the base, helping the bottom crust brown and set before the filling can soak in
- Avoid overfilling — fillings that spill over the edges during baking will seep under the crust and defeat all your preparation
A note on store-bought crusts: Pillsbury and similar refrigerated crusts are thinner than most homemade versions, which makes them more vulnerable to sogginess. Always blind bake them fully before adding any wet filling — even if the recipe says to skip it.
Checkpoint: You should now have a fully baked crust with a dry, lightly browned base. Press gently on the bottom with your finger — it should feel firm and slightly crisp, not soft or spongy.
Verify Results: A Perfect Pie Crust
After following all 7 steps, here’s what success looks like — and what to check before you add your filling:
- The sides are flush with the pan walls — no gaps, no pulling away from the edges
- The crimped rim is intact — it should look nearly identical to how it looked before baking
- The bottom is lightly golden and dry — not pale, not puffed, not bubbled
- There are no large cracks — small surface cracks are normal; large splits indicate the dough was too cold when fitted
- The overhang fold is set — the folded-under edge should be firm and golden
If you see small bubbles on the base, that’s usually a sign the docking holes were too far apart. Next time, poke holes every inch rather than every 2 inches. If the sides slumped slightly despite using weights, the weights didn’t reach high enough — fill all the way to the rim next time.
Troubleshooting: When the Crust Still Shrinks
Even with all 7 steps in place, certain situations create extra challenges. Here’s how to handle the most common ones.
Common Pitfalls (And How to Avoid Them)
1. The crust shrinks despite chilling twice.
This usually means the dough was over-handled during rolling. Specifically: rolling back and forth (rather than center-outward with quarter turns) re-tightens gluten with every pass. Review Step 4’s rolling technique — direction matters as much as duration.
2. The sides slump even with weights.
The weights didn’t go high enough. Many bakers fill the parchment halfway and assume that’s enough. It isn’t. The sides need direct lateral support — fill all the way to the top of the crust wall.
3. The crust pulls away at the corners, not the sides.
This is almost always a stretching problem at the corners specifically. When pressing the dough into the pan’s corners, it’s tempting to pull rather than press. Use your knuckle to gently push the dough into the corner from the outside in — never pull inward.
4. The crimped edge collapses but the sides hold.
The crimp needs its own support. Fold the overhang firmly under itself, press it to the rim, and ensure it’s chilled solid before baking. A loose crimp will always fall.
5. The dough tears when you try to fit it.
The dough was too cold — it went straight from the fridge to the pan without the 5-minute bench rest. Let it sit at room temperature for 5 minutes after removing from the fridge. It should bend without cracking.
Why did my Pillsbury crust shrink?
Store-bought crusts like Pillsbury have a specific failure mode that homemade dough doesn’t: they’re sized for a standard 9-inch pan, but many modern pie dishes are slightly deeper or wider. When bakers stretch the Pillsbury crust to cover the extra surface, they trigger the exact gluten tension that causes shrinkage.
The fix is simple but counterintuitive: don’t unroll a cold Pillsbury crust. Let it sit at room temperature for exactly 15 minutes — no more. Unroll it gently, center it over the pan, and let gravity do the draping. If it doesn’t quite reach the edges without stretching, don’t force it. Use a second crust and trim to fit, or accept a slightly shorter edge. A crust that fits without stretching will always look better than one stretched to fit.
Pillsbury crusts also have a lower fat content than homemade versions, which means less gluten-coating protection. This makes the second chill (Step 5) even more important for store-bought crusts than for homemade ones.
When These Techniques Fall Short
In very warm kitchens (above 75°F / 24°C), even a chilled dough will warm up quickly during rolling, re-activating gluten before the crust goes into the oven. If your kitchen runs warm, chill the fitted crust in the freezer (not just the refrigerator) for 15 minutes before blind baking — the more aggressive cold compensates for the warm environment.
Low-fat store-bought crusts are also harder to control because less fat means less gluten-coating protection from the start. In these cases, the egg white barrier (Step 6) and the second chill (Step 5) become essential rather than optional.
Frequently Asked Questions
What is the 3-2-1 rule for pie crust?
The 3-2-1 rule is the standard ratio for pie crust dough: 3 parts flour, 2 parts fat, and 1 part ice water, measured by weight. In cups, this translates roughly to 3 cups flour, 2 cups fat, and up to 1 cup ice water — though you should add water gradually and stop when the dough just holds together. The ratio works because it keeps gluten development in check: enough water for structure, but not so much that gluten becomes over-developed and prone to snapping back. For a standard 9-inch pie, this ratio produces a crust that’s flaky, tender, and far less likely to shrink than a wetter dough.
Should I poke holes before baking?
Yes — poking holes (called docking) in your pie crust before blind baking is essential for preventing puffy bubbles. As the crust bakes, fat melts and releases steam. Without holes, that steam has nowhere to go and pushes up under the crust, creating large bubbles that distort the shape. Use a fork to poke holes every inch across the entire base and partway up the sides. Iowa State University Extension (2014) specifically recommends pricking the dough with a fork before baking as a shrinkage-prevention measure. Docking alone won’t prevent shrinkage, but it works together with weights to keep the crust flat and in shape.
Why did my Pillsbury crust shrink?
Pillsbury pie crust most commonly shrinks because it was unrolled cold and then stretched to fit the pan. Cold dough is stiff, and the instinct is to pull it to cover the pan — but that pulling motion tightens gluten strands that then contract in the oven. The fix: let the Pillsbury crust rest at room temperature for 15 minutes before unrolling, then drape it over the pan without stretching. If it doesn’t reach the edges, don’t force it. Also, Pillsbury crusts have lower fat content than homemade versions, which provides less gluten-coating protection. Always follow the second chill (Step 5) with store-bought crusts — it matters more, not less, than with homemade dough.
Butter vs. shortening for crusts?
For most home bakers, a 50/50 blend of butter and shortening produces the best overall result — rich flavor from the butter, tender flakiness and lower shrinkage risk from the shortening. All-butter crusts have the best flavor but the highest shrinkage risk, because butter’s water content contributes to gluten development. All-shortening crusts (like Crisco) are the most beginner-friendly because shortening coats flour particles and blocks water-gluten interaction, as confirmed by Texas A&M University’s review on lipid shortenings (2019). Lard is a strong traditional choice for savory pies — very flaky, lower shrinkage risk, but with a distinct flavor not everyone prefers. Start with the blend, then experiment once you’ve mastered the technique.
How to stop single crusts shrinking?
The most reliable method for a single blind-baked crust is to chill it twice and use plenty of weights. Chill the dough disc for at least 1 hour before rolling (Stage 1 of The Relax-Then-Weigh Method), then chill the fitted, crimped crust for another 30 minutes before baking (Stage 2). When blind baking, fill the parchment-lined crust with pie weights or dried beans all the way to the top of the crust walls — not just the bottom. Insufficient weights are the most common reason a single crust still shrinks despite other precautions. The sides need lateral support throughout the entire first phase of baking, until the crust structure sets and can hold itself in place.
Conclusion
For home bakers dealing with a crust that slumps, snaps back, or loses its design, learning how to stop pie crust from shrinking requires a systematic fix using The Relax-Then-Weigh Method. Pie crust shrinks because of over-developed gluten tension combined with physical unsupported collapse in the oven — two distinct problems that require two distinct solutions. Research from Utah State University Extension and Iowa State University Extension confirms that rerolling, stretching, and skipping chilling are the primary causes, while fat type (particularly the gluten-coating effect of shortening, per Texas A&M University, 2019) determines how much room for error your dough has from the start.
The Relax-Then-Weigh Method works because it targets both failure stages at once. The double chill — 1 hour for the dough disc, 30 minutes for the shaped crust — releases gluten tension before it ever reaches the oven. The weights hold the relaxed crust physically in place while the fat melts and the structure sets. Neither stage alone is sufficient; together, they solve the problem reliably and repeatably.
Your next step is simple: make one pie using all 7 steps in sequence. Don’t skip the second chill, fill those weights to the top of the crust wall, and use a metal pan. Most bakers who try this method see a noticeable difference on the very first attempt — a crust that holds its shape, keeps its crimp, and looks exactly the way it did before it went into the oven.

Dave King
Recipe developer and writer at Quick Dish Cookbook.
![How Long to Cook Pork Shoulder at 250°F [Chart]](https://quickdishcookbook.com/wp-content/uploads/2026/07/pork-shoulder-cook-time-250f-720x450.webp "How Long To Cook Pork Shoulder At 250°F [Chart] 9")