Using a pressure cooker for canning foods is easy and efficient. It helps preserve your food safely and extends its shelf life.
Canning with a pressure cooker might seem daunting at first, but it’s a straightforward process once you understand the basics. Many home cooks use pressure cookers to can vegetables, fruits, and even meats. The high pressure ensures that your food is sealed and stored properly, preventing spoilage and bacteria growth.
Plus, it’s a great way to enjoy seasonal produce all year round. In this guide, you will learn step-by-step instructions to confidently use a pressure cooker for canning. Whether you’re a beginner or looking to refine your skills, this article will provide you with the knowledge you need. Let’s get started on your canning journey!

Benefits Of Pressure Canning
Using a pressure cooker for canning foods is a great way to preserve your favorite fruits, vegetables, and meats. Pressure canning helps in keeping foods safe and tasty for a long time. It is important to know how to use a pressure cooker properly to get the best results. Let’s look at the benefits of pressure canning and how it can help you store food better.
Also Read: Spicy Bowl Recipe: Sizzle Your Taste Buds with Flavor
Nutritional Value
Pressure canning helps in keeping the nutritional value of your food. When you can foods using a pressure cooker, the process is quick. This means that vitamins and minerals are better preserved. Here are some benefits:
- Fruits and vegetables retain their vitamins and minerals.
- Meats keep their protein content.
- Foods maintain a better taste.
Let’s compare the nutritional value of fresh, canned, and pressure-canned foods:
| Food Type | Fresh | Canned | Pressure-Canned |
|---|---|---|---|
| Vitamins | High | Medium | High |
| Minerals | High | Medium | High |
| Protein | High | Medium | High |
As seen in the table, pressure-canned foods can retain most of their nutritional value. This makes it a smart choice for long-term food storage.
Shelf Life
One of the biggest benefits of pressure canning is the extended shelf life of foods. Properly canned foods can last for years. This means you can enjoy your favorite foods even out of season. Here are some points to consider:
- Most pressure-canned foods last 1 to 5 years.
- Low-acid foods like meats and vegetables have a longer shelf life.
- High-acid foods like fruits and tomatoes last about 12-18 months.
Here’s a table showing the shelf life of different pressure-canned foods:
| Food Type | Shelf Life |
|---|---|
| Meats | 3-5 years |
| Vegetables | 2-5 years |
| Fruits | 1-2 years |
| Tomatoes | 1-1.5 years |
Using a pressure cooker for canning ensures that your food remains safe to eat. This can save you money and reduce food waste. Keep your pantry stocked with healthy options all year round.
Also Read: Cowboy Butter Chicken Wings Recipe: Irresistibly Delicious
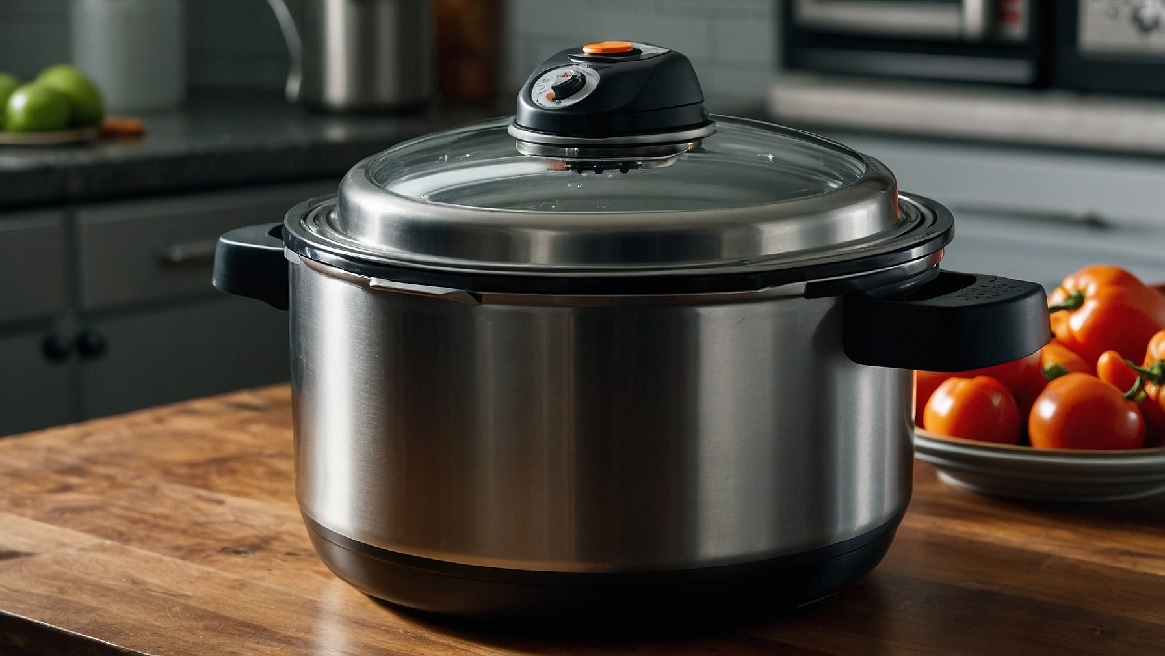
Choosing The Right Pressure Cooker
Preserving food at home can be a rewarding experience. Using a pressure cooker for canning foods is one of the most effective methods. Pressure canning is essential for preserving vegetables, meats, and other low-acid foods safely. Choosing the right pressure cooker is crucial to ensure proper food preservation and safety. Let’s explore the different types of pressure cookers and size considerations for canning.

Types Of Pressure Cookers
There are several types of pressure cookers available for home canning techniques. Understanding the differences can help you select the best pressure cookers for canning.
These are the most common type. They are used on a stovetop and come in various sizes. Key features include:
- Durable construction
- Manual pressure control
- Suitable for small to medium batches
Electric pressure cookers are convenient and easy to use. They have digital controls and automatic settings. Benefits include:
- Easy to operate
- Consistent pressure maintenance
- Good for beginners
Specifically designed for canning, pressure canners are larger and maintain higher pressure levels. They are ideal for:
- Large batches
- Ensuring food safety
- Preserving low-acid foods
Choosing the right type depends on your needs and the amount of food you plan to preserve.
Size Considerations
Choosing the right size pressure cooker is important for effective canning. Size impacts the number of jars you can process at once and the overall efficiency of your food preservation methods.
These are suitable for small families or occasional canning. They typically hold:
- 4-6 pint jars
- Limited batch sizes
- Convenient storage
Medium-sized pressure cookers can handle moderate canning needs. They are ideal for:
- 8-10 pint jars
- Regular canning activities
- Balanced capacity and efficiency
For serious canning enthusiasts, large pressure cookers are the best choice. They can process:
- 12-16 pint jars
- Large batches
- Extended canning sessions
Consider your canning needs and kitchen space to choose the best size for your pressure cooker. Ensuring you have the right size will make preserving food easier and more efficient.
Preparing For Canning

Canning foods using a pressure cooker is a great way to preserve food at home. This method, known as pressure canning, allows you to keep your fruits, vegetables, and meats fresh for longer periods. It is essential to prepare properly before starting the canning process. Having the right tools and selecting the best ingredients are key steps for successful food preservation.
Essential Tools
To begin pressure canning, you will need several essential tools. These tools ensure that the high-pressure cooking process is safe and effective. Here’s a list of items you will need:
- Pressure Cooker or Pressure Canner: This is the most important tool. Make sure it is designed for canning.
- Canning Jars: Use jars specifically made for canning. They must be durable and able to withstand high pressure.
- Lids and Bands: Ensure you have enough lids and bands for your jars. These seal the jars properly.
- Jar Lifter: This helps you safely remove hot jars from the cooker.
- Funnel: A funnel makes filling jars easier and prevents spills.
- Use this tool to remove air bubbles from filled jars.
It is also important to have a kitchen timer to keep track of the cooking time. Maintaining the right pressure level is crucial. The pressure gauge on your cooker helps monitor this.
Having a clean workspace is essential. Make sure all tools are clean and sterilized before you start canning. Following these safety tips ensures the canning process is smooth and your food is preserved correctly.
Ingredient Selection
Selecting the right ingredients is vital for successful home canning. Start with fresh, high-quality produce. Here are some tips for choosing the best ingredients:
- Freshness: Use fresh fruits and vegetables. Avoid bruised or overripe items.
- Cleanliness: Wash all produce thoroughly before canning.
- Quality: Choose high-quality meats. Trim excess fat before canning.
- Seasonality: Use seasonal produce for best flavor and nutrition.
Preparing ingredients properly is also important. For fruits and vegetables, peel, core, and cut them into uniform pieces. This ensures they cook evenly.
For meats, cut them into small pieces and season as desired. Always follow tested recipes for pressure canning. This ensures safety and quality.
Remember, proper ingredient selection leads to better food preservation. Your canned foods will taste fresher and last longer. Following these tips will help you achieve successful pressure canning at home.
Canning Process Steps
Preserving food at home is a valuable skill. Pressure canning is a great method for this. Canning foods with a pressure cooker ensures long-term storage. Let’s explore the steps in the canning process.
Filling Jars
Filling jars is a critical step in home canning techniques. First, choose the right jars. Make sure they are clean and free of cracks. Use canning jars designed for high-pressure canning. Next, prepare your food. Cut vegetables into uniform pieces. This ensures even cooking.
Follow these steps:
- Prepare jars and lids.
- Fill jars with food, leaving space at the top.
- Remove air bubbles with a non-metallic tool.
- Wipe the jar rims clean.
- Place lids on jars and screw bands until fingertip tight.
Filling the jars correctly is important. It helps in the proper sealing and processing of the food. Always follow safety tips for canning to avoid contamination. This ensures your canned food is safe to eat.
Sealing And Processing
The jar sealing process is vital in pressure canning. Place the filled jars in the pressure cooker. Ensure they are not touching each other. Add the required amount of water to the cooker. Close the lid securely. Set the cooker to the correct pressure according to your food type.
Here are some general guidelines:
| Food Type | Pressure (PSI) | Cooking Time (Minutes) |
|---|---|---|
| Vegetables | 10 | 35 |
| Meat | 15 | 75 |
Once the pressure is reached, start timing the process. Monitor the pressure to ensure it remains steady. After the time is up, turn off the heat. Let the pressure drop naturally. Do not rush this step. It is crucial for proper sealing.
Finally, remove the jars from the cooker. Place them on a towel to cool. Check the seals after 24 hours. Properly sealed jars will have a concave lid. Any unsealed jars should be refrigerated and used promptly. Successful sealing and processing ensure long-term food preservation.
Frequently Asked Questions
How Do I Use My Pressure Cooker For Canning?
Use a pressure cooker designed for canning. Follow the manufacturer’s instructions. Sterilize jars, fill them, and seal lids. Maintain recommended pressure and time.
How To Pressure Can For Beginners?
Start with clean jars and lids. Place your food in jars, leaving headspace. Seal jars and place them in the pressure canner. Add water according to instructions. Lock the lid and heat until pressure builds. Process for the recommended time.
Let the pressure release naturally. Remove jars and cool.
How To Use A Pressure Cooker For The First Time?
To use a pressure cooker for the first time, add ingredients and liquid. Secure the lid and set the pressure. Place on heat and wait for pressure to build. Reduce heat, cook for the required time, then release pressure safely.
What Foods Cannot Be Pressure Canned?
Dairy products, pasta, rice, and certain thickening agents cannot be pressure canned. Avoid canning pureed vegetables, flour, and grains.
Conclusion
Using a pressure cooker for canning is simple and efficient. Follow safety guidelines closely. Prepare jars and lids properly. Ensure pressure cooker settings are correct. Monitor pressure levels during cooking. Let jars cool before storing. Canning preserves food and reduces waste.
Enjoy homemade preserves all year long. Practice makes perfect, so keep trying. Soon, you’ll be canning like a pro. Happy canning!
