
What’s in this guide
- What You'll Need Before You Start
- Step 1: Wash and Pierce Your Sweet Potato
- Step 2: Wrap in a Damp Paper Towel
- Step 3: Microwave on High for 5 to 7 Minutes
- Step 4: Flip Halfway Through Cooking
- Step 5: Check Doneness and Rest
- Adjust Cook Time by Size & Wattage
- How to Verify Your Results
- Troubleshooting Common Mistakes
- Advanced Tips: Hybrid Method & Flavors
- Sweet Potato Health and Nutrition Facts
- Frequently Asked Questions
- Wrapping Up: Quick & Easy Sweet Potatoes
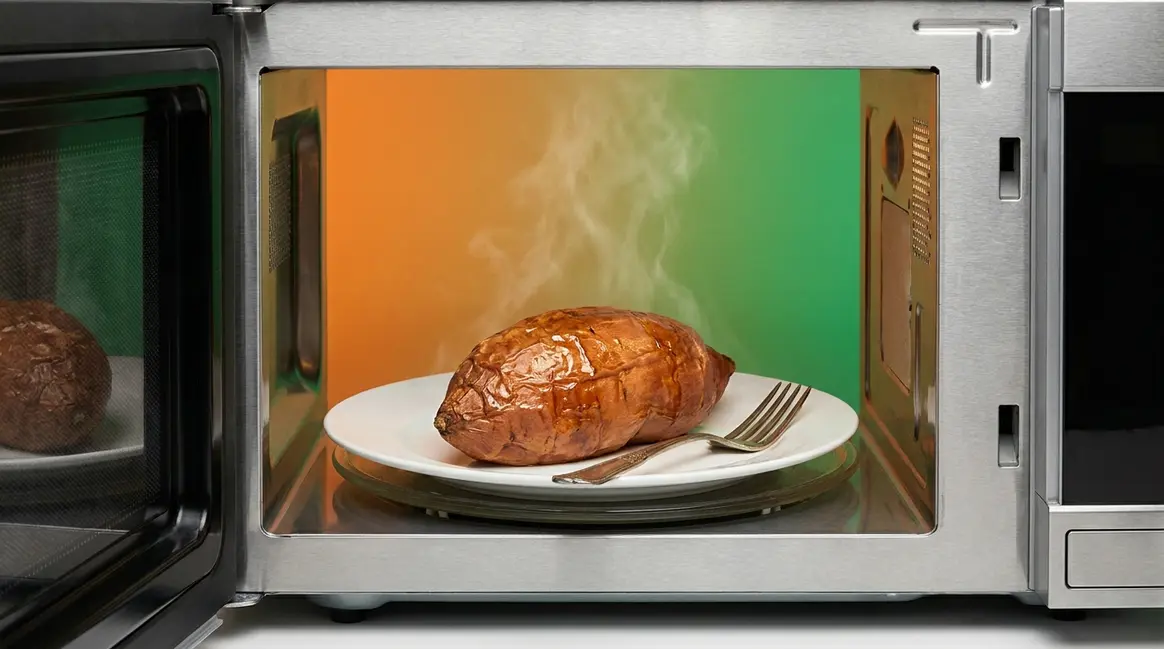
To cook a sweet potato in the microwave, pierce it 4–6 times with a fork, wrap it in a damp paper towel, and microwave on high for 5 to 7 minutes, flipping halfway through. This 5-step process takes under 10 minutes. The potato is done when a fork slides in easily at the center. Cooking time varies by size and wattage — see the chart below.
You set the timer for 5 minutes, pulled out your sweet potato, and found a rock-hard center. Or maybe you skipped the piercing step and ended up cleaning starchy shrapnel off the inside of your microwave. Either way, you know the frustration.
“Microwaving sweet potatoes is one of my favorite kitchen shortcuts. They’re perfectly soft and fluffy in under 10 minutes, which makes getting a healthy meal on the table so much easier.”
That result — soft, fluffy, perfectly cooked — is exactly what you want. The problem isn’t your microwave. Every guide online gives you one generic time that ignores your microwave’s wattage and your potato’s actual size. This guide shows you exactly how long to cook sweet potato in microwave settings that match your setup, using The Wattage-Adjusted Sweet Potato Method — a precise framework based on university extension research. You’ll also get the hybrid microwave-then-oven technique for crispy skin, plus a full health section. Five steps, under 10 minutes, no guessing.
What You’ll Need Before You Start
You only need a handful of items — most are already in your kitchen. Total time is under 10 minutes, making this one of the fastest kitchen shortcuts for a nutritious side dish.
Tools:
- Microwave — any wattage works; you’ll adjust time using the chart in Step 3
- Microwave-safe plate — a plate rated safe for microwave use (check the bottom for a microwave symbol); it catches drips and provides a stable surface
- Fork — for piercing the skin and testing doneness
- Damp paper towel — traps steam around the potato, keeping it moist and fluffy instead of dry and rubbery
- Oven mitts or a folded kitchen towel — the potato and plate get very hot; protect your hands
Ingredients:
- 1 sweet potato (any variety, any size — Beauregard, Jewel, Japanese, or purple all work)
- Optional toppings: olive oil, butter, salt, cinnamon, or black beans for serving
Skill level: Beginner-friendly. No special equipment needed.
A note on timing: Cooking time varies based on your microwave’s wattage — the power level of your appliance, usually between 700 and 1,200 watts. University of Nebraska-Lincoln guidelines recommend microwaving a whole sweet potato for 5 to 8 minutes, rotating halfway through for even cooking. The Wattage-Adjusted Sweet Potato Method chart in Step 3 gives you the exact time for your setup.
Step 1: Wash and Pierce Your Sweet Potato
Washing removes surface dirt and any residue from handling. Piercing is the step that prevents your potato from exploding — steam needs somewhere to escape, and without holes, it has no way out.
Here’s what happens when you skip the piercing step: the sweet potato’s skin acts like a sealed container. As the microwave heats the moisture inside, steam builds up rapidly. Without vent holes, that pressure has nowhere to go — and it releases all at once, splitting the potato open or sending hot starchy chunks into your microwave. Four to six small holes are all it takes to prevent this completely.
How to do it:
- Scrub the sweet potato under cool running water for 20–30 seconds, rubbing away any dirt with your fingers or a vegetable brush.
- Pat it dry with a paper towel — a dry surface helps the next step’s paper towel stay in place.
- Hold the potato steady on a cutting board or plate. Pierce it 4–6 times with a fork, spacing the holes around the entire surface — not just the top.
- Make sure holes go through both the skin and slightly into the flesh, roughly ¼ inch deep.
Do not peel the skin. The skin acts as a natural container during cooking, holding in moisture and helping the flesh cook evenly. You can always peel after.
The prep steps are the same regardless of your microwave’s wattage — only the timing changes, and The Wattage-Adjusted Sweet Potato Method in Step 3 handles that.
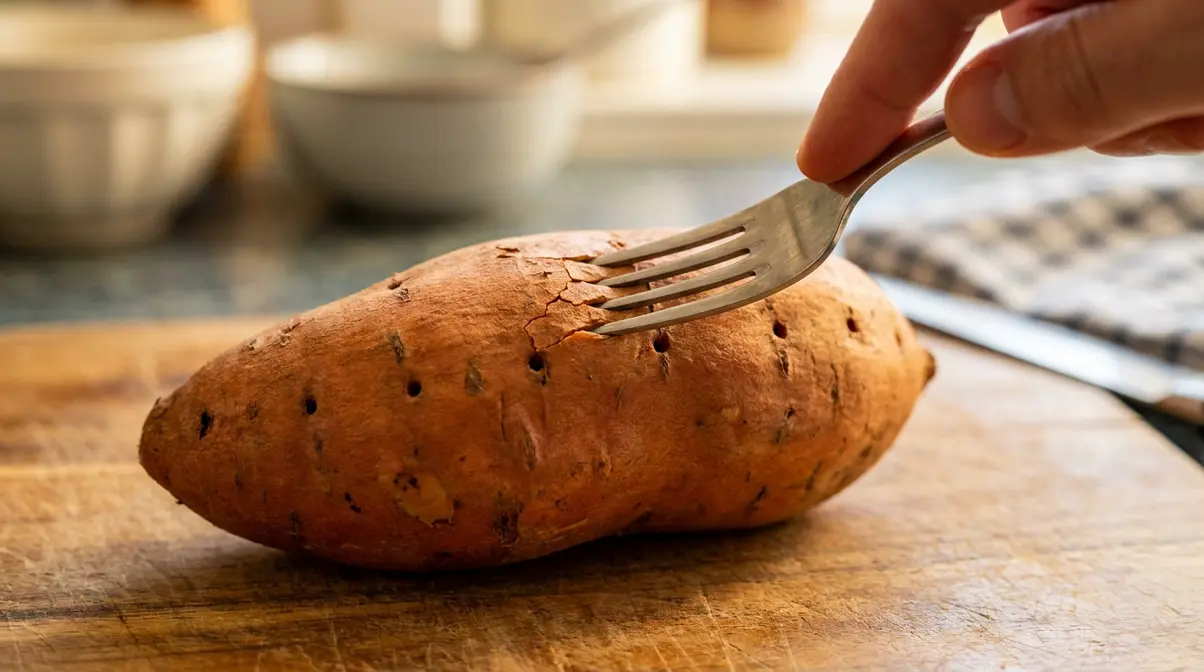
Checkpoint: Your potato should have 4–6 visible fork holes distributed around its surface and feel dry to the touch. You’re ready for Step 2.
Step 2: Wrap in a Damp Paper Towel
A damp paper towel turns your microwave into a mini steamer. Without it, the potato’s surface dries out before the center finishes cooking — leaving you with rubbery skin and a hard middle. The moisture in the towel creates a steam pocket that surrounds the potato and cooks the flesh from the outside in.
How to do it:
- Run a paper towel under the tap for 2–3 seconds.
- Wring it out firmly so it’s damp but not dripping — a soaking wet towel creates too much steam and can make the skin soggy.
- Wrap the paper towel around the entire potato, covering as much surface area as possible.
- Place it on a microwave-safe plate — a plate labeled safe for microwave use (look for a microwave symbol on the bottom, or check the manufacturer’s website if unsure). The plate catches any moisture and keeps the potato stable.
No paper towel? No problem. Place the pierced potato in a microwave-safe bowl, add 2 tablespoons of water to the bottom, and cover the bowl with a microwave-safe plate. This creates the same steam environment and works just as well if you need to microwave without paper towel.
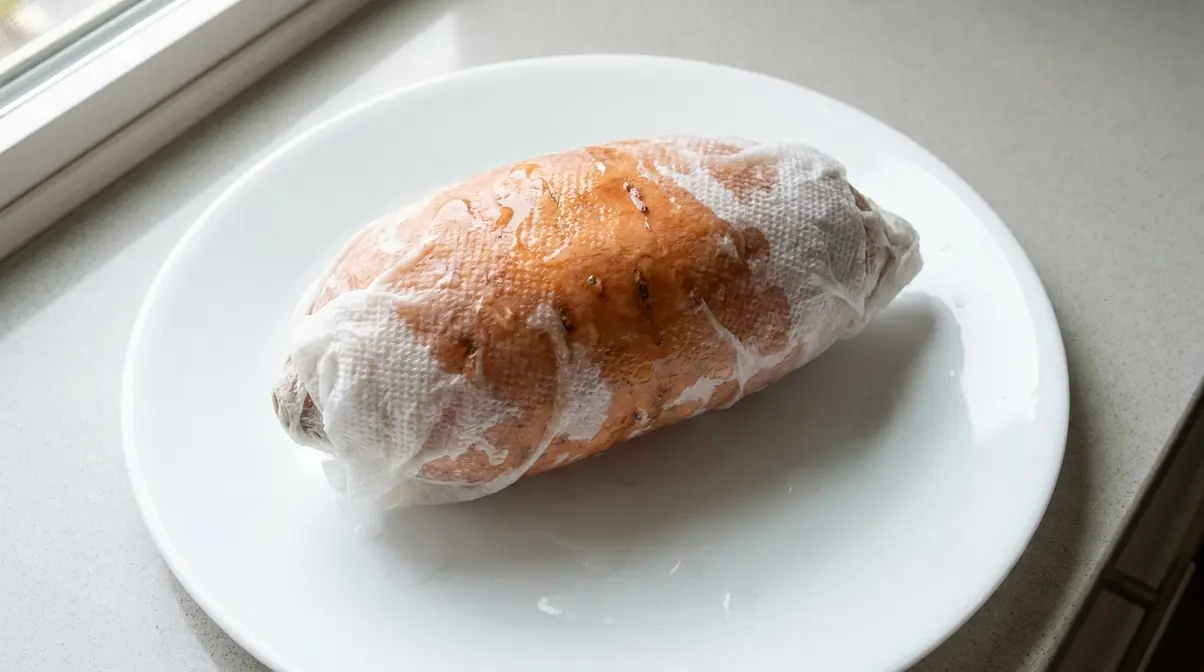
Checkpoint: Your potato is fully wrapped and sitting on a microwave-safe plate. You’re ready to set the timer.
Step 3: Microwave on High for 5 to 7 Minutes
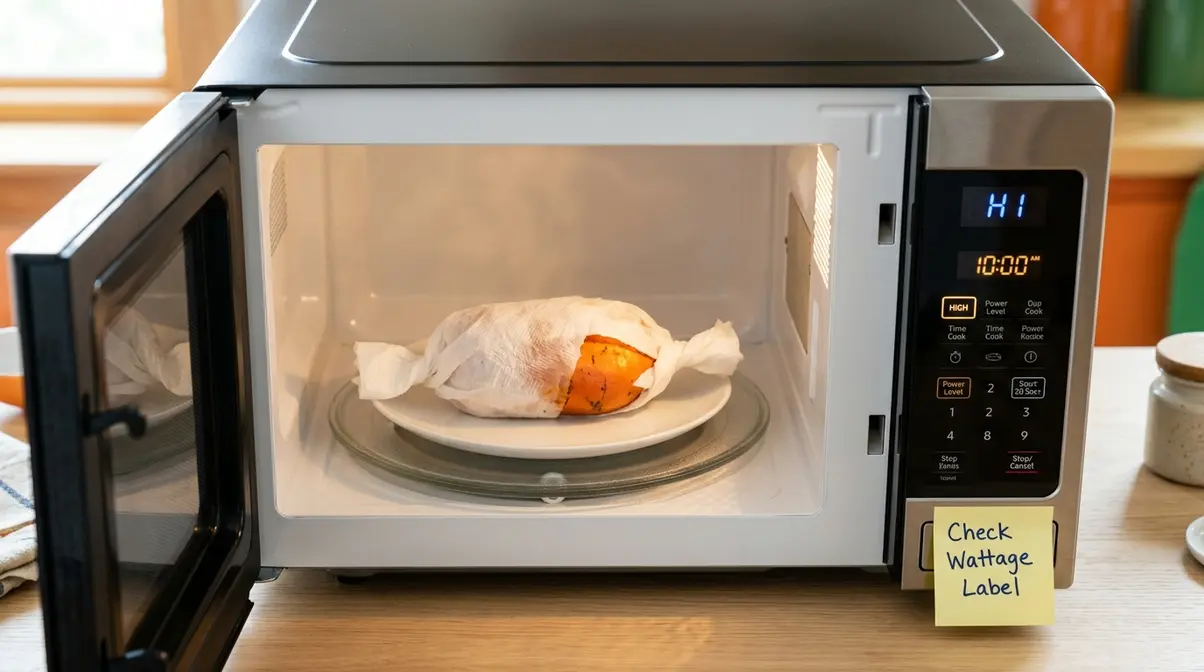
When determining how long to cook sweet potato in microwave, remember that according to Clemson University Cooperative Extension, a standard 8-ounce sweet potato needs 4 to 6 minutes on high in the microwave. But that assumes a 1,000-watt appliance — and if your microwave runs at 700 watts, that same potato needs 8 to 10 minutes. This is exactly why the generic “5-minute rule” fails so often.
Set your microwave to HIGH (100% power). Lower power settings extend cooking time significantly and cook unevenly.
Find your microwave’s wattage before you start. Wattage is simply how powerful your microwave is — a higher number means faster cooking. Check the label inside your microwave door frame, the back panel of the appliance, or your user manual. Most home microwaves fall between 700 and 1,200 watts.
Wattage-Adjusted Time Chart
This is the core of The Wattage-Adjusted Sweet Potato Method — a wattage × size time matrix that no generic recipe guide provides. Find your potato’s approximate size (use the fist rule: a medium potato is roughly the size of your closed fist) and your microwave’s wattage, then start at the lower end of the range.
| Potato Size | 700W | 900W | 1,000W | 1,200W |
|---|---|---|---|---|
| Small (~4 oz) | 6–7 min | 5–6 min | 4–5 min | 3–4 min |
| Medium (~6–8 oz) | 8–10 min | 7–8 min | 5–7 min | 4–6 min |
| Large (~10–12 oz) | 10–12 min | 9–10 min | 7–9 min | 6–8 min |
Times are for whole, unpeeled sweet potatoes cooked on HIGH. Flip halfway through. Start checking doneness at the lower end of the range.
Editorial synthesis based on Clemson University (4–6 min/8 oz at ~1,000W), University of Nebraska-Lincoln (5–8 min), and Kansas State University Extension guidance. Times may vary with individual microwave models.
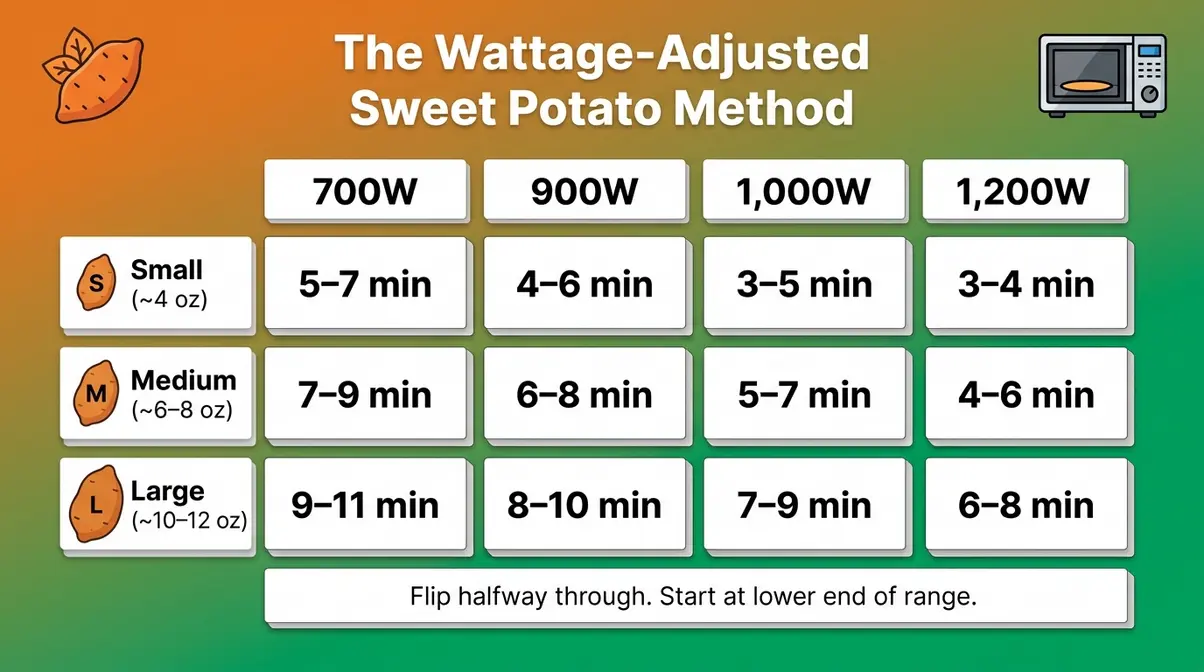
How to find your size: A small sweet potato (~4 oz) fits easily in your palm. A medium (~6–8 oz) is about the size of your closed fist. A large (~10–12 oz) is noticeably bigger and heavier than your fist.
You can also use how long to microwave a sweet potato as a quick reference alongside this chart.
Checkpoint: You’ve set the timer based on your potato’s size and your microwave’s wattage. Now move to Step 4 — flipping halfway through is essential for even cooking.
Step 4: Flip Halfway Through Cooking
At the halfway point, flip your potato over. Microwaves heat unevenly — the side touching the plate absorbs more energy because it sits closer to the heating element. Flipping balances the exposure and prevents a hard, undercooked center on one side.
As University of Nebraska-Lincoln guidelines recommend, rotating sweet potatoes halfway through microwave cooking ensures even doneness — a step many beginners skip and then wonder why one side is still firm.
How to do it:
- At the halfway point of your total cook time (for example, at 3 minutes into a 6-minute cook), open the microwave.
- Use oven mitts or fold a kitchen towel into a thick pad before touching anything. The plate and the potato will be very hot at this point — this is not optional.
- Flip the potato to its other side.
- Check the paper towel. If it has dried out completely, replace it with a freshly dampened one before continuing.
- Close the microwave and cook for the remaining time.
What you’ll see: After flipping, the bottom side of the potato may look slightly deflated or wrinkled where it was resting on the plate — that’s completely normal. The flesh underneath is softening correctly.
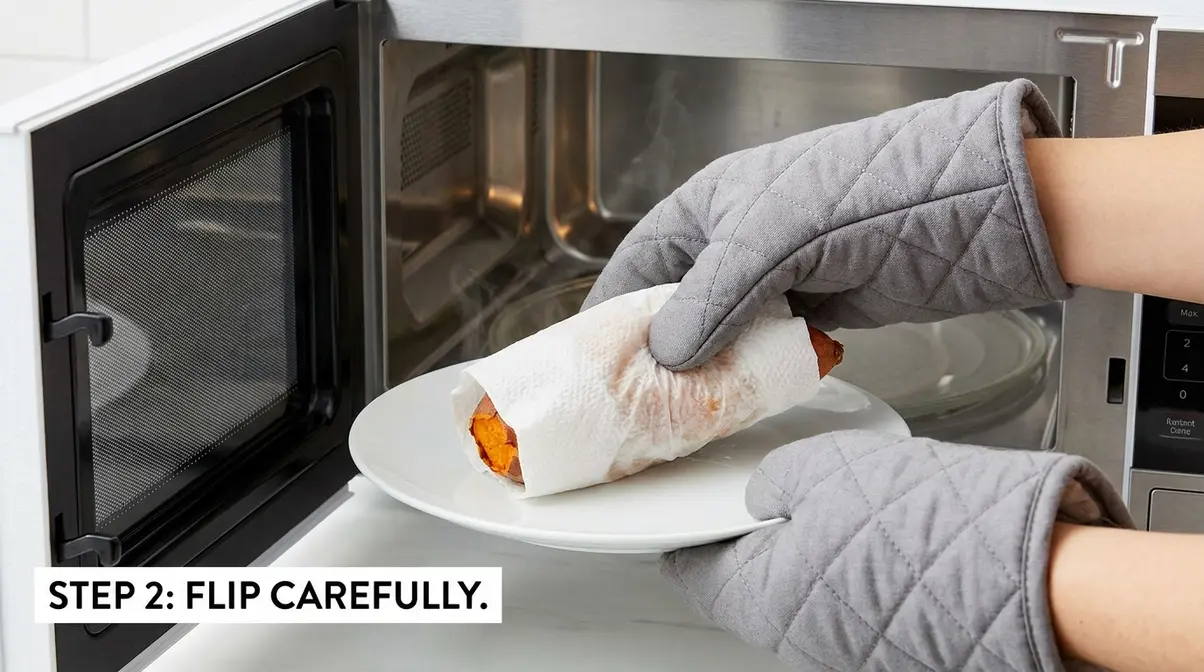
Checkpoint: Your potato is flipped and back in the microwave for the remaining cook time. You’re almost done.
Step 5: Check Doneness and Rest
Your potato is done when a fork slides into the center without any resistance — this is called fork-tender (the fork glides in with no pushing needed). If it still feels firm, add 1 minute and test again. Never judge doneness by time alone.
The fork-tender test:
- Remove the potato from the microwave using oven mitts.
- Carefully unwrap one end of the paper towel — just enough to expose the thickest part of the potato.
- Insert a fork into the center of the thickest section. Push gently.
- If the fork slides in easily → done. Proceed to resting.
- If the fork meets resistance → add 1 minute, then test again. Repeat in 1-minute increments only — jumping to 3 or 5 extra minutes risks overcooking and drying out the flesh.
The 2-minute rest — don’t skip this. Leave the potato wrapped on the counter for 2 full minutes before opening it. The potato keeps cooking after you take it out, just like a steak resting on a cutting board — this is called residual heat, and it finishes the center of the potato gently. Steam also redistributes during this time, creating the fluffy, even texture inside that makes a microwave sweet potato genuinely satisfying.
For readers with a food thermometer: a perfectly cooked microwave sweet potato reaches an internal temperature of approximately 200°F — the same doneness target used by America’s Test Kitchen for their microwave-then-oven method.
Visual doneness cue: The skin should look slightly wrinkled, and the potato should yield gently when squeezed through the towel with an oven-mitted hand.
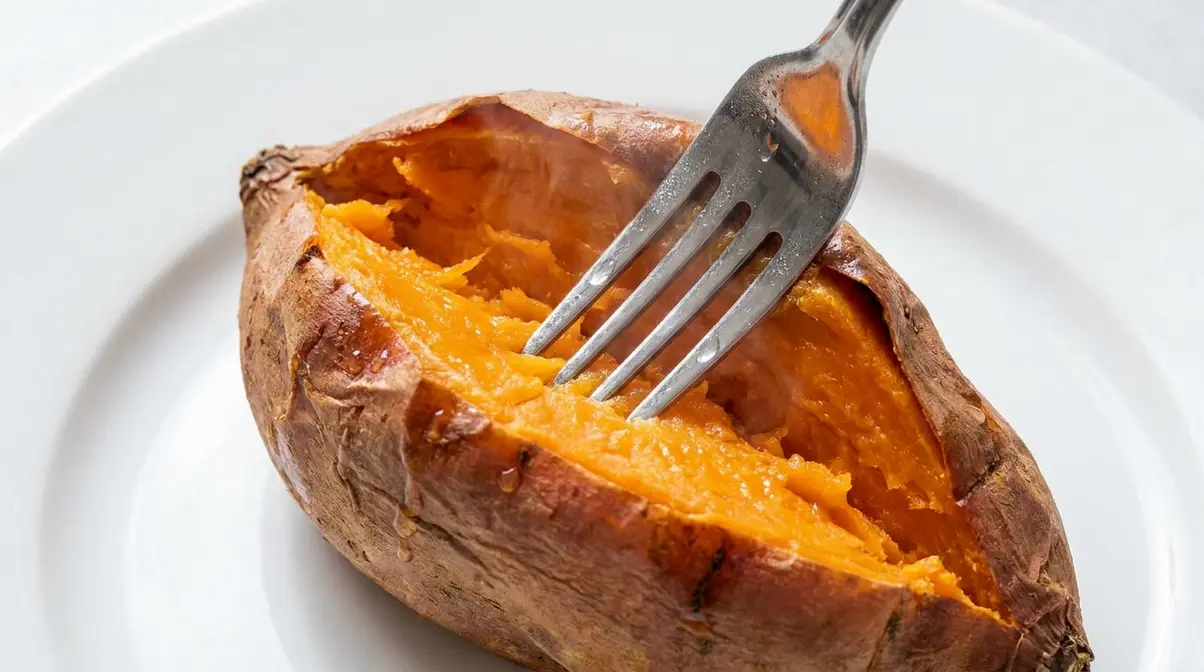
Checkpoint: Fork slides in easily, 2-minute rest complete. Cut open, add your toppings, and serve immediately.
Adjust Cook Time by Size & Wattage
If you’re calculating how long to cook sweet potato in microwave when making two at once, plan for 10 to 12 minutes in a 1,000-watt microwave — roughly 5 to 6 minutes per potato. This section extends The Wattage-Adjusted Sweet Potato Method to cover the two scenarios most guides completely ignore: cooking multiple potatoes simultaneously, and sizing up or down when you don’t own a kitchen scale.
Cooking Two or More Sweet Potatoes
Each additional potato adds 3 to 4 minutes to your total cook time. The key rule: arrange them in a single layer on the plate — never stack them. Stacking creates uneven heating and guarantees a hard center in the bottom potato.
| Number of Potatoes (medium, ~6–8 oz each) | 700W | 900W | 1,000W | 1,200W |
|---|---|---|---|---|
| 1 potato | 8–10 min | 7–8 min | 5–7 min | 4–6 min |
| 2 potatoes | 12–14 min | 10–12 min | 9–11 min | 7–9 min |
| 3 potatoes | 16–18 min | 14–16 min | 12–14 min | 10–12 min |
For 3 or more potatoes, consider cooking in two batches. Batch cooking gives you more consistent results because microwaves heat less efficiently when space is crowded.
Sizing Without a Scale
You don’t need a kitchen scale to estimate potato size. Use the fist rule:
- Small (~4 oz): Fits easily in your palm; smaller than your closed fist
- Medium (~6–8 oz): Roughly the size of your closed fist
- Large (~10–12 oz): Noticeably bigger and heavier than your fist — it’s a two-hander
When in doubt, go with the smaller time estimate first. You can always add a minute; you can’t un-cook a dry potato.
Japanese and Purple Sweet Potatoes
Japanese sweet potatoes (white or cream-colored flesh, reddish skin) and purple sweet potatoes cook on the same schedule as standard orange-flesh varieties of the same size. No timing adjustment is needed. The only difference you may notice: Japanese varieties tend to be denser and may need an extra 30–60 seconds at the upper end of the range. Always use the fork-tender test as your final check.
For a quick reference by variety and size, see sweet potato microwave cooking times by size alongside this chart.
How long to microwave sweet potato?
A medium sweet potato (6–8 oz) takes 5 to 7 minutes in a standard 1,000-watt microwave on HIGH. Smaller potatoes (around 4 oz) need 4 to 5 minutes, and larger ones (10–12 oz) may take 7 to 9 minutes. Wattage matters significantly — a 700-watt microwave needs 8 to 10 minutes for the same medium potato. Always flip halfway through and use the fork-tender test (fork slides in with no resistance) as your final check, not the timer.
How to Verify Your Results
A perfectly cooked microwave sweet potato gives you clear visual and tactile signals — you don’t need to guess. University testing and culinary consensus agree on three reliable checks you can do in under 30 seconds.
The three-point doneness check:
- Fork test (primary): Insert a fork into the thickest part of the center. It should glide in without resistance. This is the definitive test — no timer can replace it.
- Squeeze test: With an oven-mitted hand, gently squeeze the potato through the paper towel. A done potato yields softly, like a ripe avocado. Firmness means it needs more time.
- Visual check: The skin should look slightly wrinkled and pulled inward at the sides. A taut, smooth skin usually indicates the center still needs a minute or two.
If your potato isn’t done: Add 1-minute increments only. Jumping to 3 or 5 extra minutes is the most common way to overcook a sweet potato and dry it out completely.
What the inside should look like: When you cut it open after resting, the flesh should be bright orange (for standard varieties), moist, and pull apart easily with a fork. If you see any white or pale areas near the center, it needs another minute. Dry, stringy flesh means it was overcooked.
Troubleshooting Common Mistakes
Recipe testing communities consistently report the same handful of microwave sweet potato problems. Here’s what’s going wrong and exactly how to fix it.
Dry, Rubbery Texture
What happened: You skipped the damp paper towel, or the towel dried out completely before the potato finished cooking.
Fix it: Always start with a damp (not dripping) paper towel. For longer cook times — especially for large potatoes at 700W, where you’re cooking for 10–12 minutes — check the towel at the flip point and re-dampen it if it’s completely dry. The alternative bowl-and-water method (2 tablespoons of water, covered plate) is actually more reliable for large potatoes because the water source doesn’t dry out.
Hard Center Despite Correct Time
What happened: Your microwave’s actual wattage is lower than the label suggests (older microwaves lose output over time), or your potato was larger than estimated.
Fix it: Add time in 1-minute increments and re-test with the fork after each. If your potato consistently needs more time than the chart suggests, assume your microwave runs about one wattage tier lower and adjust accordingly going forward.
Exploded or Burst Potato
What happened: You didn’t pierce the skin, or the holes were too shallow or too few.
Fix it: Always pierce 4–6 times, all around the potato, with the fork going at least ¼ inch into the flesh. One or two holes on the top only is not sufficient — steam pressure builds from all sides.
Uneven Cooking or Hard Spots
What happened: You skipped the halfway flip, or the potatoes were stacked instead of laid flat.
Fix it: Always flip at the midpoint. For multiple potatoes, arrange in a single layer with space between each one. If your microwave has a rotating turntable, make sure it’s functioning — a stuck turntable is a common cause of hot spots.
Skin Sticking to the Paper Towel
What happened: The paper towel was too wet, causing the skin to steam-soften and adhere.
Fix it: Wring the paper towel out more firmly before wrapping. It should feel damp to the touch, not wet. Alternatively, use the bowl-and-water method, which keeps moisture below the potato rather than directly against the skin.
Advanced Tips: Hybrid Method & Flavors
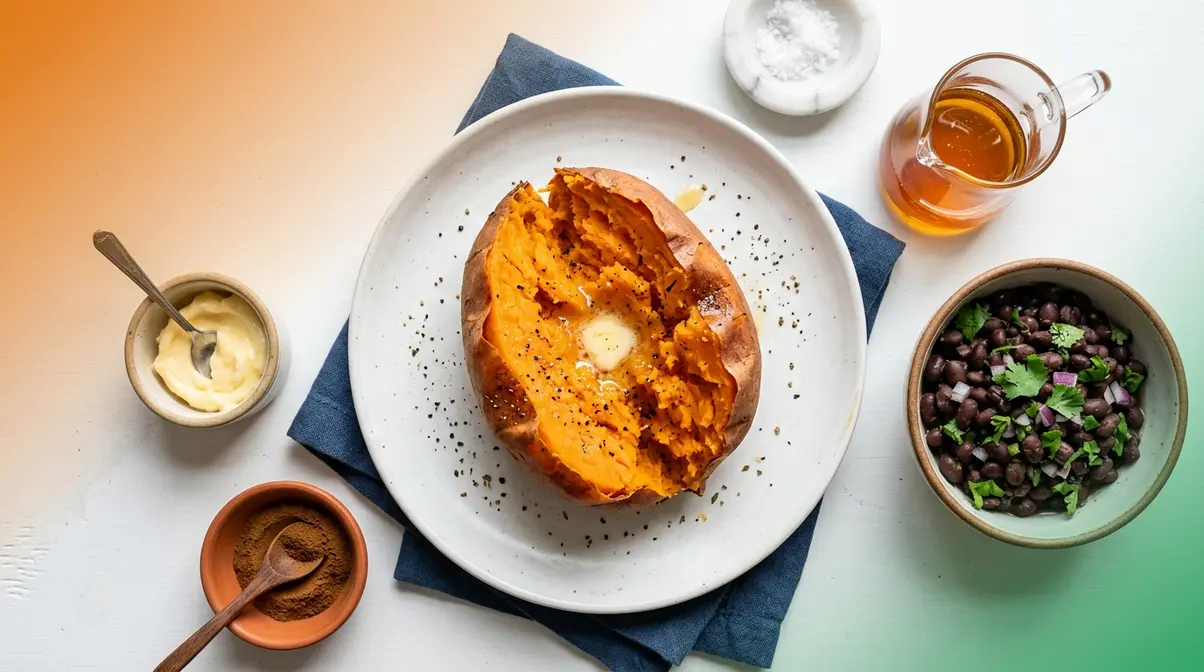
Once you’ve mastered the basic 5-step method, these techniques take your microwave sweet potato from quick and convenient to genuinely impressive.
The Microwave-Then-Oven Hybrid Method
This is the technique for anyone who wants crispy, caramelized skin without waiting an hour for a fully oven-baked potato. According to America’s Test Kitchen, microwaving a sweet potato until it reaches an internal temperature of 200°F — then finishing in a hot oven — produces a result indistinguishable from a full oven bake in a fraction of the time.
How to do it:
- Complete Steps 1–5 above. After the 2-minute rest, verify the potato has reached fork-tender doneness (or approximately 200°F with a thermometer).
- Preheat your oven to 400°F (204°C) while the potato rests.
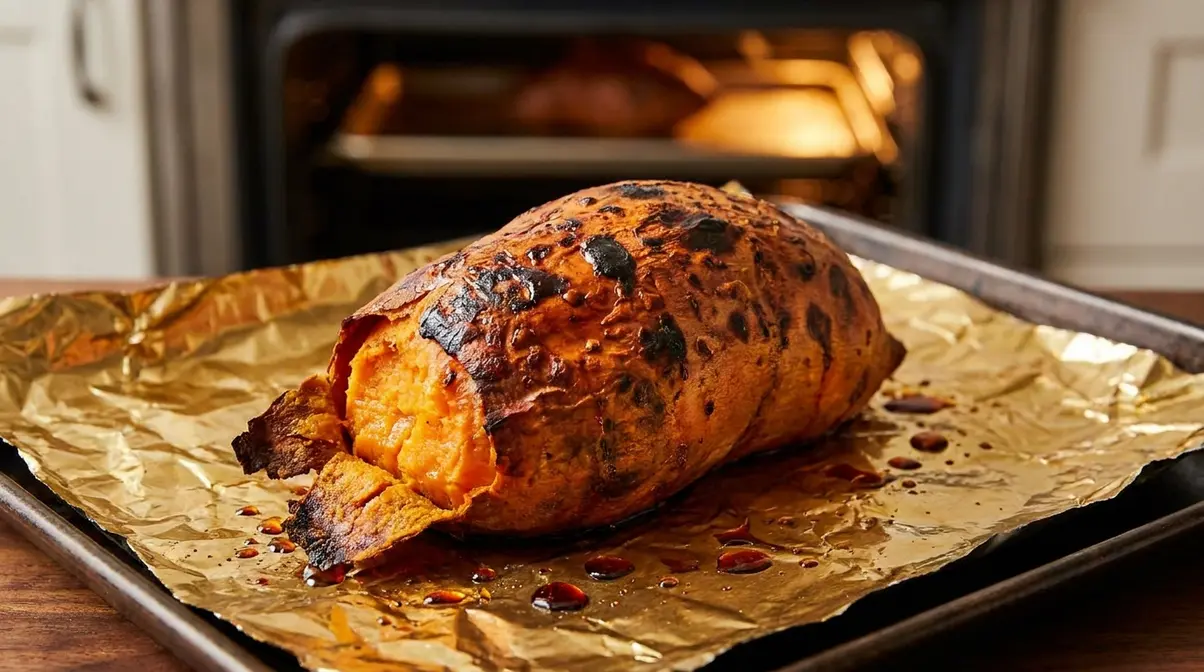
- Unwrap the potato and place it directly on the oven rack or on a foil-lined baking sheet.
- Bake for 8–12 minutes, until the skin is visibly crisp, slightly blistered, and pulls away slightly from the flesh.
- Remove and serve immediately — the skin will soften as it cools.
Why it works: The microwave handles the time-intensive internal cooking, reaching the starch-gelatinization temperature range of 170–200°F where the flesh becomes sweet and creamy. The oven then does what microwaves cannot: drive off surface moisture and create the Maillard reaction that makes the skin crispy and flavorful. Total time: 20–25 minutes versus 45–60 minutes for a traditional oven bake.
Settings reference:
| Step | Setting | Time |
|---|---|---|
| Microwave phase | HIGH (100% power) | Per wattage chart (Step 3) |
| Rest | Counter, wrapped | 2 minutes |
| Oven phase | 400°F (204°C) | 8–12 minutes |
Flavor Variations
Savory: Rub the skin with olive oil and a pinch of sea salt before the oven phase for a restaurant-style finish. Top the cooked flesh with black beans, Greek yogurt, and smoked paprika.
Sweet: After cutting open the rested potato, add a small pat of butter, a drizzle of honey, and a shake of cinnamon. The residual heat melts everything together in under a minute.
Stuffed: Microwave the potato using the 5-step method, rest it, then slice it open and scoop out most of the flesh. Mix the flesh with cream cheese, chives, and shredded cheddar, then spoon it back in and microwave for 90 seconds more. This works especially well with large potatoes.
Cut sweet potato pieces: Dice or slice sweet potatoes before microwaving and you’ll cut cooking time roughly in half. Place pieces in a microwave-safe bowl with 1 tablespoon of water, cover with a plate, and microwave on HIGH for 3–5 minutes, stirring once halfway through.
Sweet Potato Health and Nutrition Facts
Sweet potatoes are one of the most nutrient-dense vegetables available, and microwaving is actually one of the better cooking methods for preserving those nutrients. Here’s what the research says.
This information is for general educational purposes only. It is not medical or dietary advice. Always consult a qualified healthcare professional before making dietary changes.
Nutritional Profile
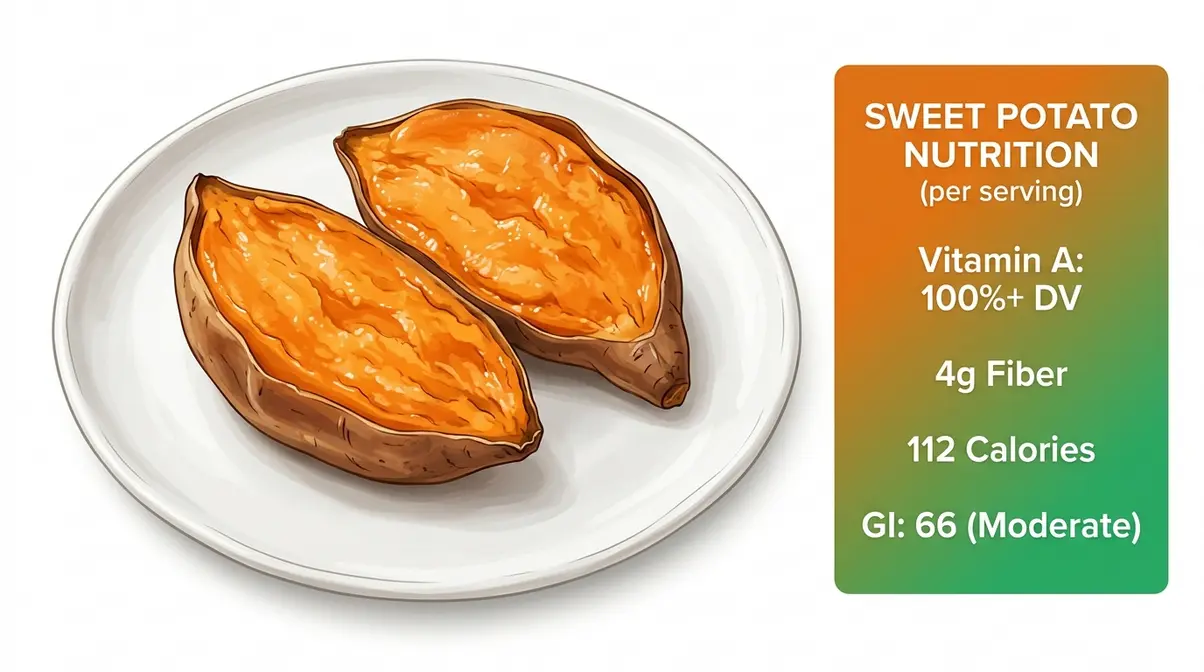
According to USDA SNAP-Ed data, a medium sweet potato (approximately 130 g) provides roughly 112 calories, 26 g of carbohydrates, 4 g of dietary fiber, 5 g of natural sugars, and 2 g of protein with essentially no fat. A 100 g baked sweet potato with skin delivers approximately 961 µg of vitamin A (RAE) — exceeding 100% of the daily value — thanks to its high beta-carotene content (USDA FoodData Central, via LeanEat, 2026).
Sweet potatoes also provide roughly 0.6–0.7 mg of non-heme iron per 100 g (approximately 3–4% of the adult daily value), according to USDA FoodData Central measurements. They are not a primary iron source on their own, but their vitamin C content can enhance the absorption of non-heme iron from other foods eaten in the same meal.
Glycemic Index and Blood Sugar
Glycemic index (GI) is a measure of how quickly a food raises blood sugar — lower numbers mean a slower, steadier rise. According to USDA Agricultural Research Service data (Allen et al., 2012), microwaved sweet potato flesh has a moderate glycemic index of 66. Steamed sweet potato registers slightly lower at GI 63, while boiled sweet potato falls into the low-GI range at approximately 41 — because boiling retains more resistant starch that slows digestion.
A GI of 66 places microwaved sweet potato in the moderate range. Pairing it with protein (chicken, Greek yogurt), fat (olive oil, avocado), or additional fiber (black beans, leafy greens) further blunts the blood sugar response — a practical approach for anyone monitoring their glucose levels.
Is Sweet Potato Good for Anemia?
Sweet potatoes contain non-heme iron (the plant-based form) at roughly 0.7 mg per medium potato — about 4% of the daily value for most adults (USDA FoodData Central, 2026). This is a supporting contribution, not a primary treatment. However, the high vitamin C content in sweet potatoes can meaningfully boost the absorption of non-heme iron from other foods eaten in the same meal. Their exceptional beta-carotene content also supports immune function and overall nutritional status, which matters for people managing chronic deficiency conditions. For iron-deficiency anemia specifically, sweet potatoes work best as part of a broader iron-rich diet that includes legumes, fortified cereals, or lean meats.
Safety for People with Diabetes
People with diabetes can generally include sweet potatoes in a balanced diet, but portion size and preparation method matter. The USDA ARS data shows microwaved sweet potato has a GI of 66 — moderate, not low. Boiling (GI ~41) produces a lower blood sugar response for the same food. Pairing any preparation with protein and fat further reduces the glycemic load. Individual responses vary significantly based on overall diet, medication, and metabolic health.
Always consult a qualified healthcare professional or registered dietitian before making dietary changes if you have diabetes or any condition affecting blood sugar regulation.
What Is the Worst Food for Blood Sugar?
Highly processed foods with high GI values — white bread (GI ~70–75), sugary drinks, and refined cereals — spike blood sugar far more sharply than sweet potatoes. Sweet potatoes at GI 66 (microwaved) are a moderate-GI food; boiled sweet potatoes at GI 41 fall into the low category. Context, portion size, and what you eat alongside them matters more than the GI number alone.
Is microwaving sweet potatoes healthy?
Yes — microwaving is one of the better cooking methods for retaining sweet potato nutrients. Because cooking time is short and no water is used, heat-sensitive vitamins like vitamin C are better preserved than with boiling. A medium sweet potato provides over 100% of the daily value for vitamin A (from beta-carotene), 4 g of fiber, and roughly 112 calories (USDA SNAP-Ed, 2026). The glycemic index of microwaved sweet potato is 66 — moderate — according to USDA ARS research (Allen et al., 2012). Pairing it with protein or fat further steadies the blood sugar response.
Frequently Asked Questions
Are sweet potatoes OK for diabetics?
Sweet potatoes can fit into a diabetic diet when portion size and preparation method are managed carefully. According to USDA ARS research (Allen et al., 2012), microwaved sweet potato has a moderate glycemic index of 66 — lower than white bread but not low GI. Boiled sweet potato has a GI of approximately 41, making it a better option for blood sugar management. Pairing any preparation with protein, fat, or fiber reduces the glycemic load further. Always consult a qualified healthcare professional or registered dietitian before adjusting your diet if you have diabetes.
How to microwave a perfect potato?
Pierce the skin 4–6 times, wrap in a damp paper towel, and microwave on HIGH for 5 to 7 minutes for a medium potato at 1,000 watts — flipping halfway through. Let it rest, still wrapped, for 2 full minutes after cooking. The rest period is what most people skip: residual heat finishes the center and steam redistributes, creating the fluffy interior texture that makes a microwave sweet potato genuinely satisfying. Cut it open, add your toppings, and serve immediately while the steam is still rising.
Common microwaving mistakes?
The five most common mistakes are skipping the piercing step, using a dry paper towel, not flipping halfway, adding extra time in large increments, and skipping the rest period. Skipping piercing risks an exploded potato. A dry towel leads to rubbery, dry flesh. Skipping the flip creates an unevenly cooked center. Adding 3–5 minutes at once when the potato isn’t done often overcooks the outside while the center catches up. Skipping the 2-minute rest means cutting into a potato whose center hasn’t fully finished cooking from residual heat.
Can you eat the skin?
Yes, you can absolutely eat the skin of a microwaved sweet potato. The skin contains a significant amount of the potato’s fiber and essential nutrients. Just ensure you wash and scrub it thoroughly under cool running water before cooking to remove any dirt or residue.
Why did my sweet potato spark?
Sparking in the microwave, known as arcing, can happen if the sweet potato is grown in mineral-rich soil. High concentrations of iron or magnesium can occasionally cause these harmless sparks. If this happens, stop the microwave immediately and finish cooking the potato in your oven.
Wrapping Up: Quick & Easy Sweet Potatoes
For home cooks who want a fast, reliable result, knowing exactly how long to cook sweet potato in microwave delivers a soft, fluffy outcome in under 10 minutes when you match cooking time to your actual setup. USDA ARS research (Allen et al., 2012) confirms the moderate GI of 66 for microwaved sweet potato, and university extension guidelines from Clemson and UNL validate the 4–9 minute timing range across standard wattages. The best approach combines the right prep (piercing + damp paper towel), wattage-adjusted timing, and the 2-minute rest.
The Wattage-Adjusted Sweet Potato Method is the framework that makes this repeatable. Generic timing fails because it ignores the two variables that actually determine doneness: your microwave’s wattage and your potato’s size. The chart in Step 3 accounts for both — use it every time until the timing becomes second nature for your specific appliance.
Your next step is straightforward: pick up one sweet potato, find the wattage label inside your microwave door, and run through the 5 steps. Most people nail a perfectly fork-tender result on their first try when they follow the wattage chart. If you want crispy skin without a full oven bake, add the 8–12 minute oven finish from the hybrid method — your total time stays under 25 minutes.

Dave King
Recipe developer and writer at Quick Dish Cookbook.
![How Long to Cook Pork Shoulder at 250°F [Chart]](https://quickdishcookbook.com/wp-content/uploads/2026/07/pork-shoulder-cook-time-250f-720x450.webp "How Long To Cook Pork Shoulder At 250°F [Chart] 11")