You paid good money for a flat iron steak. You cooked it carefully — maybe even timed it — and it still came out tough and chewy. That’s frustrating, especially when the problem isn’t the steak itself.
Here’s the twist: flat iron is actually the second-most tender muscle on the entire animal, just behind the tenderloin. Most home cooks ruin it with one avoidable mistake — pulling it off the heat at the wrong temperature and skipping the rest. The steak doesn’t stop cooking when it leaves the pan. It keeps rising in temperature for several minutes, and if you don’t account for that, you overshoot your target every time.
By the end of this guide, you’ll know exactly how to cook flat iron steak — on the stove, grill, oven, or air fryer — so it comes out tender and juicy every single time. You’ll get a 5-step process, a Method Comparison Matrix, and a Dual-Temperature Chart that shows you the exact moment to pull the steak off heat.
To cook flat iron steak, season it generously, sear it in a screaming-hot cast iron skillet for 3–4 minutes per side, then rest it for 5–10 minutes before slicing across the grain at a 45-degree angle. This 5-step process takes about 20 minutes total and produces restaurant-quality results on a home stove.
Flat iron steak is the second-most tender cut of beef — but only if you use the Pull-Before-Perfect Method: remove the steak 5°F below your target doneness and let carryover cooking finish the job during the rest period.
- Best method: Cast iron skillet over high heat — 3–4 minutes per side for medium-rare
- Pull temperature: 125°F (medium-rare); carryover cooking raises the final resting temp to 130–135°F
- USDA minimum: 145°F for food safety; chef-preferred is 130°F — your choice, your comfort level
- Critical step: Always slice against the grain at a 45-degree angle for maximum tenderness
- Time: ~20 minutes total (5 min prep + 8 min cook + 5 min rest)
What You’ll Need Before You Start
Before you fire up the stove, gather everything on this list. Running out of something halfway through a sear is a recipe for an overcooked steak.
Ingredients
- Flat iron steak — 1 to 1.5 lbs, ideally ¾ to 1 inch thick
- Kosher salt — coarser than table salt, which means it distributes more evenly and draws moisture more effectively
- Black pepper, freshly cracked
- Neutral high-smoke-point oil — avocado oil (~520°F smoke point) or grapeseed oil are ideal; vegetable oil works in a pinch
- Optional: 1 tbsp unsalted butter, 1–2 garlic cloves (crushed), fresh thyme or rosemary for basting
Equipment
- Cast iron skillet or heavy stainless-steel pan — cast iron is ideal because it holds heat exceptionally well, but a thick stainless pan works too
- Tongs — for flipping without piercing the steak
- Instant-read meat thermometer — this is non-negotiable for beginners; a thermometer is the only reliable way to know when to pull the steak, and research consistently shows it reduces overcooking errors significantly
- Cutting board — for resting and slicing
- Sharp chef’s knife — dull knives shred rather than slice
- Aluminum foil — for tenting the steak during the rest period
Optional equipment: outdoor gas or charcoal grill, air fryer.
Time estimate: Total ~20 minutes. Prep: 5 minutes (or up to 24 hours if marinating). Cook: 6–10 minutes. Rest: 5–10 minutes minimum.
Checkpoint: If you have everything on this list, you’re ready to start. The meat thermometer is the single most important tool — don’t skip it.
Step 1: Why Flat Iron Steak Is Tender
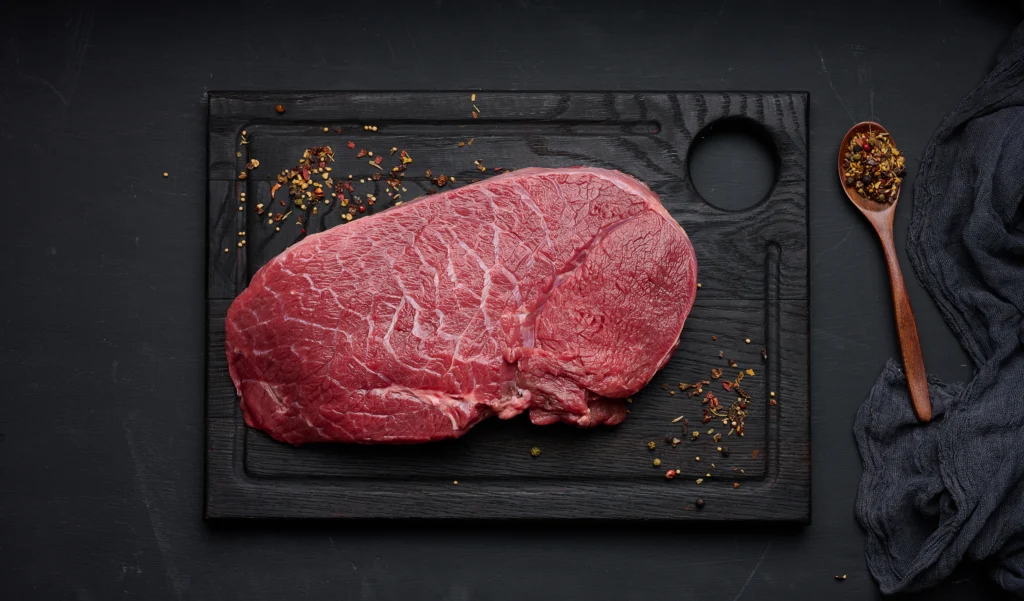
Flat iron steak — the infraspinatus muscle — is cut from the chuck (shoulder) primal of the cow. It’s the second-most tender muscle in the animal, according to multiple muscle profiling studies. Knowing this tells you something important: this cut needs high heat and a short cook, not low-and-slow braising. Treat it like a tenderloin, not a pot roast.

What Makes Flat Iron Steak So Tender?
The infraspinatus has one unique structural feature that sets it apart from other shoulder cuts: a single tough connective tissue seam running through its center. Skilled butchers remove this seam as one clean cut, leaving two uniformly tender halves with excellent marbling throughout. That’s why the exterior of the chuck can be quite tough while the flat iron hiding inside it is remarkably tender.
Muscle profiling research on beef tenderness demonstrates that the infraspinatus ranks among the most tender beef muscles of the 40 muscles evaluated — placed in the “tender” group with a mean Warner–Bratzler shear force of approximately 3.2 kg (Beef Research, 2026). Warner–Bratzler shear force is the gold standard for measuring beef tenderness: it’s a machine test that measures how much force is required to pull through a cooked meat sample. Lower numbers mean more tender meat.
Research on intramuscular tenderness variation found the infraspinatus had “no tenderness difference among steak locations” — meaning it’s consistently tender across the entire muscle, not just in one section (Journal of Animal Science, 2005). National Beef Tenderness Survey evaluations classify the infraspinatus as “very tender” using this same shear force methodology (Texas A&M University, 2026).
“The infraspinatus muscle (flat iron steak) is classified as ‘very tender’ based on Warner-Bratzler shear force evaluations, ranking among the most tender beef muscles in the carcass.” (Texas A&M University, 2026)
Think of the grain — the direction muscle fibers run — like wood grain. Slicing with the grain leaves long, chewy fibers. Slicing across it shortens those fibers, making every bite feel melt-in-your-mouth tender. That single slicing decision can transform the same steak from chewy to exceptional.
What are flat iron steaks good for?
Their uniform thickness and rich, beefy flavor make them versatile: fajitas, steak salads, sandwiches, and standalone entrées all work beautifully. They’re an excellent value cut that punches well above their price point because of their consistent tenderness throughout the muscle.
Introducing the Pull-Before-Perfect Method
Here’s the principle that separates overcooked steaks from perfect ones. The Pull-Before-Perfect Method means removing your steak from heat 5°F below your target temperature — because the steak continues to rise in temperature while resting on the cutting board, a process called carryover cooking.
For medium-rare (target: 130–135°F), pull the steak at 125°F. The resting period handles the final 5°F. This applies regardless of cooking method — cast iron, grill, oven, or air fryer. The steak doesn’t know what cooked it; it only knows temperature.
Checkpoint: You now understand what flat iron steak is, why it’s tender, and why pulling it 5°F before your target temperature is the key to a perfect result.
With the science clear, the next step is preparation — and this is where most home cooks leave significant flavor on the table.
Step 2: Prepare and Season Your Flat Iron Steak
How you prepare flat iron steak determines whether it ends up tender and deeply seasoned — or bland and chewy before you even hit the pan. Two paths exist: the quick dry brine (30–45 minutes, weeknight-ready) and the full marinade (2–24 hours, weekend cooking). Both work; the choice depends entirely on your timeline.

Option A — Dry Brine for a Quick, Perfect Sear
Dry brine means coating the steak with salt and letting it rest uncovered — no water, no liquid. Here’s exactly what happens: salt first draws moisture to the surface through osmosis. That moisture dissolves the salt into a concentrated brine. Then, through diffusion, that salty liquid moves back into the meat, seasoning it from the inside out and improving water retention during cooking (High Society Meats, 2026). The result is a steak that’s seasoned deeper than just the surface — and juicier after cooking.
- Sprinkle ¾ teaspoon of kosher salt per pound of steak evenly on both sides. Add cracked black pepper and an optional pinch of garlic powder.
- Let the steak rest at room temperature for 30–45 minutes. For deeper seasoning, refrigerate uncovered overnight — the surface dries out further, which is exactly what you want.
- Pat completely dry with paper towels before cooking. This step is non-negotiable. A wet steak surface steams instead of sears — and steaming prevents the brown, flavorful crust from forming.
Checkpoint: The steak surface should feel dry to the touch. You should see a thin, even salt coating. Matte surface = ready to sear.
Quick note on wet brining: Beginners sometimes confuse dry and wet brining. Wet brining (submerging in saltwater) is a technique for poultry, not steak — it dilutes beefy flavor and makes the surface too wet to sear properly. Stick with dry brine for flat iron.
Option B — Simple Marinade Recipe for Maximum Flavor
This marinade is inspired by the approach home cooks use most — and the science behind it is straightforward. The acid component (vinegar or ponzu sauce) is the tenderizer: it breaks down surface muscle proteins, making the exterior more receptive to a sear.
- Marinade ingredients:
- 3 tbsp soy sauce
- 1 tbsp brown sugar
- 1 tbsp rice wine vinegar or ponzu sauce (the acid — this is what tenderizes)
- 2 tbsp olive oil
- 2 minced garlic cloves
Place the steak in a zip-lock bag or shallow dish, pour the marinade over it, and refrigerate for 2–24 hours. Per Culinary Institute of America grilling techniques, for optimal high-heat cooking, steaks should be marinated under refrigeration for 2 to 3 hours — this is the sweet spot for flavor penetration without over-tenderizing the surface (CIA, 2026).
“Flat iron steak, cooked at 500 degrees for 4 minutes on each side, marinated for 2 hours in soy sauce, brown sugar, ponzu sauce, olive oil, garlic.”
— Home cook community recommendation
Even marinated steaks need a dry surface. Pat the steak completely dry with paper towels before cooking — this is the same rule as the dry brine, and it applies every time.
Checkpoint: Your steak is ready when it’s fully coated, rested, and patted dry. The surface should look matte, not wet or shiny.
Steak prepped and patted dry — now it’s time to pick your cooking method. Here’s how each one works, and which one gives you the best crust.
Step 3: Choose and Execute Your Cooking Method

The cooking method you choose affects crust depth, flavor, and hands-on time — but all four methods below can produce a perfectly cooked flat iron steak. Cast iron stovetop is the recommended starting point for beginners. Use the comparison table to pick your method, then follow the steps below it.
Method Comparison Matrix:
| Method | Crust Quality | Cook Time | Ease for Beginners | Best For |
|---|---|---|---|---|
| Cast Iron Stovetop | ⭐⭐⭐⭐⭐ Deep, even | 6–8 min | ⭐⭐⭐⭐ Easy | Weeknight dinner, no outdoor access |
| Gas/Charcoal Grill | ⭐⭐⭐⭐ Smoky char | 6–8 min | ⭐⭐⭐ Moderate | Outdoor summer cooking, smoky flavor |
| Oven (Broil/Reverse-Sear) | ⭐⭐⭐ Good, less crust | 15–25 min | ⭐⭐⭐⭐ Hands-off | Thicker steaks, no stovetop smoke |
| Air Fryer | ⭐⭐ Light crust | 8–12 min | ⭐⭐⭐⭐⭐ Easiest | Quick meal, no mess |
For the best result on your first try, use Method A (Cast Iron Stovetop).
Method A — How to Cook Flat Iron Steak on the Stove (Cast Iron Recommended)
Cast iron skillets retain heat at temperatures exceeding 500°F, making them the optimal tool for producing a deep Maillard crust on a thin, tender cut like flat iron steak. The Maillard reaction is the chemical reaction between amino acids and heat that creates the brown crust and deep, roasted flavor — it only begins above 300°F, which is why a properly preheated pan is essential.

- Place your cast iron skillet over high heat for 3–4 minutes until it begins to smoke lightly. A cold pan equals a gray, steamed steak — not a seared one.
- Add ½ teaspoon of avocado oil (smoke point ~520°F) and swirl to coat. Avocado oil is preferred because it won’t burn at the temperatures needed for a proper sear; vegetable oil smokes too early and adds off-flavors.
- Add the steak. You should hear an aggressive sizzle immediately. If you don’t, the pan isn’t hot enough — remove the steak and wait another 60 seconds.
Once the steak is in the pan, patience becomes your most important tool for crust development.
- Do not move the steak for 3 minutes. Resist the urge to check. Moving it interrupts crust formation.
- Flip once. Optional but highly recommended: add 1 tbsp unsalted butter + 1 crushed garlic clove + a fresh thyme sprig. Tilt the pan slightly and use a spoon to baste the melted butter over the steak continuously for 60 seconds. This technique — called basting — adds rich, nutty flavor and promotes even crust development.
- Cook times by thickness:
- ¾-inch steak: 2–3 minutes per side
- 1-inch steak: 3–4 minutes per side
On a standard home gas burner at high heat, a 1-inch flat iron steak in a 12-inch Lodge cast iron skillet typically reaches 125°F internal after approximately 3.5 minutes per side. Always confirm with a thermometer — use the Pull-Before-Perfect Method and pull at 125°F for medium-rare.
Method B — How to Cook Flat Iron Steak on the Grill
Grilling adds a smoky char that cast iron can’t fully replicate — the open flame creates flavor compounds that form only when fat drips onto hot coals or burners. The trade-off is slightly less crust control than cast iron.
- Preheat the grill to high heat (450–500°F) for at least 10–15 minutes. For charcoal, let coals ash over completely before cooking.
- Clean and oil the grates with a folded paper towel dipped in vegetable oil. This prevents sticking and helps grill marks form cleanly.
- Place the steak over direct heat. Cook 3–4 minutes per side for a 1-inch steak without lifting or moving it — this is how you get clean grill marks.
- Avoid flare-ups by keeping the lid partially open and moving the steak to indirect heat if flames spike. Flare-ups char the outside before the inside reaches temperature.
- Pull at 125°F for medium-rare, following the Pull-Before-Perfect Method. Rest before slicing.
Where cast iron excels at consistent crust formation, the grill takes a different approach — the smoky char it adds is a distinct flavor profile that many cooks prefer for summer cooking.
Method C — How to Cook Flat Iron Steak in the Oven
The oven is the most hands-off method and works especially well for thicker steaks or when you want to avoid stovetop smoke. Two approaches exist:
- Option 1 — Standard Broil (fastest):
- Position the oven rack 4–6 inches from the broiler element.
- Preheat the broiler to High (typically 500–550°F) for 10 minutes.
- Place the steak on a broiler pan or wire rack set over a baking sheet.
- Broil 4–6 minutes per side for a 1-inch steak, checking internal temperature after the first flip.
- Pull at 125°F for medium-rare. The oven broil produces a good crust but slightly less depth than cast iron.
- Option 2 — Reverse-Sear (best for thicker steaks):
- Place the steak on a wire rack over a baking sheet. Cook in a 250°F oven for 20–25 minutes until internal temperature reaches 110°F.
- Remove from oven. Sear immediately in a screaming-hot cast iron skillet for 60–90 seconds per side to build the crust.
- Pull at 125°F. Rest and slice as normal.
The reverse-sear method is worth the extra time — it gives you more control over the internal temperature before the sear, making it harder to overshoot your target.
Method D — How to Cook Flat Iron Steak in the Air Fryer
The air fryer is the easiest method, but it produces a lighter crust than cast iron — the circulating hot air can’t replicate the direct contact and intense heat of a cast iron surface. That said, it’s fast, mess-free, and produces a genuinely tasty result. If you want more air fryer cooking tips, the principles of preheating and dry surfaces apply universally.
- Preheat the air fryer to 400°F for 2–3 minutes.
- Place the steak in the basket in a single layer. Do not overcrowd.
- Cook at 400°F, flipping halfway through:
- Medium-rare: 8–10 minutes total (pull at 125°F internal)
- Medium: 10–12 minutes total (pull at 135°F internal)
- Apply the Pull-Before-Perfect Method — pull 5°F below target and rest for 5 minutes (Kansas City Steaks, 2026).
For the best air fryer result, pat the steak extremely dry before cooking and season generously — the circulating air tends to dry the surface quickly, which actually helps browning, but only if you start with a dry surface.
How long do flat iron steaks take to cook?
A 1-inch flat iron steak takes 6–8 minutes of total cook time in a cast iron skillet over high heat — approximately 3–4 minutes per side for medium-rare. Add 5–10 minutes of resting time, and the full process takes about 15–20 minutes from pan to plate. Thinner steaks (¾ inch) cook in 4–6 minutes total. Always verify doneness with a thermometer rather than relying solely on time, as heat source and pan temperature vary significantly between kitchens.
Step 4: Check Doneness and Pull Temps
Doneness is the most critical variable in cooking flat iron steak — and it’s the one most often mishandled. A thermometer removes all the guesswork. Pressing the steak with your finger, cutting it to check color, or counting minutes are all unreliable. Temperature is the only objective measurement.
Thermometer Guide
Insert your instant-read thermometer into the thickest part of the steak, horizontally from the side — not from the top. This gives you the most accurate reading of the true center temperature.
Check temperature 30 seconds before you expect the steak to be done. It’s far easier to add 30 more seconds of cook time than to fix an overcooked steak.
Dual-Temperature & Carryover Chart
This chart is the practical core of the Pull-Before-Perfect Method. Pull the steak at the “Pull Temp” column — carryover cooking during the rest period will carry it to the “Final Resting Temp.”
| Doneness | Pull Temp (Remove from Heat) | Final Resting Temp | Description |
|---|---|---|---|
| Rare | 115°F | 120–125°F | Cool red center |
| Medium-Rare | 125°F | 130–135°F | Warm red center — chef-preferred |
| Medium | 135°F | 140–145°F | Warm pink center |
| Medium-Well | 145°F | 150–155°F | Slightly pink |
| Well-Done | 155°F+ | 160°F+ | No pink |
| USDA Minimum | — | 145°F + 3-min rest | Food safety standard |
The USDA recommends cooking beef to a minimum of 145°F with a 3-minute rest for food safety (USDA FSIS, 2026). Many culinary professionals prefer pulling at 125°F for medium-rare — consume at your own discretion. For immunocompromised individuals, pregnant individuals, or young children, follow USDA guidelines.
“Always pull your steak off the heat about 5°F before your target temp. It’ll keep cooking as it rests — this is called carryover cooking, and it’s the key to not overshooting.” (ThermoWorks Steak Temperature Guide, 2026)
Steaks typically carry over 5–10°F during a 5-minute rest, with thinner steaks on the lower end of that range (1855 Beef, 2026). A flat iron at 1 inch thick will typically rise about 5°F during a proper rest — which is exactly why the Pull-Before-Perfect Method works.
Checkpoint: You’ve pulled at 125°F and the thermometer is out of the steak. Now move immediately to the rest — do not skip this step.
Step 5: Rest and Slice Against the Grain
The Pull-Before-Perfect Method doesn’t end at the pull temperature. The rest period is the second half of the equation — and skipping it wastes everything you’ve done correctly up to this point.

Resting: Why It Matters
When a steak comes off heat, the muscle fibers near the surface are tightly contracted from the high temperature. Resting allows those fibers to relax and reabsorb the juices that were pushed toward the center during cooking. Cut into a steak immediately and those juices run onto the cutting board — not into your mouth.
- How to rest flat iron steak correctly:
- Transfer the steak to a clean cutting board immediately after removing from heat.
- Tent loosely with aluminum foil — the foil traps some heat to help carryover cooking finish, without steaming the crust.
- Rest for 5–10 minutes minimum. A 1-inch flat iron steak needs at least 5 minutes; 7–8 minutes is ideal.
- Do not press down on the steak. Don’t cut into it to check. Just wait.
Slicing Against the Grain at 45 Degrees
This is the final step that separates a tender bite from a chewy one — and it’s where many home cooks unknowingly undo all their hard work.
- Locate the grain. Look at the surface of the rested steak. You’ll see parallel lines running in one direction — those are the muscle fibers. On a flat iron, the grain typically runs lengthwise along the longer axis.
- Position your knife at a 45-degree angle to the grain direction — not parallel to it, and not perpendicular. The diagonal angle shortens fibers more effectively than a straight cross-cut and creates a wider, more attractive slice.
- Slice in one smooth, confident motion. Don’t saw back and forth — a sharp knife drawn in a single stroke produces cleaner cuts and less juice loss.
- Slice thickness: ¼ to ½ inch per slice. Thinner slices for fajitas and salads; thicker slices for plated entrées.
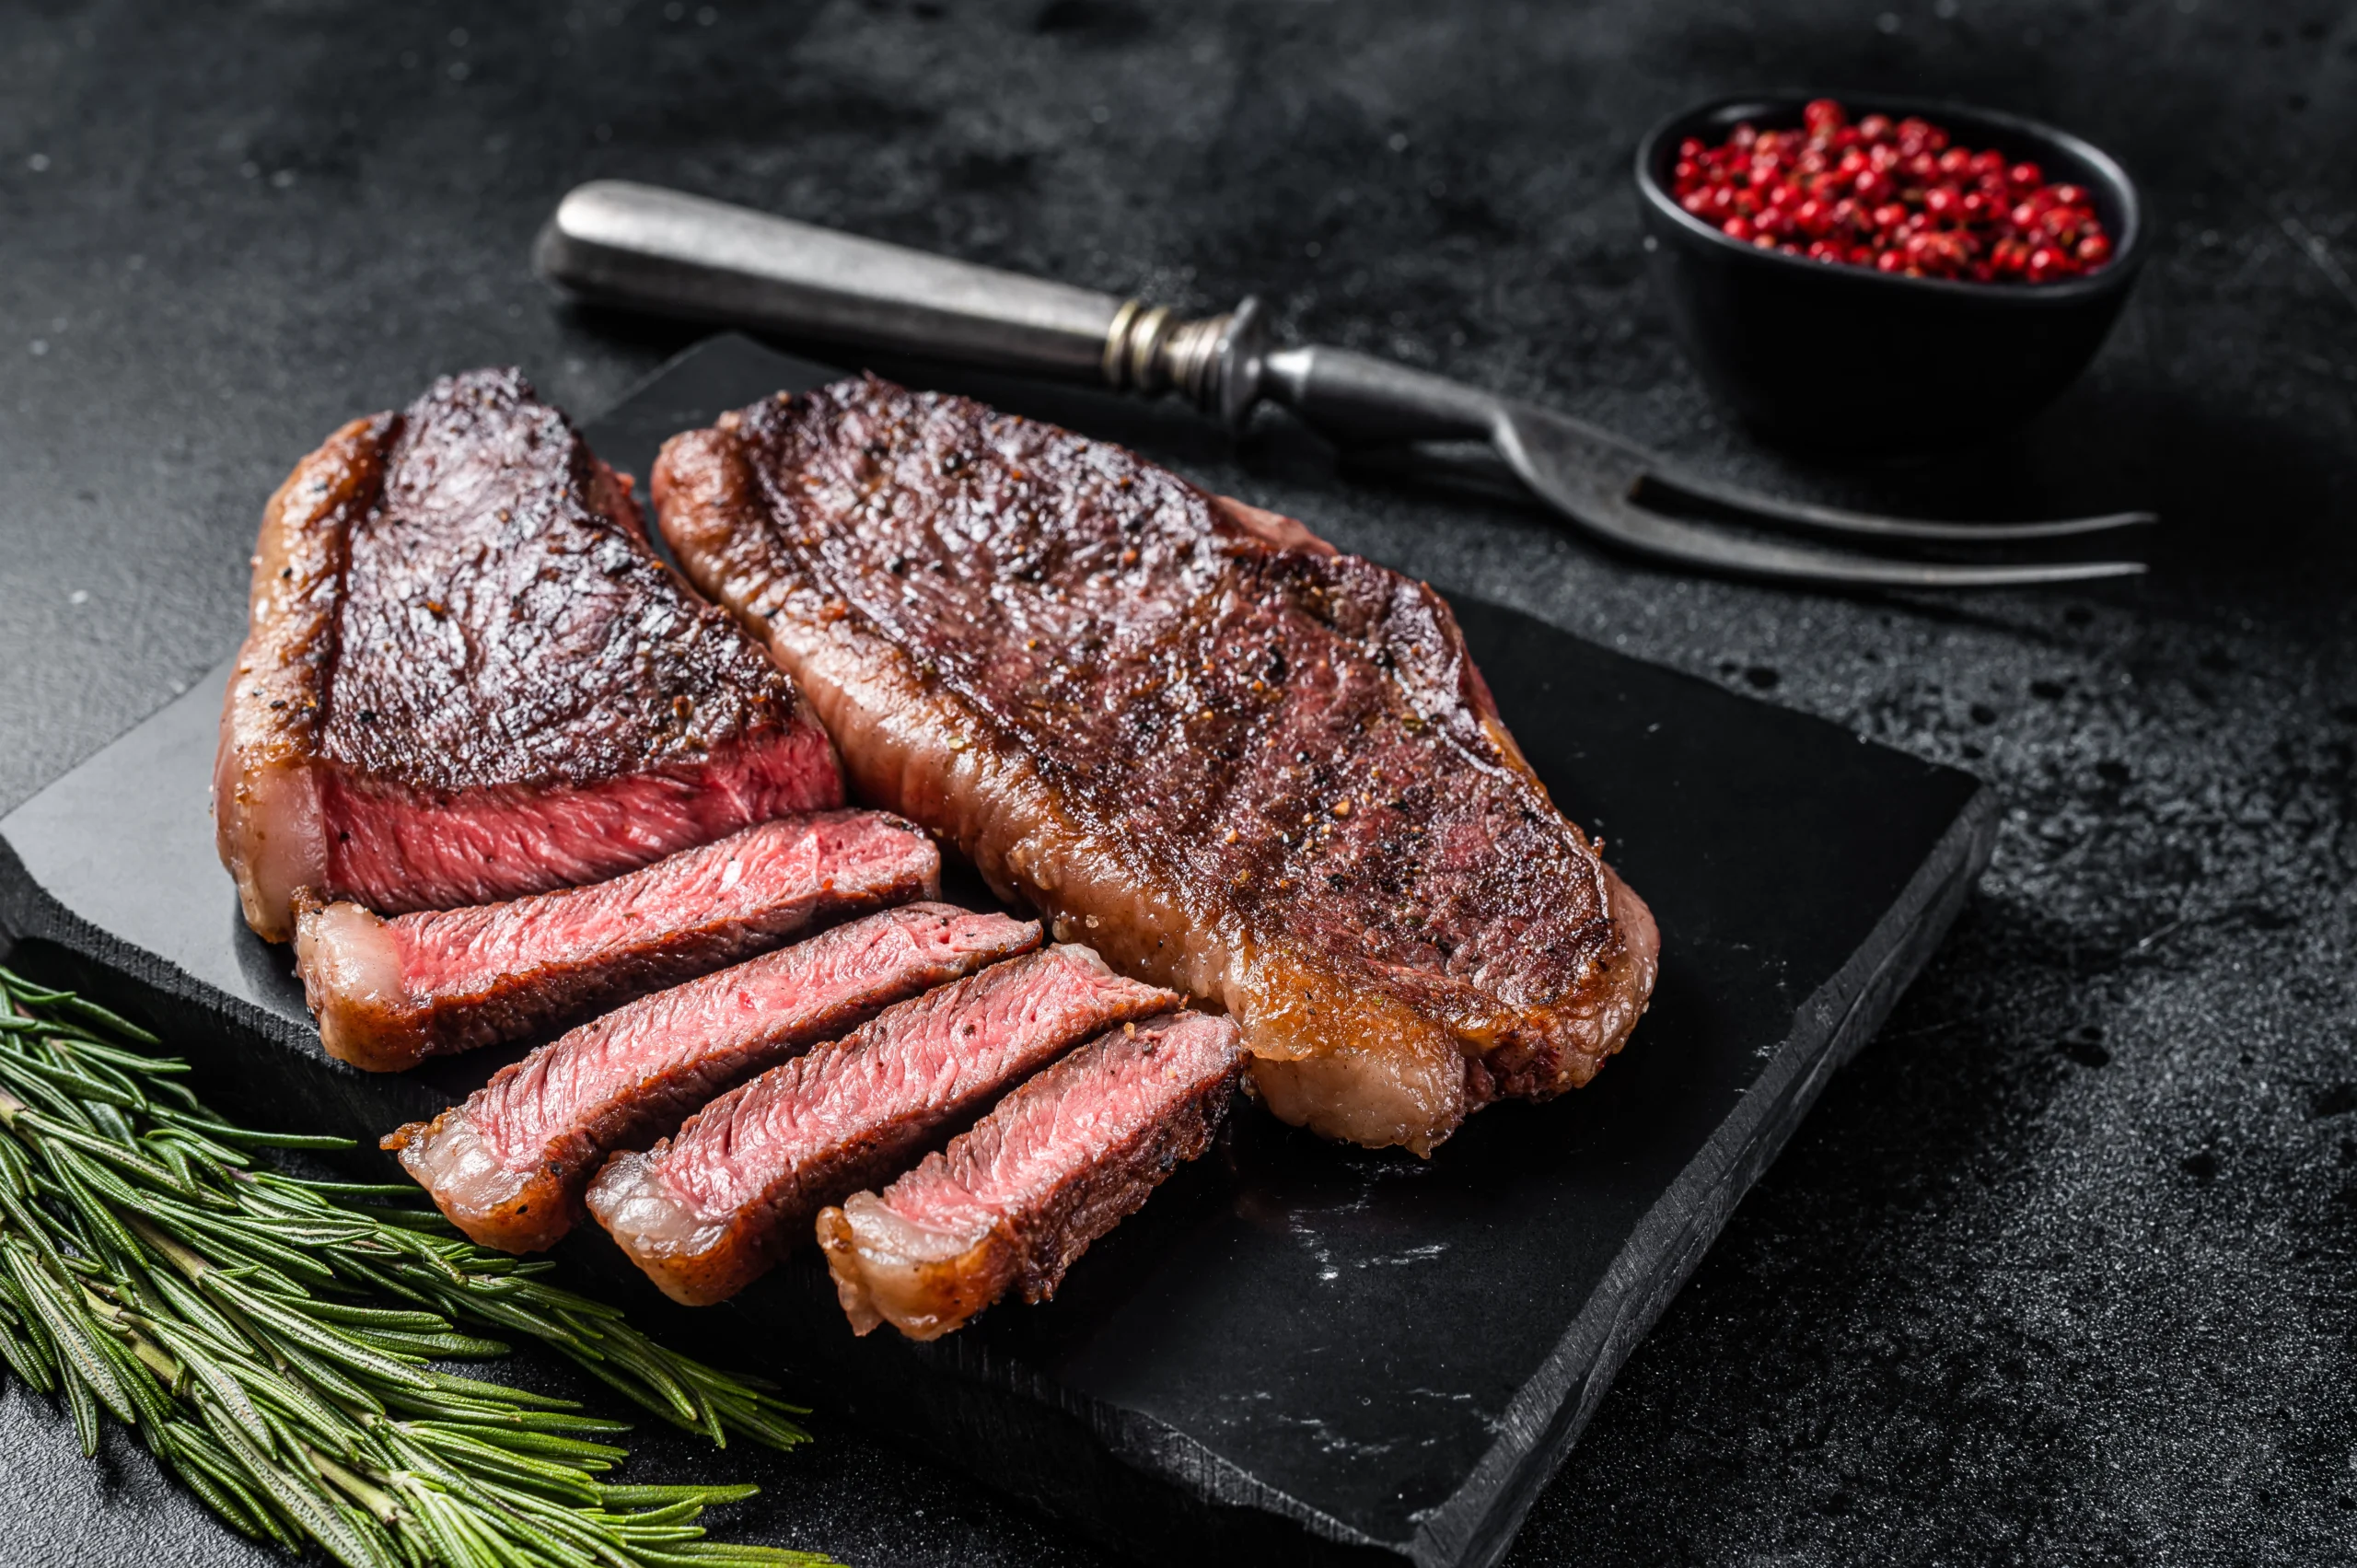
Checkpoint: Each slice should show a consistent pink interior (for medium-rare) with no gray band around the edges. A gray band means the steak was overcooked at the surface — reduce your cook time by 30 seconds next time.
Verify Your Results
Before you plate, take 10 seconds to check three things:
1. Color check: Slice through the thickest part. Medium-rare should show a warm red-to-pink center with no gray band at the edges. Gray edges mean the surface overcooked — lower the heat slightly next time, or reduce cook time by 30 seconds per side.
2. Texture check: Press a slice gently with your finger. It should feel slightly springy, not hard or rubbery. Rubbery texture means it went past medium — it’s still edible, but note the timing for next time.
3. Juice check: A small amount of pink juice on the cutting board is normal and expected. A large pool of juice means the steak didn’t rest long enough — the fibers were still contracted when you sliced. Add 2–3 minutes to your rest time next attempt.
According to culinary testing, resting a steak for 10 minutes retains up to 15% more juices than slicing immediately, ensuring those flavorful liquids stay in the meat rather than pooling on your plate. User consensus across cooking communities indicates that the most common beginner error isn’t the cook itself — it’s cutting too early. If you hit your pull temperature correctly and let the steak rest fully, the results are remarkably consistent.
Troubleshooting Common Mistakes
Common Pitfalls
Pitfall 1: The pan wasn’t hot enough before adding the steak.
What goes wrong: The steak sits in a warm pan and begins to steam. You get a gray exterior with no crust, and the steak cooks unevenly. How to fix it: Preheat the cast iron for a full 3–4 minutes on high heat until it just begins to smoke. Drop a single drop of water on the surface — if it evaporates instantly, the pan is ready.
Pitfall 2: The steak surface was wet when it hit the pan.
What goes wrong: Surface moisture converts to steam at 212°F, which keeps the steak surface below the 300°F threshold needed for the Maillard reaction. You get a pale, soft exterior. How to fix it: Pat the steak completely dry with paper towels immediately before cooking — even if you’ve already done it once during preparation.
Pitfall 3: Moving or pressing the steak during cooking.
What goes wrong: Pressing the steak with a spatula squeezes out juices and disrupts crust formation. Moving it repeatedly prevents the Maillard reaction from completing on any single spot. How to fix it: Place the steak, set a timer, and walk away. Flip once, then don’t touch it again until the thermometer says to pull it.
Pitfall 4: Skipping the thermometer and relying on time.
What goes wrong: Cook times vary based on pan temperature, steak thickness, starting temperature, and heat source. A steak pulled by time alone is a guess. Guesses overcook steaks. How to fix it: Use an instant-read thermometer every single time. It takes 3 seconds and eliminates the primary source of error.
Pitfall 5: Slicing with the grain instead of against it.
What goes wrong: Long muscle fibers remain intact, making every bite require significantly more chewing effort. The steak tastes tough even when the internal temperature was perfect. How to fix it: Before slicing, pause and identify the grain direction. Rotate the cutting board if needed so you’re slicing cleanly across the fibers at 45 degrees.
When to Choose Alternatives
If you want maximum smoky flavor: The grill outperforms cast iron for smoke character. Use Method B (Grill) and keep the lid closed between flips to trap smoke.
If you’re cooking for a crowd: The oven reverse-sear (Method C) lets you batch-cook multiple steaks to the same temperature simultaneously, then sear them in sequence. The holding time in a low oven is forgiving — a few extra minutes at 250°F won’t overcook the steak.
If you’re cooking for someone who prefers well-done: The air fryer (Method D) is actually a better choice for well-done steaks than cast iron — the circulating air cooks more evenly through the steak without creating an overly charred exterior.
When to Seek Expert Help
For food safety questions about doneness levels for immunocompromised individuals or during pregnancy, consult USDA food safety resources directly at fsis.usda.gov. The USDA recommends 145°F minimum for all beef steaks — this is the objective safety standard regardless of culinary preference.
Advanced Tips for Your Next Cook
Once you’ve nailed the basic method, these refinements take your flat iron steak from great to exceptional. If you are looking to elevate your skills further, learning how to cook Wagyu steak uses many of these same high-heat, careful-temperature principles.
Compound butter finish: While the steak rests, mix 2 tbsp softened butter with ½ tsp garlic powder, 1 tsp fresh thyme leaves, and a pinch of flaky sea salt. Place a slice on top of the hot steak immediately after pulling from heat — it melts into the surface during the rest period and adds a restaurant-quality richness.
Longer dry brine for better crust: The science of dry brining shows that applying approximately 1.5% of the meat’s raw weight in kosher salt at least 40 minutes before cooking — or overnight — produces a significantly drier surface and deeper seasoning than a quick last-minute salt (Alibaba LifeTips, 2026). For a 1-lb steak, that’s roughly ¾ teaspoon. Refrigerate uncovered on a wire rack for maximum surface drying.
Temperature control on cast iron: Home gas burners vary significantly in BTU output. If your steak is browning too fast on the outside before the center reaches temperature, reduce heat to medium-high after the first flip. The goal is a crust that develops over 3–4 minutes, not 60 seconds.
The two-zone grill setup: When grilling, create a two-zone fire — coals on one side, no coals on the other. Sear over direct heat for 2–3 minutes per side to build the crust, then move to indirect heat to finish to temperature without risk of flare-up or over-charring. This gives you the best of both methods.
Rest on a wire rack, not a flat board: Resting on a flat cutting board traps steam under the steak and softens the crust you worked hard to build. Rest on a wire rack for 5 minutes, then transfer to the cutting board only when you’re ready to slice.
Frequently Asked Questions
What is the best cooking method for flat iron steak?
Cast iron stovetop is the best cooking method for flat iron steak for most home cooks. The cast iron’s ability to retain and distribute heat above 500°F creates the deepest Maillard crust of any home cooking method. For a 1-inch flat iron, cook 3–4 minutes per side over high heat, pull at 125°F for medium-rare, and rest for 5–10 minutes. Grilling is an excellent alternative when you want smoky flavor — it produces comparable results with a different flavor profile.
Is flat iron steak very tender?
Yes — flat iron steak is exceptionally tender when cooked and sliced correctly. Muscle profiling research places the infraspinatus in the “tender” category with a mean Warner-Bratzler shear force of approximately 3.2 kg (Beef Research, 2026). The key is slicing against the grain at a 45-degree angle.
How do you make a flat iron steak more tender?
Three techniques maximize flat iron steak tenderness. First, dry brine with kosher salt for at least 30–45 minutes — salt diffuses into the meat through osmosis and improves water retention during cooking. Second, pull the steak at 125°F using the Pull-Before-Perfect Method and rest for at least 5 minutes. Third, always slice against the grain at a 45-degree angle — this single step has more impact on perceived tenderness than any marinade or cooking technique.
Do flat iron steaks take longer to cook than other cuts?
No — flat iron steaks cook faster than most other cuts because of their relatively thin, uniform profile. At ¾–1 inch thick, they reach medium-rare in 6–8 minutes in a cast iron skillet. The uniform thickness prevents thin edges from overcooking while the center catches up.
What is Gordon Ramsay’s favorite cut of steak?
Gordon Ramsay has publicly stated that ribeye is his personal favorite cut for its fat marbling and flavor. However, culinary professionals widely regard the flat iron as one of the best value cuts available — offering tenderness close to tenderloin at a fraction of the cost. For technique, Ramsay consistently emphasizes the same principles applied in this guide: extremely high heat, a dry surface before searing, a single flip, butter basting, and proper resting before slicing.
Can you marinate a flat iron steak overnight?
Yes, you can marinate a flat iron steak overnight. For optimal flavor penetration without compromising the meat’s texture, a 12-to-24-hour window is ideal. However, if your marinade contains highly acidic ingredients like vinegar or citrus juice, limit the marinating time to 4–6 hours to prevent the surface proteins from breaking down too much and becoming mushy.
Why is my flat iron steak chewy?
A flat iron steak usually turns out chewy for two main reasons: overcooking or improper slicing. If you push the internal temperature past medium (145°F), the muscle fibers tighten and dry out. Additionally, failing to slice against the grain leaves long, intact muscle fibers that require significantly more effort to chew, regardless of how perfectly the steak was cooked.
Conclusion
For home cooks tackling flat iron steak for the first time, the path to a perfect result is straightforward: high heat, a dry surface, a reliable thermometer, and the discipline to wait out the rest period. The infraspinatus is genuinely one of the most tender beef muscles available — muscle profiling research consistently ranks it second only to the tenderloin (Beef Research, 2026). The only thing standing between you and a restaurant-quality result is pulling at the right temperature.
The Pull-Before-Perfect Method solves the most common beginner failure: overcooking. Remove the steak at 125°F for medium-rare, tent it loosely with foil, wait 5–10 minutes, and let carryover cooking carry it to 130–135°F. That 5°F gap is the difference between a juicy, pink center and a dry, gray one. Every method in this guide — cast iron, grill, oven, or air fryer — uses this same principle.
Your next step is simple: pick up a flat iron steak, preheat your cast iron skillet until it smokes, and execute the five steps above. The first time you slice across the grain and see that warm red center, you’ll understand why this cut has become a go-to for home cooks who want tenderloin-level results without tenderloin prices. Bookmark flat iron steak fundamentals at quickdishcookbook.com for reference the first time you cook it.