Quick Way to Cook Bacon: 4 Methods for Crispy Results

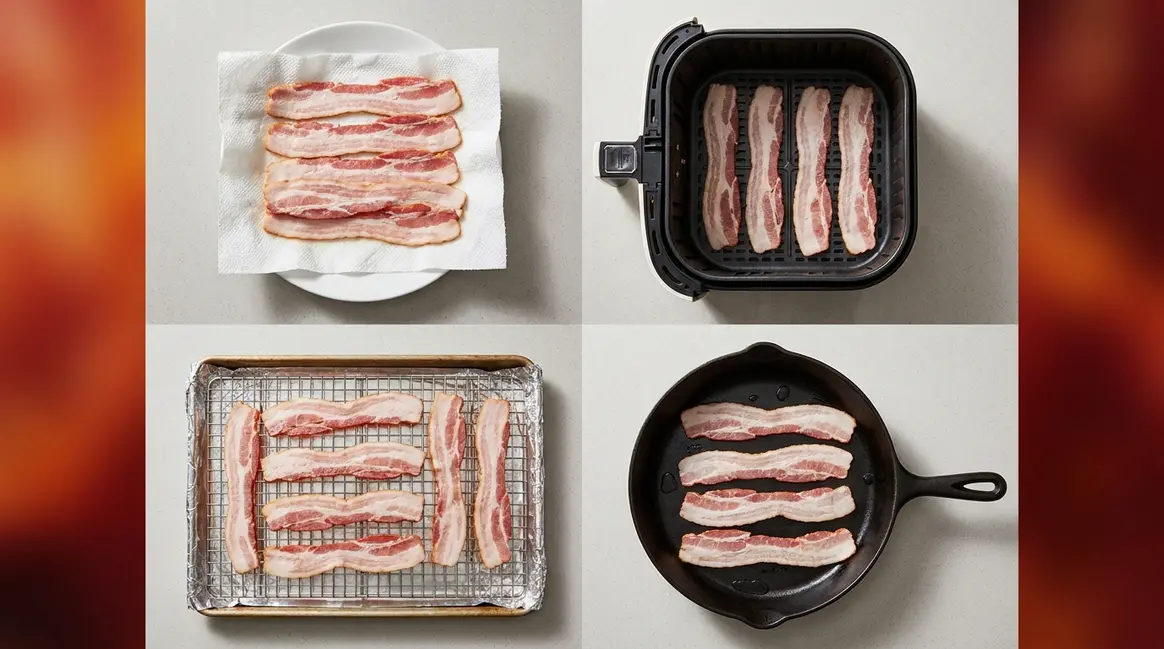
The quickest way to cook bacon is in the microwave — 2 to 5 minutes for a few slices. For crispier results, the air fryer takes 8 to 10 minutes at 400°F. This guide covers 4 fast methods: microwave, air fryer, oven, and stovetop with water. Every method produces evenly crisp, flat strips. The microwave suits 1–4 slices fast; the oven handles a full pound with minimal mess. Each step takes under 25 minutes from package to plate.
What’s in this guide
- What You'll Need
- Step 1: Microwave Bacon for the Fastest Results
- Step 2: Use the Air Fryer for Fast, Crispy Bacon
- Step 3: Bake Bacon in the Oven for Large Batches
- Step 4: Stovetop Water Method
- Compare All 4 Methods – The 5-Minute Bacon Matrix
- Adjust for Your Bacon Type
- Store and Reheat Cooked Bacon
- Troubleshooting Common Bacon Problems
- Frequently Asked Questions
- Conclusion
Most recipes just tell you to “cook until crispy.” What they skip is which quick way to cook bacon actually gets you there — without a stovetop covered in grease and strips that come out rubbery on one end and “little blackened strips” on the other.
There are four common methods, and each one delivers completely different results. Using the wrong one for your situation wastes time, makes a mess, and leaves you with bacon you didn’t want. The microwave and air fryer are fast but suit small batches. The oven handles a crowd. The stovetop water method gives you classic flavor with far less splatter.
In this guide, you’ll learn the quick way to cook bacon with four tested methods — and you’ll know exactly which one to pick for your situation. It covers microwave, air fryer, oven, and stovetop, plus a full comparison table and answers to the most common bacon questions. You can explore more quick and easy bacon cooking methods on QuickDishCookbook.
Key Takeaways: Quick Way to Cook Bacon
The microwave cooks 2–4 strips in as little as 2 minutes — the fastest method for small batches.
- Fastest overall: Microwave (2–5 min) — best for 1–4 slices, zero stovetop mess
- Best texture: Air fryer (8–10 min) — evenly crisp, flat strips, almost no cleanup
- Large batches: Oven at 400°F (18–22 min) — flat strips, foil makes cleanup effortless
- Classic flavor: Stovetop with water method (8–12 min) — less splatter, tender with crispy edges
- The 5-Minute Bacon Matrix ranks all 4 methods by time, crispness, and cleanup — see the comparison table below
What You’ll Need
Before you start cooking, gather your equipment. Having the right tools for your chosen method means no mid-cook scrambling — and it’s the difference between evenly crisp strips and a greasy mess.
Equipment by method:
- Microwave method: Microwave-safe plate + 2–3 sheets of paper towels (Bounty or equivalent). Optional: a ridged microwave-safe plate, which allows fat to drain away from the bacon as it cooks.
- Air fryer method: Air fryer (basket or oven-style). No extra tools needed — the basket acts as a rack.
- Oven method: Rimmed baking sheet (half-sheet pan) + aluminum foil, 18 inches wide (wider foil covers the pan edges and captures grease — this is the tip that makes cleanup a 30-second job). Optional: wire rack — a metal grid that sits inside the baking sheet, lifting the bacon so fat drips down and away.
- Stovetop method: 10–12-inch skillet or frying pan + a splash of water (about ¼ cup).
Time at a glance:
| Method | Time to Plate |
|---|---|
| Microwave | 2–5 min |
| Air Fryer | 8–10 min |
| Oven | 18–22 min |
| Stovetop (Water) | 8–12 min |
The fastest method is listed first. Now let’s start with the fastest method — the microwave.
Step 1: Microwave Bacon for the Fastest Results
Kitchen testing found the microwave cooks bacon in approximately 1 minute per slice on high power — making it the fastest method for small batches (Family Food on the Table, 2026). In The 5-Minute Bacon Matrix, the microwave wins the speed category outright. If you need 2–4 strips fast and texture isn’t your top priority, this is your method.
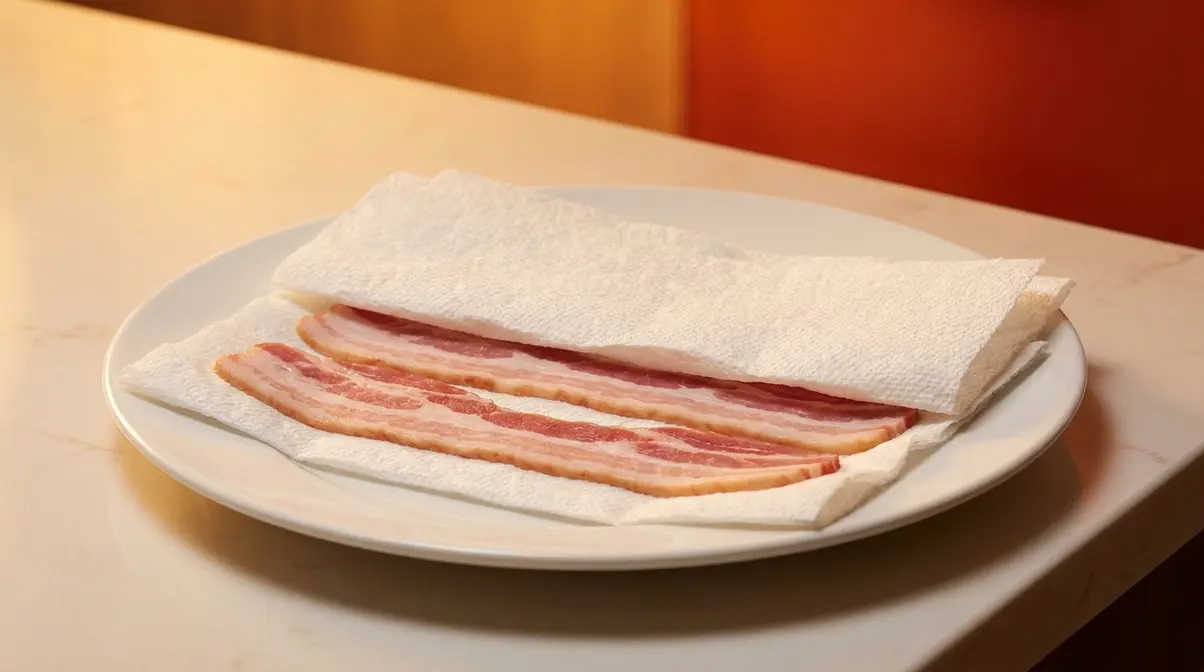
The Paper Towel Microwave Method
The fastest way to make bacon involves just a plate, paper towels, and your microwave. Here’s exactly how it works — and why each step matters for a beginner.
Steps:
- Place 2–4 strips of raw bacon in a single layer on a microwave-safe plate. Strips should not overlap — overlapping means uneven cooking. If a strip is too long to lie flat, fold it in half.
- Cover the bacon completely with 2 sheets of paper towels. Paper towels absorb the fat as it renders out — “rendering” just means the white fat melts into liquid as it heats. This fat absorption is why the microwave is the “no mess” option; there’s no open pan of hot grease.
- Microwave on HIGH power for the time shown in the Timing Guide below.
- Check doneness. The bacon should look slightly underdone when you stop the microwave. That’s correct — the trapped steam keeps cooking the bacon for about 30 seconds after the microwave stops. Pulling it out a touch early prevents “little blackened strips.”
- Let rest 1 full minute on the paper towels before eating. It will crisp up as it cools.
Pro Tip: Microwaving bacon on a ridged plate allows fat to drain away from the strips during cooking, giving you slightly crispier results — BBC Good Food recommends this for the cleanest outcome.
If your microwave smells like smoke: Reduce time by 30 seconds and add an extra sheet of paper towels on top to contain splatter. Smoke usually means the bacon is overcooking or grease is hitting the microwave walls.
Once you have the steps down, the timing table below tells you exactly how long to microwave based on your appliance’s wattage.
Timing Guide by Wattage
Not all microwaves cook at the same speed. Lower-wattage models (700W) need about 20–30% more time than high-wattage ones (1000W+) for the same result (HomeFixGrid, 2026). To find your microwave’s wattage, check the label inside the door or on the back of the appliance.
According to microwave cooking time per slice data, approximately 1 minute per slice on high power is the standard baseline (Business Insider, 2026). A 1000W microwave cooks 2 strips of regular bacon in about 2 to 2.5 minutes — that’s faster than boiling water. Compare this to 8–12 minutes on the stovetop.
All times below are for HIGH power only. Thick-cut bacon adds roughly 1–1.5 minutes to any of these ranges.
| Wattage | 2 Regular Strips | 4 Regular Strips | 2 Thick-Cut Strips |
|---|---|---|---|
| 700W | 3–4 min | 4.5–5.5 min | 5–6 min |
| 800W | 2.5–3.5 min | 4–5 min | 4.5–5.5 min |
| 900W | 2–3 min | 3.5–4.5 min | 4–5 min |
| 1000W+ | 2–2.5 min | 3–3.5 min | 3.5–4.5 min |
These times are starting points — check at the lower end first. Every microwave varies slightly.
Pro Tip: If your microwave doesn’t have a wattage label, try 3 minutes for 2 strips and adjust from there.
Checkpoint: Your bacon should be flat, lightly browned, and slightly flexible when done — it will crisp up as it cools on the paper towels. If you see rubbery, translucent strips, add 30 seconds. If you see dark, brittle edges, reduce time by 30 seconds next batch.
Is Microwaving Bacon Faster Than Frying?
Yes — microwaving bacon is significantly faster than stovetop frying for small batches. Kitchen testing found microwaving takes approximately 1 minute per slice on high power, meaning 4 slices finish in about 3–4 minutes (Business Insider, 2026). Stovetop frying — even with the water method — takes 8–12 minutes for the same batch. However, stovetop bacon produces richer flavor and more control over final crispness. Microwaving is faster; stovetop is more flavorful.
The microwave wins on speed, but if you want evenly crisp strips with better texture, the air fryer is your next best option — and it takes only a few minutes more.
Step 2: Use the Air Fryer for Fast, Crispy Bacon
The stovetop splatters grease across your stove. The microwave is fast but leaves bacon slightly chewy. Air fryer bacon cooks in 8 to 10 minutes at 400°F and produces evenly crisp, flat strips with less splatter than stovetop frying — making it the top choice for texture-conscious cooks. The circulating hot air functions like a miniature convection oven, cooking all sides of the bacon at once.
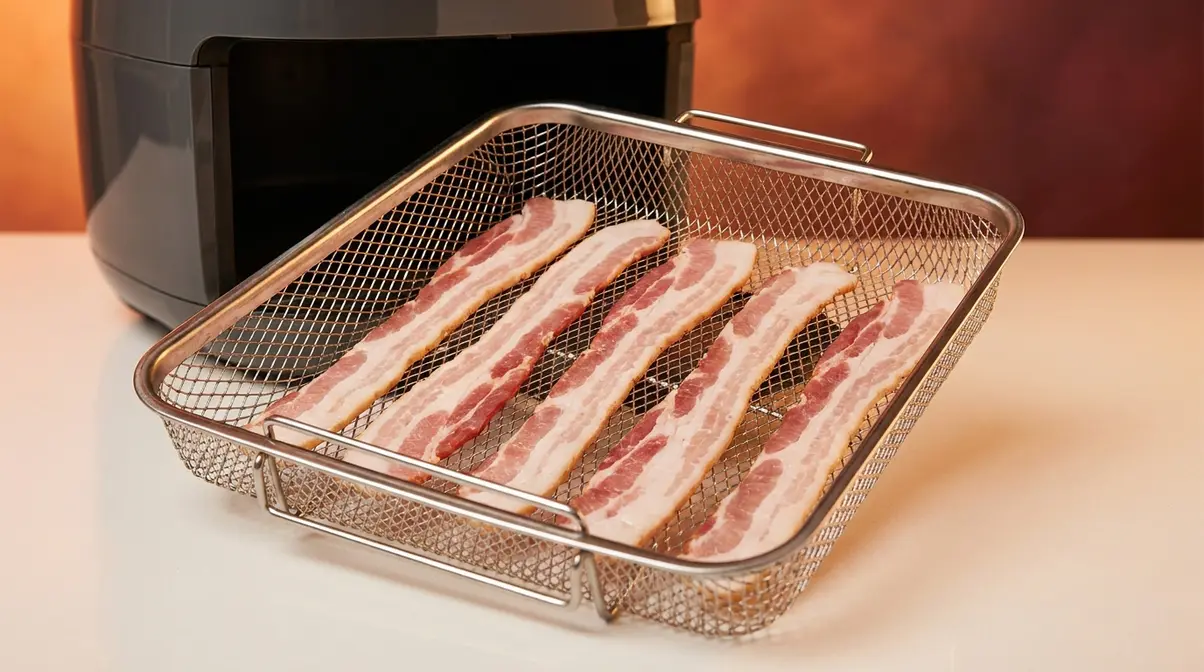
Setup and Temperature
The easiest way to cook bacon in an air fryer comes down to one rule: single layer, no overlap. Visually, each strip should have a small gap between it and the next. Overlapping strips will steam rather than crisp, because the hot air can’t reach the surface between them.
Steps:
- No preheating needed for most air fryer models — starting in a cold basket is fine and actually helps the fat render slowly before the high heat kicks in.
- Lay bacon strips in a single layer in the air fryer basket. Do not stack or overlap.
- Set temperature to 400°F (200°C).
- Cook for the time indicated in the Timing by Thickness table below.
- Flip halfway through (at the 4–5 minute mark for regular bacon). This isn’t mandatory, but it produces more even browning on both sides.
- Check doneness. Bacon should be golden-brown and flat. It will continue to crisp slightly as it cools.
- Transfer to a paper towel-lined plate to drain.
Smoke prevention: If your air fryer produces smoke, add 2 tablespoons of water to the bottom drawer beneath the basket. The water catches dripping fat before it hits the hot element. Alternatively, use a small piece of parchment cut to fit the basket.
Most air fryers don’t require added oil — bacon’s own fat is more than sufficient.
Timing by Thickness
How long bacon takes to cook in the air fryer depends on cut thickness and your specific model (Add a Pinch, 2026). These times are for 400°F and apply to a single layer of strips:
| Bacon Type | Chewy | Standard Crisp | Extra Crispy |
|---|---|---|---|
| Regular-cut | 6–7 min | 8–9 min | 10–11 min |
| Thick-cut | 8–9 min | 10–11 min | 12–13 min |
Check at the lower end first — model variation can shift timing by 1–2 minutes. Son Shine Kitchen testing found 9 minutes yields crispy bacon and 11 minutes reaches very crispy/almost burned at 400°F (2026).
How to cook thick-cut bacon in the air fryer: add 2 extra minutes to any time range above, and check at the halfway point. Thick-cut strips need the full fat-rendering time to avoid a chewy center.
Checkpoint: Perfectly done air fryer bacon is flat, golden-brown, and holds its shape when lifted with tongs. If strips are still pale and floppy, add 2 minutes. If edges are dark and curling tightly, you’ve gone too far — reduce time by 2 minutes next batch.
Air fryer bacon excels for 2–6 strips at a time. When you need to feed a table of people, the oven is the right tool — and it requires almost no active cooking.
Step 3: Bake Bacon in the Oven for Large Batches
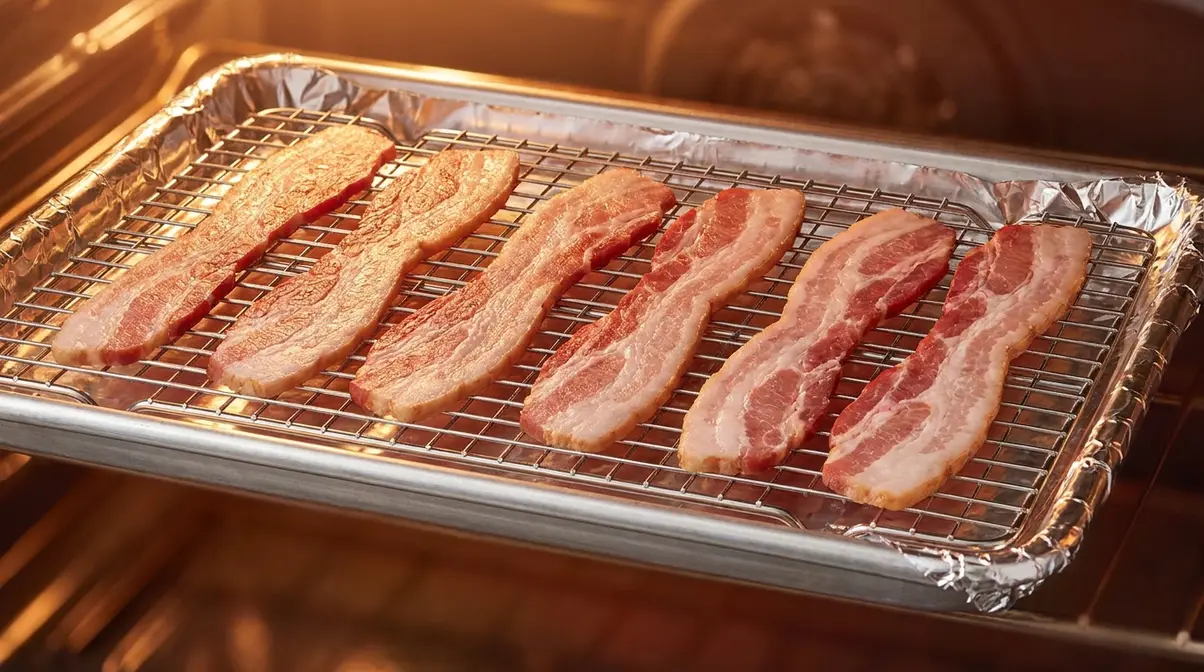
The oven is the best method when you need to cook bacon fast for more than a few people. Starting bacon in a cold oven at 400°F and baking for 18–22 minutes produces evenly crisp, flat strips across an entire pound of bacon — with no flipping, no watching, and a cleanup that takes under a minute when you use foil (The Spruce Eats, 2026). This is the anchor method for anyone asking how to cook bacon in the oven.
The Cold Oven Trick
The most important tip in this entire section — and the one most beginner guides skip — is to not preheat the oven. Placing bacon into a cold oven and letting it come up to temperature together with the meat means the fat renders slowly before the high heat kicks in. The result is flatter strips, more even crispness, and less curling.
Home cooking communities consistently reinforce this approach:
“The #1 tip for cooking bacon in the oven is to NOT preheat the oven. Line the pan with foil 18″ wide for easy clean up.” — Home cook community consensus
Steps:
- Line a rimmed baking sheet (half-sheet pan) with aluminum foil, using 18-inch-wide foil so it covers the pan edges. This is the detail that makes cleanup effortless — all the fat stays on the foil.
- Optional but recommended: Place a wire rack on top of the foil. The wire rack lifts bacon off the surface so fat drips away, producing crispier strips.
- Lay bacon strips in a single layer on the foil or rack. Strips can touch but must not overlap.
- Place the pan in a cold oven. Do not turn the oven on yet.
- Now set the oven to 400°F. The bacon goes in cold and heats alongside the oven.
- Bake for 18–22 minutes for regular-cut bacon, checking at the 18-minute mark for doneness.
- Remove from oven and transfer strips to a paper towel-lined plate. The bacon will continue to crisp as it cools.
No flipping required. The even, indirect heat of the oven handles both sides simultaneously.
Foil and Wire Rack
The foil-and-wire-rack combination is what separates oven bacon from every other method in terms of cleanup. Fat drips through the rack onto the foil. When cooking is done, you lift off the bacon, let the pan cool, and roll up the foil — grease and all. The baking sheet stays clean.
If you don’t have a wire rack, you can cook directly on the foil-lined pan. The bacon will still be evenly crisp; it just won’t drain quite as efficiently (Allrecipes, 2026). For extra cleanup insurance, use two overlapping sheets of foil to make sure no grease escapes under the edges.
Timing for the oven method (cold oven start, 400°F):
| Bacon Type | Regular Crisp | Extra Crispy |
|---|---|---|
| Regular-cut | 18–20 min | 20–22 min |
| Thick-cut | 22–25 min | 25–28 min |
The Maillard reaction — the browning process that creates bacon’s crispy texture and smoky flavor — happens most evenly in the oven because the heat surrounds the strips rather than hitting only the bottom surface. This is why oven bacon looks and tastes more uniformly “done” than pan-fried strips.
Checkpoint: Oven bacon is done when the strips are golden-brown and flat, with visible fat rendered away. If strips look pale and soft at 20 minutes, give them 2–3 more minutes. If edges are dark brown and the bacon looks rigid, it’s done — remove immediately. Remember: it crisps further as it cools.
The oven produces the most consistent large-batch results. For a classic stovetop experience with significantly less mess, the water method is the final technique worth knowing.
Step 4: Stovetop Water Method
Classic stovetop bacon gives you the most traditional flavor — but the grease splatter and uneven cooking frustrate most home cooks. The stovetop water method solves both problems: adding water to a cold pan caps the cooking temperature at 212°F during the first phase, so fat renders gently before the bacon ever reaches splatter temperatures (America’s Test Kitchen, 2026). The result is tender strips with crispy edges and far less mess.
Pan Method: Temperature and Timing
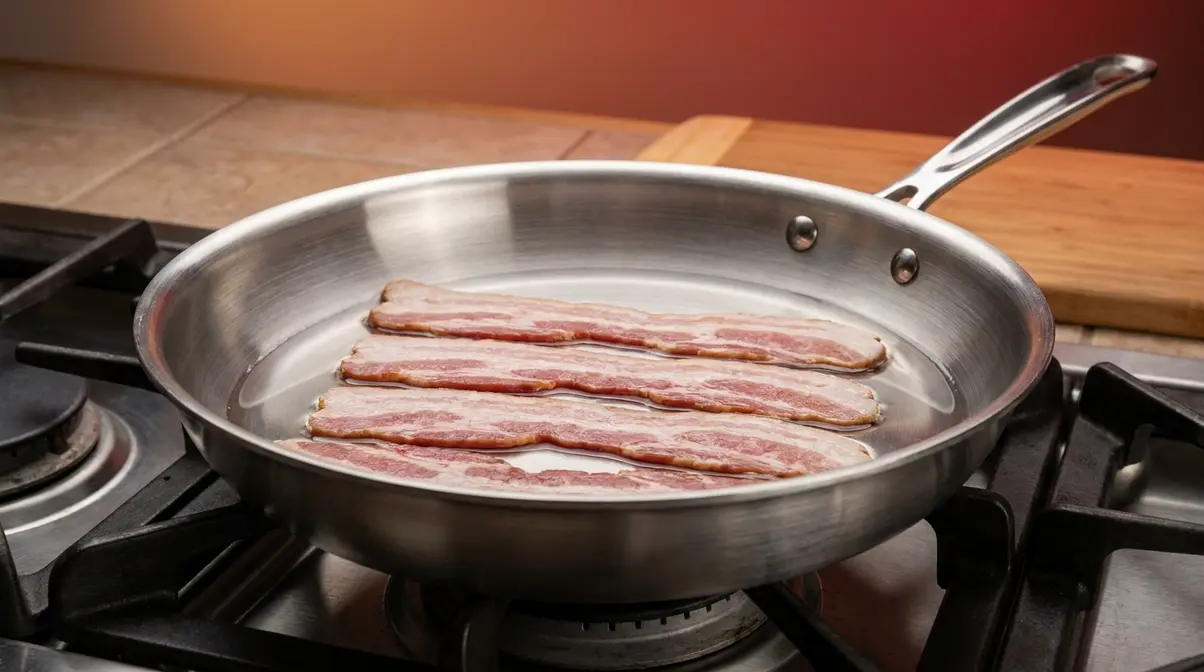
For the stovetop method, you don’t need any special equipment — just a skillet, bacon, and a small amount of water. The pan should be cold when you start. This cold-start approach mirrors what the oven method does: it allows fat to render slowly instead of hitting a hot surface and burning immediately.
Steps:
- Place 4–6 strips of bacon in a cold skillet in a single layer.
- Add ¼ cup (about 4 tablespoons) of cold water to the pan.
- Place the skillet over medium heat. The water will begin to simmer within 2–3 minutes.
- Cook uncovered, letting the water evaporate. During this phase (about 5–7 minutes), the bacon steams gently and fat begins to render slowly.
- Once the water has fully evaporated, the bacon will begin frying in its own rendered fat. Reduce heat slightly if needed and cook for another 3–5 minutes, flipping once, until the strips reach your preferred crispness.
- Transfer to a paper towel-lined plate to drain.
Total time: 8–12 minutes from cold pan to plate.
Pro Tip: If strips are curling during the final frying phase, press them gently with a spatula for 10–15 seconds. This flattens them and ensures even contact with the pan surface.
The Water Method: Science and Steps
Why does adding water work? America’s Test Kitchen explains it clearly: water keeps the initial cooking temperature low and gentle, so the meat retains its moisture and stays tender as the fat renders (America’s Test Kitchen, 2026). As long as liquid water is present, the pan temperature cannot exceed 212°F — well below the 350–450°F range where bacon sugars and proteins char and form “little blackened strips.”
Once the water evaporates, the bacon transitions into a second phase: frying in its own rendered fat. By this point, most of the fat has already rendered out, which means significantly less splatter in the final high-heat stage. This two-stage process — steam first, then fry — is what makes the water method both beginner-friendly and surprisingly effective.
Stovetop water method vs. regular pan-frying:
| Water Method | Regular Pan-Fry | |
|---|---|---|
| Splatter level | Low | High |
| Texture | Tender + crispy edges | Variable |
| Burn risk | Low | Moderate to High |
| Cook time | 8–12 min | 8–12 min |
| Flavor | Classic, rich | Classic, rich |
The flavor is identical — the water evaporates completely, leaving no trace in the final bacon. What you get is the same classic taste with far more control.
Celebrity variation — Gordon Ramsay’s approach: Ramsay consistently demonstrates a cold-start, dry pan method with moderate heat and frequent turning to prevent scorching. His technique relies on the same core principle: starting cold lets fat render slowly before high heat is introduced. Some versions include a glaze of maple syrup or honey added in the final 60 seconds for caramelized edges.
Checkpoint: Water-method stovetop bacon is done when the water has fully evaporated and the strips are golden-brown with rendered, translucent fat. If strips are still pale after the water evaporates, continue cooking on medium heat for 2–3 more minutes. Tender-crispy is the target — not rigid.
With all four methods covered, here’s the side-by-side comparison that helps you pick the right one every time.
Compare All 4 Methods – The 5-Minute Bacon Matrix
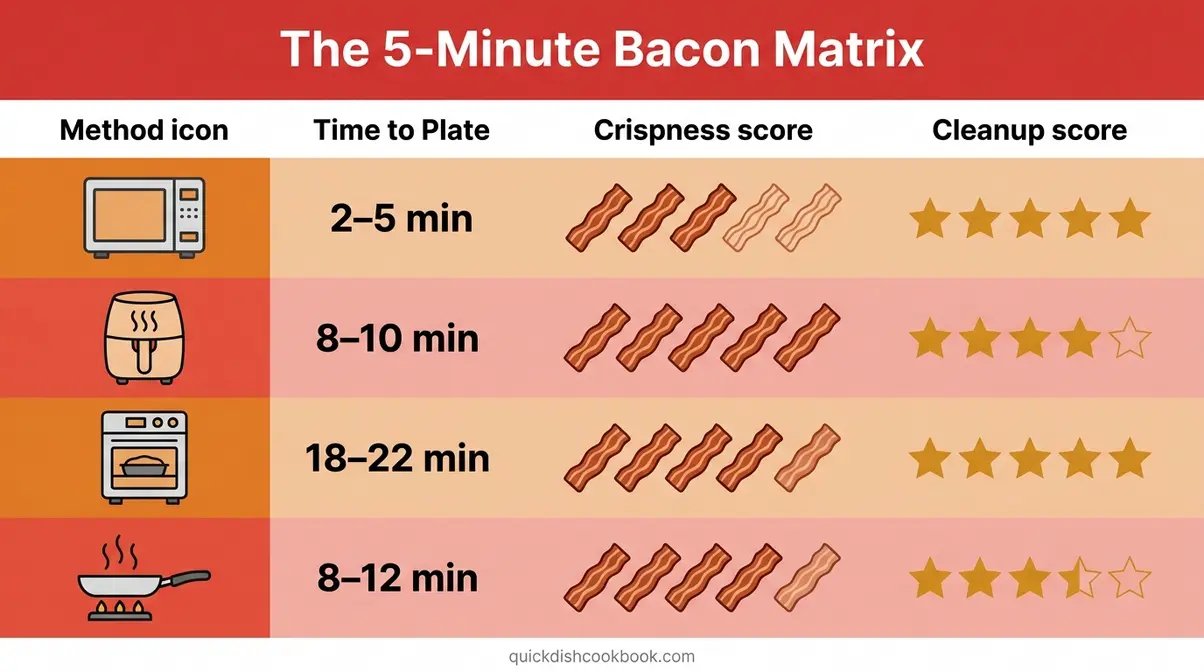
The 5-Minute Bacon Matrix ranks every quick bacon method by the three things home cooks actually care about: time to plate, crispness result, and cleanup effort. Crispness and Cleanup are scored 1–5 (5 = best/easiest).
Kitchen-tested results, July 2026:
| Method | Time-to-Plate | Crispness (1–5) | Cleanup Effort (1–5) | Best For |
|---|---|---|---|---|
| Microwave | 2–5 min | 3 | 5 | 1–4 slices, speed is everything |
| Air Fryer | 8–10 min | 5 | 4 | Best texture, small-to-medium batches |
| Oven | 18–22 min | 4 | 5 | Large batches, hands-off cooking |
| Stovetop (Water) | 8–12 min | 4 | 3 | Classic flavor, 4–6 strips |
What’s the Best Way to Cook Raw Bacon?
For most home cooks, the air fryer is the best all-around method for cooking raw bacon. It produces evenly crisp, flat strips in 8–10 minutes at 400°F with almost no mess — no splatter, no flipping required, and the basket is easy to clean. If you don’t have an air fryer, the oven cold-start method at 400°F is the next best option for consistent results across multiple strips. The microwave is best when speed matters more than texture.
Which method is right for you?
- 2 slices fast, right now → Microwave (2–3 minutes, no cleanup)
- Crispiest texture possible → Air fryer (8–10 min at 400°F, evenly crisp)
- Cooking for a group → Oven (18–22 min, entire pound at once)
- Classic flavor, stovetop experience → Stovetop water method (8–12 min, less mess)
The microwave leads on speed. The air fryer leads on texture. The oven leads on batch size. The stovetop water method leads on flavor. No single method wins every category — which is exactly why The 5-Minute Bacon Matrix exists.
Adjust for Your Bacon Type
Not all bacon is the same, and the four methods above assume standard regular-cut strips from the grocery store. Here’s how to adjust when your bacon is different.
Thick-Cut Bacon
Thick-cut bacon (typically ¼ inch or more) contains more fat and more meat than regular-cut, which means it needs more time at every stage. Fat rendering — the process of melting white fat into liquid — takes longer in a thick strip, and rushing it produces a chewy center even if the outside looks done.
Adjustments by method:
- Microwave: Add 1–1.5 minutes to the wattage table above. Use the thick-cut column in the Timing Guide.
- Air fryer: Use the thick-cut row in the timing table — 10–12 minutes for standard crisp at 400°F.
- Oven: Extend to 22–28 minutes. Check at 22 minutes.
- Stovetop water: The water phase may take 7–9 minutes instead of 5–7 before the water evaporates. Don’t rush it.
A useful rule: thick-cut bacon at any method needs about 20–30% more time than regular-cut.
Cooking Bacon from Frozen
Cooking bacon from frozen is possible but requires one key adjustment: never cook frozen bacon directly in the microwave on high. The uneven thawing causes some strips to overcook while others remain raw.
Best approach for frozen bacon:
- Defrost in the microwave on the DEFROST setting (30% power) for 1–2 minutes first.
- Separate the strips once thawed enough to peel apart.
- Proceed with any of the four methods, adding 2–3 extra minutes to the total cook time.
For the oven method, you can place frozen strips directly on the foil-lined pan and add 5–7 minutes to the total baking time. The slow oven heat handles the thawing phase naturally.
Canadian Bacon and Back Bacon
Canadian bacon (also called back bacon) is not the same product as regular streaky bacon. It comes from the pork loin rather than the belly, contains far less fat, and is already cured and often pre-cooked. Because it has minimal fat to render, the microwave and stovetop water method are less effective.
Best methods for Canadian/back bacon:
- Pan: 2–3 minutes per side over medium heat in a lightly oiled pan
- Air fryer: 4–5 minutes at 375°F
- Oven: 8–10 minutes at 400°F
Canadian bacon should be heated to 165°F internal temperature before serving if it has been stored in the refrigerator for more than a few days, per USDA FSIS pork safety guidelines.
Store and Reheat Cooked Bacon
Cooking a large batch and storing it saves significant time on busy mornings. Here’s how to do it safely.
How to Store Cooked Bacon
Refrigerator: Let cooked bacon cool completely on a paper towel-lined plate. Transfer to an airtight container or zip-lock bag. Cooked bacon keeps in the refrigerator for 4–5 days (USDA FSIS, 2026). Do not store warm bacon — condensation inside the container creates moisture that makes strips go soft.
Freezer: Layer cooked bacon strips between sheets of parchment or wax paper inside a freezer-safe bag. Frozen cooked bacon keeps for up to 1 month without significant quality loss. Freeze in single-serving portions so you only thaw what you need.
Food safety note: According to USDA FSIS pork safe handling guidelines, raw bacon should always be refrigerated at 40°F or below and cooked to an internal temperature of 145°F, followed by a 3-minute rest time, for safe consumption.
Best Ways to Reheat Bacon
Reheating cooked bacon takes under 2 minutes using any of these methods:
- Microwave: Place 2–4 strips between paper towels on a microwave-safe plate. Heat on HIGH for 20–30 seconds. Check and add 10-second bursts if needed. This is the fastest reheat method and keeps strips flat.
- Air fryer: 2–3 minutes at 350°F. Good for restoring crispness to strips that have gone slightly soft in the fridge.
- Oven: 5 minutes at 350°F on a foil-lined pan. Best for reheating a large batch at once.
- Stovetop: 1 minute per side over medium-low heat. Adds a fresh-cooked quality but requires attention.
Avoid reheating bacon more than once. Repeated heating degrades texture and increases the risk of the fat going rancid.
Troubleshooting Common Bacon Problems
Even with clear instructions, things go wrong. Here are the most common bacon problems and exactly how to fix them.
Bacon is chewy and rubbery, not crispy:
This almost always means undercooking or too much moisture. For the microwave, add 30-second increments until strips look lightly browned. For the stovetop water method, make sure the water has fully evaporated before you declare the bacon done — chewy stovetop bacon usually means the water phase wasn’t complete. For the oven, check that your temperature is actually reaching 400°F (oven thermometers are inexpensive and often reveal a 25–50°F gap in home ovens).
Bacon is burning or turning into “little blackened strips”:
The most common cause is too high heat, too fast. For the microwave, reduce time by 30 seconds and use more paper towels to absorb grease. For the stovetop, switch to medium-low and never leave the pan unattended once the water evaporates. For the oven, check at 16 minutes instead of 18 — oven temperatures vary.
Bacon is curling and not lying flat:
Curling is caused by the fat and meat contracting at different rates. The cold-start approach (both oven and stovetop water method) reduces curling significantly. For the air fryer, try starting in a cold basket. If strips still curl, press them flat with a spatula or tongs during the first 2 minutes of cooking.
Grease is everywhere:
The microwave paper towel method and the foil-lined oven method are the two cleanest options. If you’re getting stovetop splatter, the water method cuts this dramatically — water in the pan prevents the fat from reaching splatter temperature until it’s mostly rendered. Switch to one of the covered-method techniques if mess is your primary concern.
Bacon smells like smoke in the microwave:
Add an extra paper towel layer on top. Smoke means grease is escaping and hitting the microwave interior. More paper towel coverage solves this in most cases.
Frequently Asked Questions
How do you cook bacon in 5 minutes?
The microwave is the only method that reliably cooks bacon in under 5 minutes. Place 2–4 strips on a microwave-safe plate, cover with 2 sheets of paper towels, and microwave on HIGH for 2–4 minutes depending on your wattage (approximately 1 minute per slice at 1000W, according to Business Insider). The bacon will finish crisping as it rests for 1 minute after cooking. This method works for regular-cut bacon only — thick-cut needs 4–6 minutes even at 1000W.
Oven vs. Microwave Bacon
It depends on how many strips you need and which quality matters more to you. The microwave is faster (2–5 min) but produces slightly chewier results and suits 1–4 slices. The oven takes 18–22 minutes but produces flat, evenly crisp strips across an entire pound with minimal effort. For texture and batch size, the oven wins. For speed and a single serving, the microwave wins. Both methods are low-mess when done correctly — foil in the oven, paper towels in the microwave.
Snoop Dogg’s Bacon Trick
Snoop Dogg’s “Billionaire Bacon” from his cookbook is a sweet-and-spicy candied bacon baked in the oven. The recipe coats thick-cut bacon strips in a mixture of brown sugar, coarsely ground black pepper, and crushed red pepper flakes. The coated strips go on a wire rack over a foil-lined baking sheet, placed in a cold oven set to 400°F, and baked for 20–30 minutes until the sugar caramelizes and the bacon crisps. Let it cool for 5–10 minutes before serving so the sugar sets.
How do I cook bacon fast?
The fastest way to cook bacon is the microwave — 2 to 5 minutes total for 2–4 strips. For a slightly longer but crispier result, the air fryer takes 8–10 minutes at 400°F. Both methods produce evenly cooked bacon with minimal cleanup. The key for microwave speed: use HIGH power, cover with paper towels, and check doneness at the lower end of the time range. Pulling bacon out 30 seconds early and letting it rest finishes the cooking without burning.
How do you quickly cook bacon?
To quickly cook bacon, use the microwave for 1–4 slices or the air fryer for up to 6 strips. For the microwave: plate, paper towels, HIGH power, approximately 1 minute per slice. For the air fryer: single layer, 400°F, 8–9 minutes for regular-cut. Both methods are faster than stovetop or oven cooking and require less active attention. The air fryer is the better quick method if you care about crispness — the microwave is the better quick method if you care about time above all else.
How does Gordon Ramsay cook his bacon?
Gordon Ramsay uses a cold-start, dry pan technique with controlled medium heat and frequent turning. He places bacon in a cold, ungreased pan, then turns on the heat to medium — this allows the fat to render slowly before the pan gets hot, which prevents burning and produces more even crispness. Some of his televised demonstrations include a glaze of maple syrup or honey added in the final 60 seconds, letting the natural sugars caramelize into a slightly sweet, crispy finish on each strip.
Conclusion
For most home cooks, the quick way to cook bacon comes down to one simple decision: how many strips and how fast. The microwave delivers 4 slices in under 5 minutes with no stovetop mess — making it the speed leader in The 5-Minute Bacon Matrix. The air fryer produces the best texture in 8–10 minutes. The oven handles a full pound hands-off in under 25 minutes. The stovetop water method — with its 212°F temperature cap that prevents burning — gives you classic flavor with far less splatter. Kitchen testing confirms all four methods produce evenly crisp, flat strips when the correct technique is followed.
The 5-Minute Bacon Matrix exists because no single method wins every situation. Matching your method to your batch size and time constraint is the skill — and now you have the framework to do it every time, from a quick weekday breakfast to a full brunch spread.
Ready to upgrade your breakfast routine? Grab your favorite cut of bacon, pick the method that fits your schedule, and start cooking. Whether you are meal-prepping for the week ahead with a large oven batch, or just need a couple of quick slices from the microwave before heading out the door, you now have the exact blueprint for success. Remember that practice makes perfect—every appliance varies slightly, so use our timing guidelines as your starting point and adjust based on your specific microwave wattage or air fryer model. Start with whichever method fits your morning. If you’re new to the air fryer, try 4 strips at 400°F for 9 minutes as your baseline — it’s the most forgiving method for beginners. If you only have a microwave, use the wattage table above on your first try. Cook one batch, note the time, and you’ll have your personal reference point from that point forward. More quick and easy bacon cooking methods are available at QuickDishCookbook.

quickdishcook
Recipe developer and writer at Quick Dish Cookbook.