
What’s in this guide
- What You'll Need Before You Start
- Step 1: Choose the Right Herbs
- Step 2: Wash and Prepare Your Herbs for Drying
- Step 3: Arrange Herbs on the Dehydrator Trays
- Step 4: Set Temperature and Start Drying
- Step 5: Test for Doneness
- Step 6: Cool, Store, and Use Your Dried Herbs
- Timing, Temperature & Energy Costs
- Common Mistakes to Avoid When Dehydrating Herbs
- Frequently Asked Questions
- Wrap Up: Your First Batch Starts Today
You bought a beautiful bunch of fresh basil at the farmers’ market on Saturday. By Monday, it’s already wilting on your counter. Your first instinct? Toss it in the oven on the lowest setting.
Here’s the problem: even a 200°F oven destroys the essential oils — the natural aromatic compounds that give herbs their flavor and aroma — before the leaves come close to drying out. The result is dull, papery herbs that taste like nothing.
Learning how to use a dehydrator for herbs and spices solves this completely. Set the temperature to 95–115°F, arrange clean, dry herbs in a single layer on the trays, and dry for 1 to 4 hours. This 6-step process takes 2 to 5 hours total including prep. Herbs are done when they snap cleanly and crumble between your fingers.
By the end of this guide, you’ll know the exact temperature and time for every herb type, which herbs should never go in the dehydrator, and what a 12-hour drying session actually costs to run.
What You’ll Need Before You Start
Before you dehydrate herbs, gather these items. Most beginners have everything already — the only purchase you may need is a mesh liner if your trays have wide gaps.
- Equipment:
- Food dehydrator (an electric appliance that circulates low heat to remove moisture from food)
- Dehydrator trays (the stackable mesh shelves that hold your herbs inside the unit)
- Mesh liner or parchment paper (a thin sheet placed over the tray to catch tiny leaves that would otherwise fall through)
- Airtight containers (sealed glass or plastic jars that prevent moisture from re-entering your dried herbs)
- Paper towels or a clean kitchen towel (for the critical surface-drying step in Step 2)
- Kitchen scissors or your hands (for separating leaves from thick stems)
- Time estimate:
- Prep (wash, dry, arrange): 15–30 minutes
- Drying cycle: 1–4 hours depending on herb type
- Cooling and storage: 15–20 minutes
- Total: 2–5 hours
Knowledge required: None. This is a complete beginner’s guide — every term is defined on first use.
You’ll also apply The Herb Dehydration Decision Matrix starting in Step 1 — a three-question framework that tells you exactly which herbs to dry, which to freeze, and what temperature to use. Once you have everything ready, move straight to Step 1.
Step 1: Choose the Right Herbs
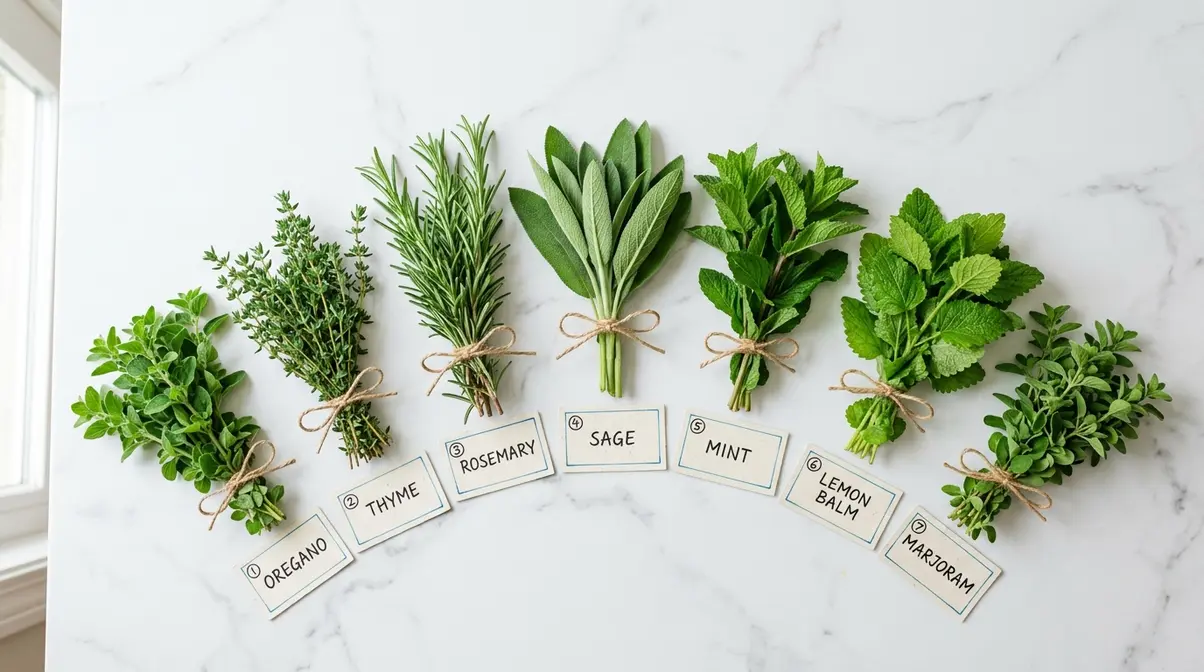
When figuring out how to use a dehydrator for herbs and spices, the single factor that determines whether your herbs dehydrate successfully is moisture content. Low-moisture, woody herbs — like oregano, thyme, and rosemary — retain their essential oils through the full drying process. High-moisture, delicate herbs — like basil and cilantro — lose most of their flavor before the leaves even dry out. Choosing the right herbs before you load a single tray prevents wasted time, ruined batches, and disappointing results.
The Herb Dehydration Decision Matrix is a three-question framework you’ll use throughout this guide:
- Question 1: Is this herb woody or leafy? → Sets your temperature (woody = 105–115°F, leafy = 95–105°F)
- Question 2: Is this herb high-moisture or delicate? → Determines whether to dehydrate or freeze
- Question 3: What recipe ratio do I need? → Use the 3:1 fresh-to-dried rule (1 tablespoon fresh = 1 teaspoon dried)
What herbs are best for dehydrating?
Best herbs for dehydrating share two traits: woody or semi-woody stems and low natural moisture content. These characteristics allow the dehydrator’s low heat to remove water gradually without evaporating the essential oils that make herbs worth preserving.
Here are the top 7 herbs for beginners:
- Oregano — Low moisture, woody stems, retains its sharp, peppery flavor even after 3 hours of drying. The ideal beginner’s first batch — forgiving and fast.
- Thyme — Tiny leaves release moisture quickly; the woody stems stay firm and easy to strip after drying.
- Rosemary — Needle-like leaves and fibrous stems make this one of the most dehydrator-friendly herbs available. Strong flavor survives the full drying process.
- Sage — Slightly higher moisture than oregano but still dries beautifully at 105–115°F; the velvety texture becomes papery and crumbly when done.
- Mint — Semi-woody stems and moderate moisture; dries in 1–2 hours at 95–105°F with an intensified, concentrated flavor.
- Lemon balm — Similar structure to mint; excellent dried for teas and cooking.
- Marjoram — A close relative of oregano with a milder, sweeter flavor that holds up perfectly through dehydration.
Bonus category: Seeds and spices also dehydrate well — coriander seeds, dill seeds, and fennel fronds dry at slightly higher temperatures (120–125°F) and are worth exploring once you’ve mastered leafy herbs. No top competitor covers this, so you’re already ahead.
The Spruce Eats confirms oregano, thyme, rosemary, sage, and mint as top dehydrating herbs, noting that their robust essential oil content makes them especially well-suited to low-temperature drying (2026).
“Herbs with low moisture content and woody stems — such as oregano, thyme, and rosemary — retain their essential oils through the dehydration process, making them ideal candidates for drying.”
Now that you know which herbs to choose, the next step is getting them clean and ready for the trays — and there’s one preparation mistake that causes more failed batches than any other.
What herbs should you not dry?
Some herbs simply fail in a dehydrator — not because of user error, but because of their biology. These herbs have either heat-sensitive oils that evaporate almost instantly under low heat, or such high moisture content that the outside dries and turns black while the inside stays damp.
Herbs to avoid drying — and exactly what to do instead:
- Basil — High moisture content plus heat-sensitive oils cause the leaves to turn black and lose most of their flavor within the first hour. Better alternative: Blanch leaves briefly in boiling water for 5 seconds, pat dry, then freeze in olive oil in an ice cube tray. Each cube drops directly into pasta sauce or soup.
- Cilantro — Volatile aromatic oils evaporate almost entirely during dehydration, leaving behind papery, flavorless flakes. Better alternative: Blend cilantro with a small amount of water into a paste and freeze flat in a zip-lock bag; break off pieces as needed.
- Chives — Become completely flavorless and papery when dried. Better alternative: Chop finely and freeze dry in an airtight container — they retain their mild onion flavor for months.
- Parsley — Usable but loses significant color (turns pale green) and some flavor. Better alternative if you must dehydrate: Set the temperature to exactly 95°F, accept the color loss, and use within 3 months for best flavor.
One more item to keep out of the dehydrator entirely: herb-based sauces like pesto and chimichurri. Their fat content prevents proper moisture removal and creates a food-safety risk. Freeze them instead.
Freezing basil in olive oil takes 5 minutes and produces flavor-packed cubes you can drop directly into a pasta sauce — no dehydrator required, and significantly better flavor than anything a dehydrator could produce with basil.
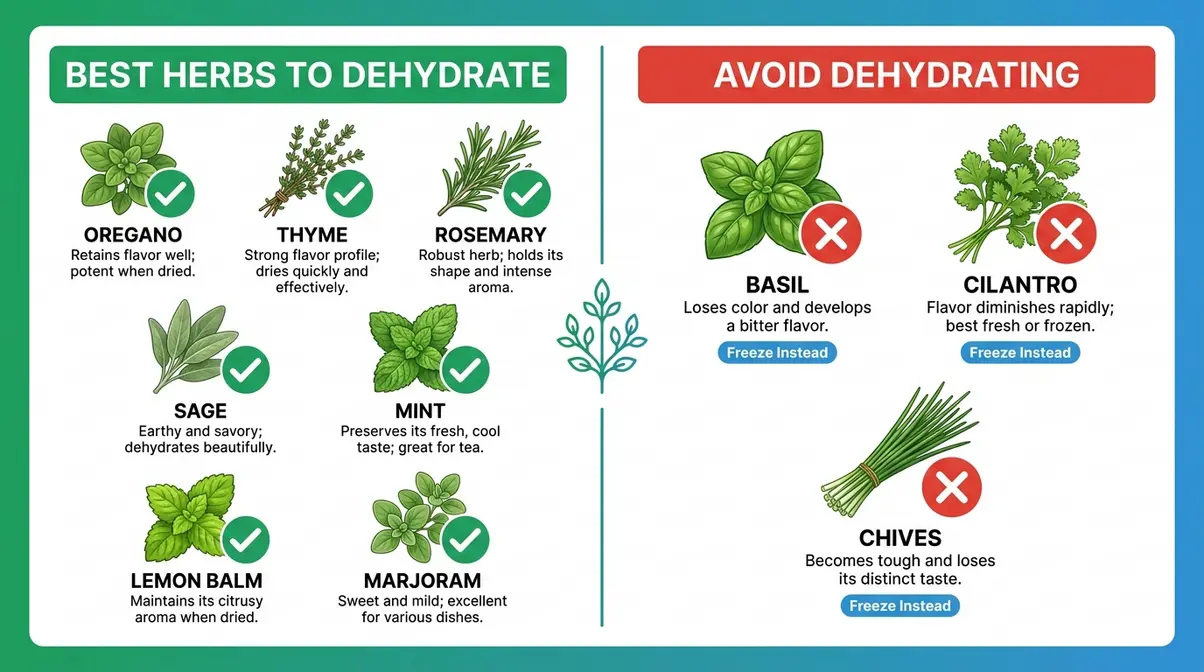
Checkpoint: You should now have a clear pile of herbs to dehydrate and a plan for any delicate herbs (basil, cilantro) — those go in the freezer.
With your herbs selected, the next step is the one most beginners rush — and it’s the step that determines whether your dried herbs taste incredible or bland.
Step 2: Wash and Prepare Your Herbs for Drying
Picture this: you load your fresh thyme into the dehydrator, run it for two hours, and pull out trays where some leaves are perfectly papery while others are still pliable and slightly damp. You didn’t do anything wrong with the temperature or the timing. The problem happened before you even turned the machine on.
Surface moisture — water remaining on herb leaves after washing — is the most common cause of uneven drying. Even a small amount makes your dehydrator work harder and causes the outside of the leaf to dry while the inside stays damp, which can lead to mold during storage.
“Herbs must be completely surface-dry before entering the dehydrator — residual moisture on leaves causes uneven drying and increases the risk of mold during storage (Brod & Taylor, 2026).”
How to prepare herbs for dehydrating:
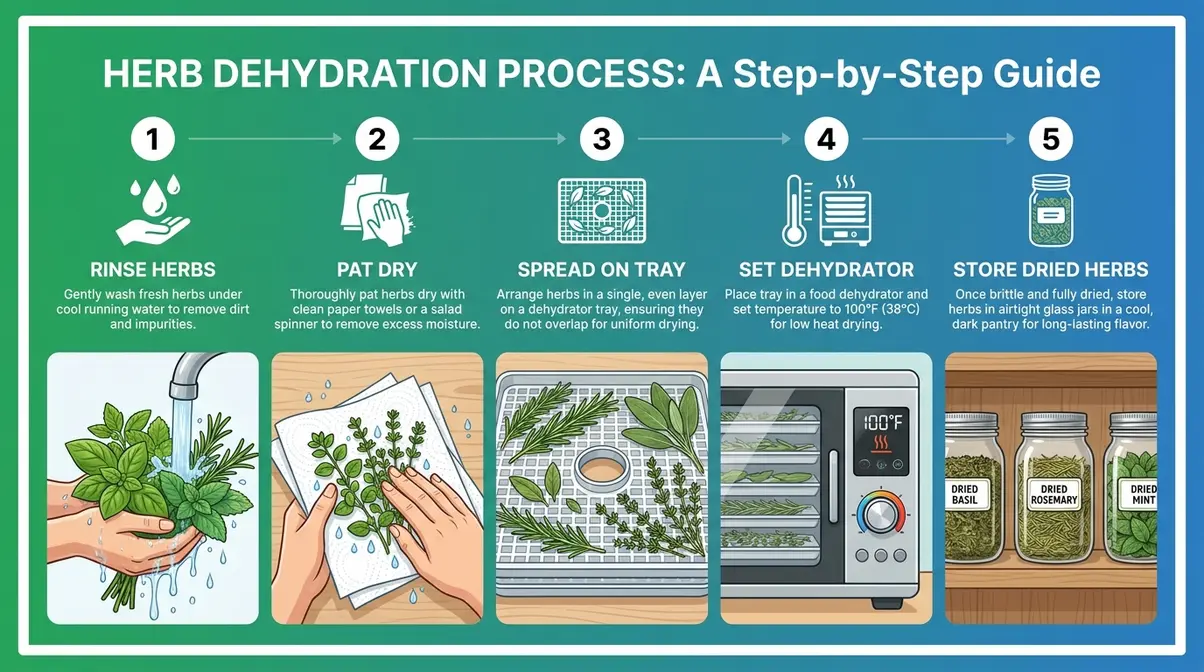
- Rinse under cool running water — hold the stems and swish the leaves gently; avoid hot water, which starts to wilt delicate herbs immediately.
- Shake firmly over the sink — remove the bulk of the surface water before touching a towel.
- Pat completely dry with paper towels — press gently but thoroughly; flip the bundle and pat the other side.
- Remove damaged, yellowed, or bruised leaves — these dry unevenly and can affect the flavor of the whole batch.
- Separate leaves from thick stems — woody stems take far longer to dry than leaves; removing them ensures even drying across the tray.
Small leaves vs. large leaves: Small-leafed herbs like thyme can go on the tray as-is, stems and all. Large-leafed herbs like sage or bay leaves benefit from being torn in half — this exposes more surface area and speeds up the drying process noticeably.
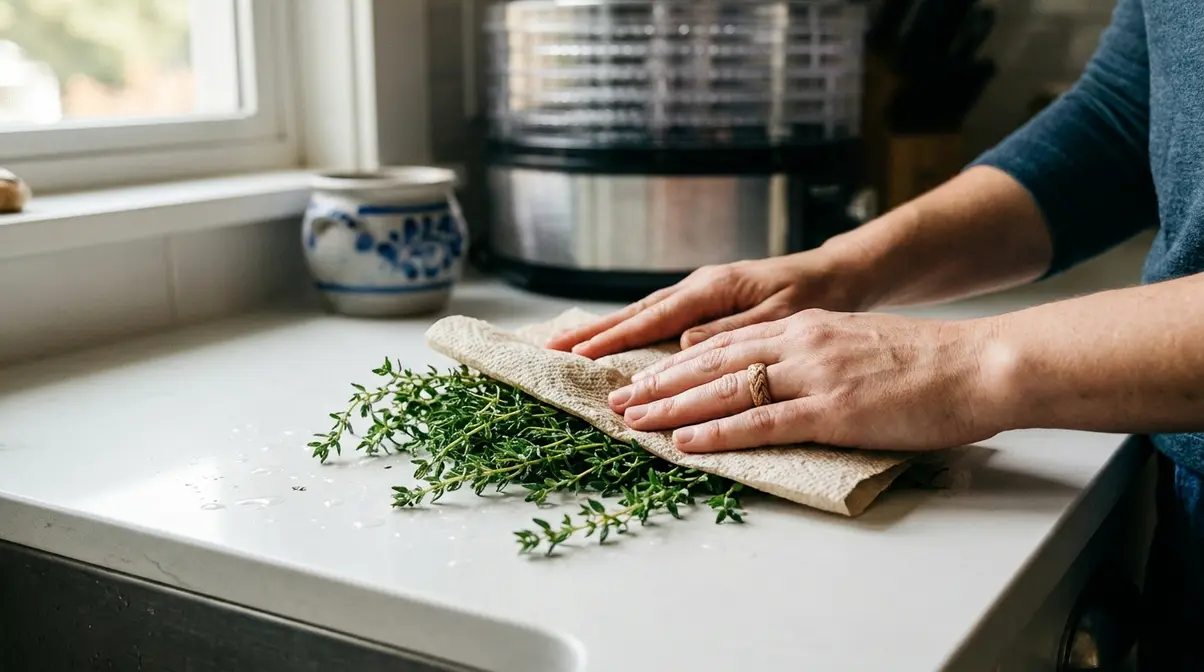
Checkpoint: Your herbs should be visibly dry — no water droplets on leaves, no damp stems. If they’re still wet, wait 20 more minutes before loading the trays.
Step 3: Arrange Herbs on the Dehydrator Trays
Every herb leaf must lie flat, in a single layer, with no overlapping. Break this rule and you’ll get a mixed tray of over-dried crumbles and still-damp leaves — because the covered leaves never get the airflow they need.
Airflow is the moving warm air that actually removes moisture from your herbs. If herbs overlap, the air can’t reach every leaf, and those covered leaves stay damp regardless of how long you run the machine.
“Placing herbs in a single, non-overlapping layer on dehydrator trays is the most critical preparation step — overlapping leaves block airflow and result in uneven drying, with some leaves over-dried while others remain pliable (Fresh Off the Grid, 2026).”
How to arrange herbs in a dehydrator:
- Spread in a single layer — no leaf should sit on top of another.
- Use small stems as anchors — lay a thin stem across a cluster of lightweight leaves to prevent them from blowing around when the dehydrator fan starts up.
- Use a parchment liner for tiny leaves — small herbs like thyme or lemon balm leaves will fall through standard mesh gaps; a parchment sheet or fine mesh liner keeps them on the tray.
- Leave spacing between trays — if your dehydrator is stackable, leave one empty tray between herb-loaded trays to allow warm air to circulate freely between levels.
- Never stack or compress herbs — if you run out of tray space, run a second batch rather than crowding the first.
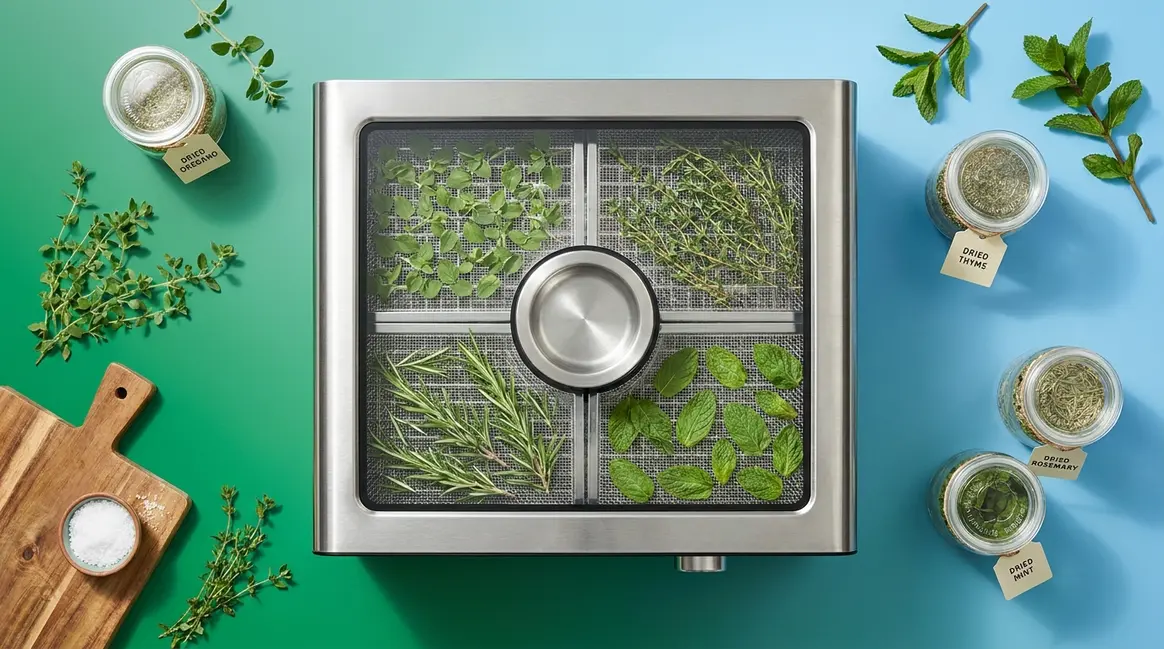
See the arrangement guide above for a visual reference on correct vs. incorrect tray loading.
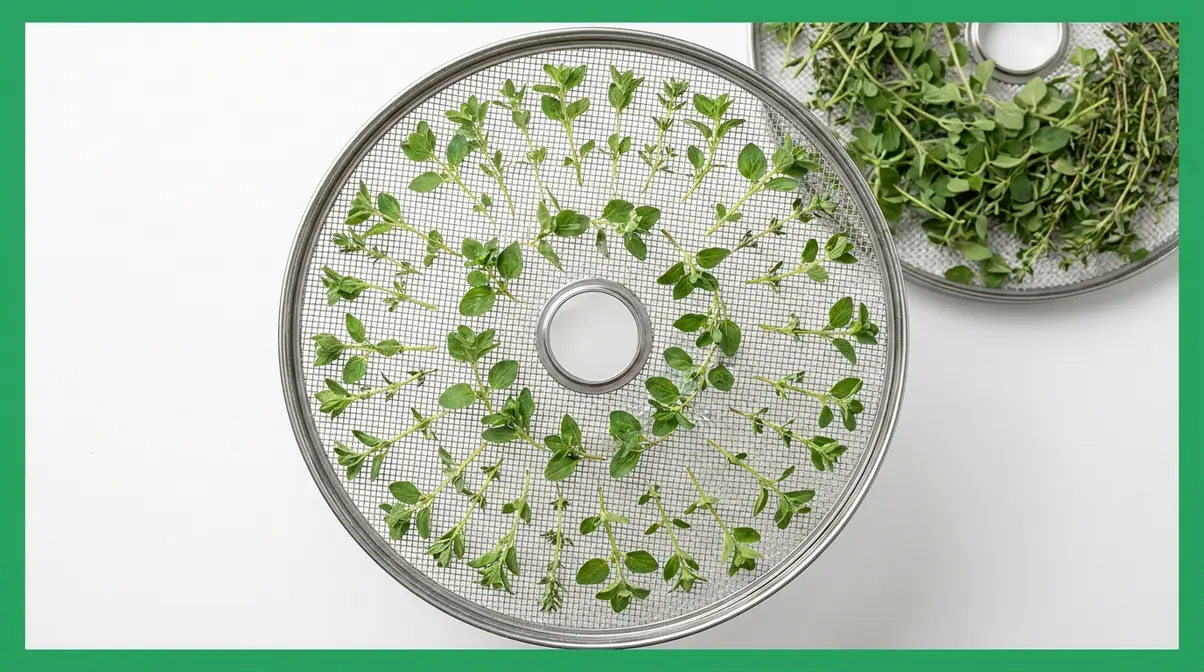
Checkpoint: Every leaf should be visible from above with no overlapping. If you have more herbs than tray space, run two batches — never crowd the trays.
Step 4: Set Temperature and Start Drying
When learning how to use a dehydrator for herbs and spices, temperature is the decision that matters most. Set it too low and herbs dry unevenly, taking far longer than necessary. Set it too high and you’ll destroy the essential oils — the natural aromatic compounds in herbs that provide their flavor and aroma — before the moisture is fully removed. The correct range is 95–115°F, and the exact setting within that range depends on the type of herb you’re drying.
“Herbs should be dried at 100°F (38°C). Small herbs should be placed on the mesh screen for the best drying.”
This is exactly right, and it reflects what university extension researchers have confirmed repeatedly. According to Oregon State University Extension, keeping dehydrator temperatures between 90–100°F preserves herb flavor, with drying times typically ranging from 1 to 3 hours until the herbs crumble easily (Oregon State University Extension, 2026).
Temperatures: Leafy vs. Woody Herbs
This is where Question 1 of the Herb Dehydration Decision Matrix applies. Identify your herb type first, then set your temperature:
- Woody herbs (rosemary, thyme, oregano) — set toward the higher end: 105–115°F. Their fibrous stems and low natural moisture content handle slightly higher heat without losing flavor.
- Leafy herbs (mint, lemon balm, sage) — stay at the lower end: 95–105°F. Their softer structure and higher moisture content require gentler heat to dry evenly.
- Spices and seeds (coriander seeds, dill seeds, fennel fronds) — use 120–125°F. Their hard outer shells protect the essential oils inside, making them tolerant of slightly higher temperatures.
UC ANR confirms that the optimal dehydrator temperature for herbs is 95°F to 115°F; in highly humid environments, increasing to 125°F may be necessary to ensure thorough drying (UC ANR, 2026).
Reference table — herb type, temperature, and typical drying time:
| Herb Type | Examples | Temperature | Typical Drying Time |
|---|---|---|---|
| Leafy herbs | Mint, lemon balm, sage | 95–105°F | 1–2 hours |
| Woody herbs | Oregano, thyme, rosemary | 105–115°F | 2–4 hours |
| Spices/seeds | Coriander, dill, fennel | 120–125°F | 3–4 hours |
| High-humidity adjustment | Any herb type | Up to 125°F | Add 30–60 min |
Why high temperatures destroy herbs: Essential oils start to break down above 120°F for most leafy herbs. The compounds responsible for flavor — the same ones that make fresh oregano smell sharp and fresh thyme smell earthy — simply evaporate when exposed to excessive heat. This is why keeping the temperature low is non-negotiable for leafy varieties.
To understand dehydrator settings and timing for herbs in more depth, the quickdishcookbook.com guide on dehydrator settings covers spice-specific techniques in detail.
The 3:1 conversion ratio: Once your herbs are dried, use them in recipes at a 3:1 ratio — 1 tablespoon of fresh herb equals 1 teaspoon of dried herb. This is the widely accepted standard across culinary references (The Pioneer Woman, 2026; Reluctant Gourmet, 2026), and it applies to virtually every herb you’ll dehydrate.
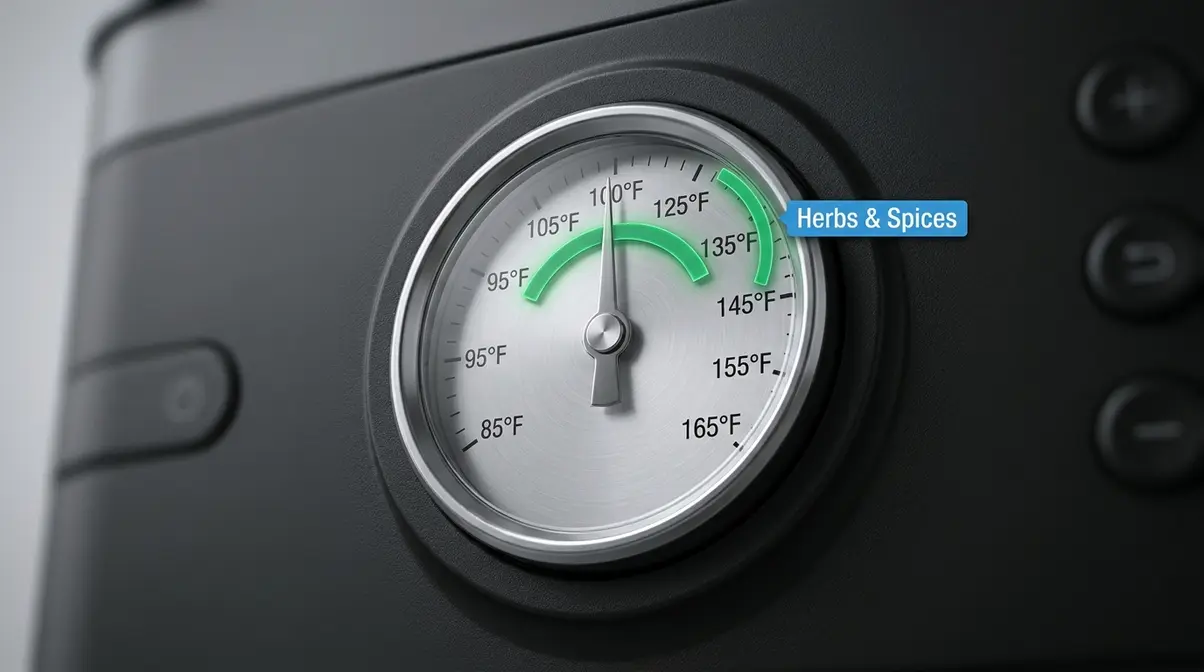
Checkpoint: Your dehydrator is running at the correct temperature for your herb type. Set a timer for 1 hour — you’ll perform the doneness tests in Step 5.
Step 5: Test for Doneness
Most beginners make the same mistake here: they pull herbs after a set amount of time without actually testing them. Time is a guideline, not a guarantee. Humidity, herb thickness, and how thoroughly you surface-dried in Step 2 all affect the final drying time. The only reliable way to know your herbs are done is to test them.
The three doneness tests — perform all three before removing herbs from the dehydrator:
Snap, Crumble, and Stem Bend Tests
Snap Test: Pick up a stem and bend it firmly. A fully dried herb stem snaps cleanly in two with an audible crack. If it bends without breaking, or bends and slowly returns to shape, the herb needs more time.
Crumble Test: Pinch a leaf between your thumb and forefinger and rub firmly. Properly dried leaves crumble into small flakes immediately. If the leaf compresses without breaking apart, or feels slightly pliable, moisture remains inside.
Stem Bend Test: For woody herbs like rosemary and thyme, hold a stem at both ends and apply gentle pressure. A dry stem snaps; an under-dried stem flexes. This test is especially useful for thick-stemmed herbs where the leaves may appear dry while the stem still holds moisture.
Check schedule: Start checking at the 1-hour mark, then every 30 minutes after that. Remove individual trays as they finish — thinner herbs on upper trays often dry 30–60 minutes faster than thicker herbs on lower trays.
What under-dried herbs look like in storage: If you skip these tests and store herbs with residual moisture, you’ll see condensation form on the inside of the jar within 24 hours. If that happens, return the herbs to the dehydrator immediately for another 30–60 minutes.
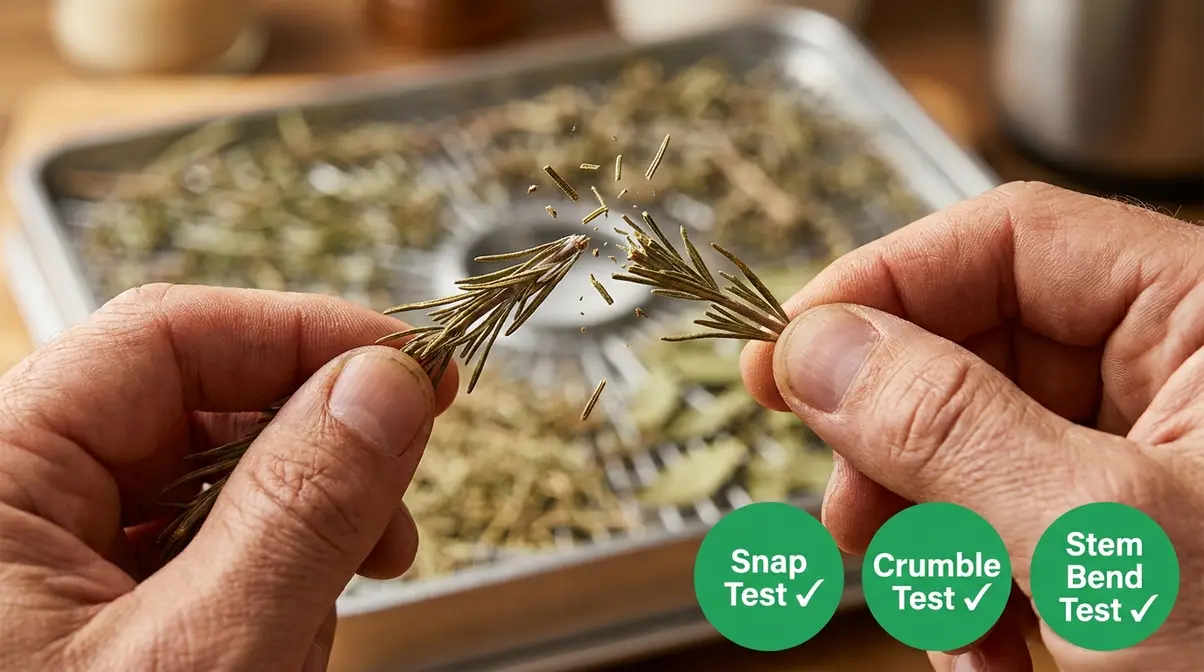
Checkpoint: All three tests pass — stems snap, leaves crumble, no flexibility remains. Remove the trays and move to Step 6.
Step 6: Cool, Store, and Use Your Dried Herbs
Removing herbs from the dehydrator and immediately sealing them in jars is one of the most common beginner mistakes. Hot herbs release steam inside a sealed container, which creates condensation — and that moisture can cause mold even in herbs that tested perfectly dry.
How to cool and store dried herbs:
- Remove trays from the dehydrator and set them on a clean, dry countertop.
- Let herbs cool completely — at least 20–30 minutes at room temperature. The leaves should feel cool to the touch before you handle them further.
- Strip leaves from stems — run your fingers down woody stems to release the leaves, or simply crumble directly into your storage jar.
- Fill airtight glass jars — glass is preferred over plastic because it doesn’t absorb herb oils or odors. Mason jars with tight-fitting lids work perfectly.
- Label with herb name and date — dried herbs look surprisingly similar once they’re in jars. Always write the date so you know when to replace them.
- Store in a cool, dark location — a pantry or cupboard away from the stove, sink, and any windows. Heat and light degrade essential oils even in dried herbs.
Shelf life: According to Penn State Extension, most dried herbs keep well for one year when stored in airtight containers in a cool, dry, dark area (Penn State Extension, 2026). UC ANR narrows this to best flavor within 6 months to 1 year, and recommends storing whole leaves rather than crushing them until you’re ready to use them — whole herbs retain their oils longer than pre-crumbled ones (UC ANR, 2026).
The 3:1 ratio in practice: When you reach for your dried oregano, remember the Herb Dehydration Decision Matrix — Question 3. Every recipe calling for 1 tablespoon of fresh oregano needs only 1 teaspoon of your home-dried version. Home-dried herbs are often more potent than store-bought, so start with slightly less and adjust to taste.
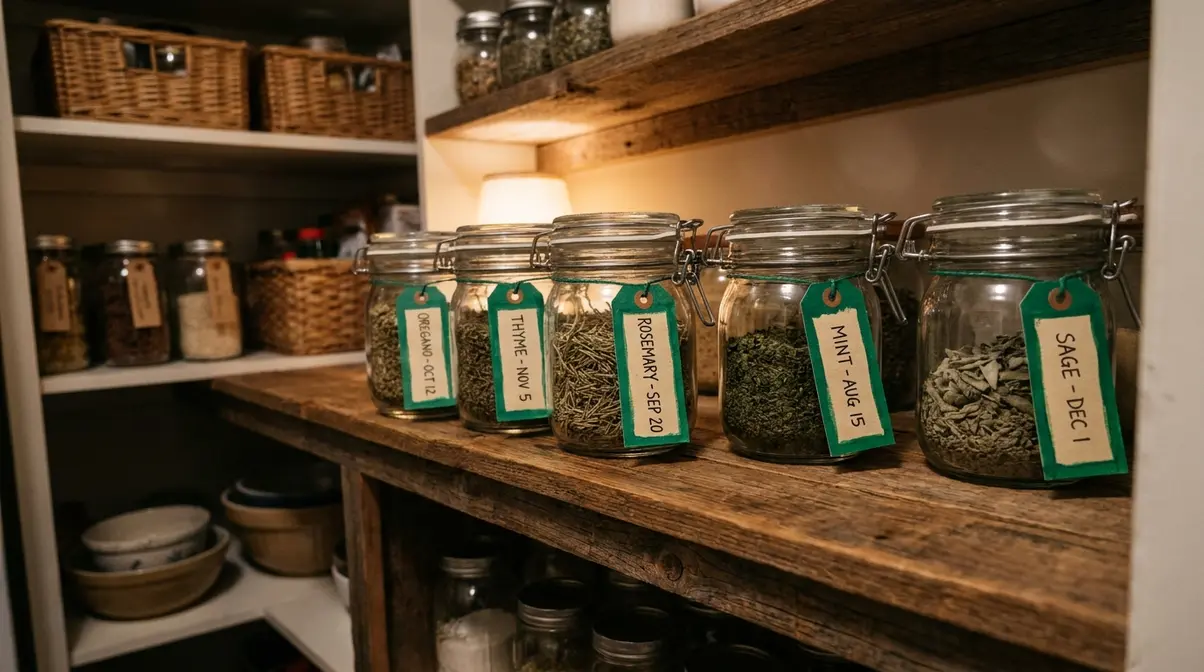
Checkpoint: Herbs are cool, labeled, sealed in airtight jars, and stored away from heat and light. Your first batch is complete.
Timing, Temperature & Energy Costs
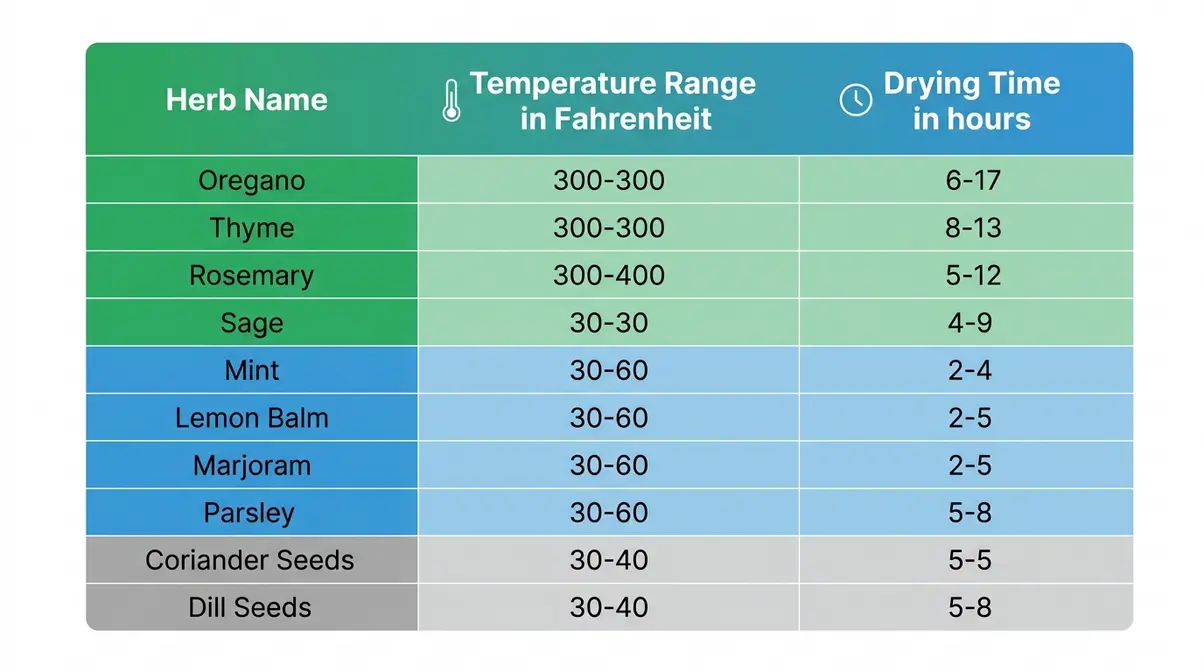
Herb-by-Herb Temperature and Time Chart
This table covers the most common culinary herbs. Use it alongside the Herb Dehydration Decision Matrix — confirm your herb type in Step 1, set your temperature in Step 4, and use this chart as your timing reference.
| Herb | Category | Temperature | Drying Time | Doneness Cue |
|---|---|---|---|---|
| Oregano | Woody | 105–115°F | 1–3 hours | Leaves crumble instantly |
| Thyme | Woody | 105–115°F | 1–3 hours | Stems snap cleanly |
| Rosemary | Woody | 105–115°F | 2–4 hours | Needles fall off stem |
| Sage | Leafy/Woody | 95–115°F | 1–3 hours | Leaves papery, crumble |
| Mint | Leafy | 95–105°F | 1–2 hours | Leaves crumble, no flex |
| Lemon balm | Leafy | 95–105°F | 1–2 hours | Crispy, no pliability |
| Marjoram | Woody | 105–115°F | 1–3 hours | Leaves fall from stem |
| Parsley | Leafy | 95°F (max) | 2–3 hours | Pale green, crumbles |
| Coriander seeds | Seeds | 120–125°F | 3–4 hours | Hard, no moisture |
| Dill seeds | Seeds | 120–125°F | 3–4 hours | Firm, light tan color |
Sources: Oregon State University Extension (2026); UC ANR (2026)
Cost to Run Dehydrator for 12 Hours
This is the question every top competitor missed — and it matters, because the answer is reassuringly low.
The calculation:
Most home food dehydrators draw between 300–800 watts. A mid-range unit at 600 watts running for 12 hours uses:
600W ÷ 1,000 × 12 hours = 7.2 kWh
At the 2026 U.S. average residential electricity rate of approximately $0.17 per kWh (EcoFlow, citing U.S. Energy Information Administration data, 2026):
7.2 kWh × $0.17 = $1.22 for a full 12-hour session
For most herb drying sessions (1–4 hours), the actual cost is dramatically lower:
| Session Length | 300W Unit | 600W Unit | 800W Unit |
|---|---|---|---|
| 2 hours | ~$0.10 | ~$0.20 | ~$0.27 |
| 4 hours | ~$0.20 | ~$0.41 | ~$0.54 |
| 8 hours | ~$0.41 | ~$0.82 | ~$1.09 |
| 12 hours | ~$0.61 | ~$1.22 | ~$1.63 |
Based on $0.17/kWh U.S. average (EcoFlow / U.S. Energy Information Administration, 2026). Check your utility bill for your local rate.
To calculate your exact cost: Divide your dehydrator’s wattage (found on the label or in the manual) by 1,000, multiply by hours used, then multiply by your local electricity rate per kWh.
A 4-hour herb-drying session on a typical home dehydrator costs less than a cup of coffee — and produces dried herbs that outperform anything available at the grocery store.
Common Mistakes to Avoid When Dehydrating Herbs
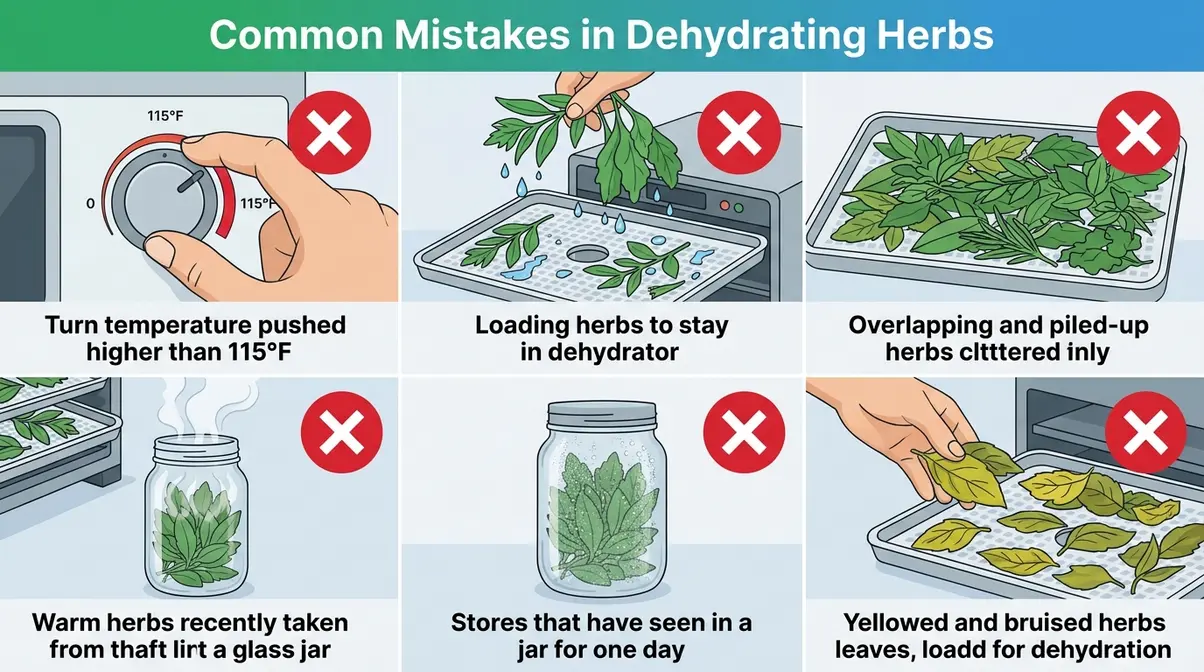
Even with the right temperature and the right herbs, a few consistent errors derail beginners. Research from food-preservation communities and university extension resources points to several mistakes that account for the vast majority of failed batches. Avoiding these pitfalls ensures your herbs retain their maximum flavor and shelf life.
Mistake 1: Using Too-High Temperatures
The most tempting shortcut is pushing the temperature above 115°F to finish faster. It seems logical — higher heat, faster drying. The result is the opposite of what you want. Essential oils evaporate rapidly above 120°F for most leafy herbs, leaving behind dull, flavorless dried herbs that smell faintly of hay rather than the vibrant herb you started with.
Furthermore, excessive heat creates a phenomenon known as “case hardening.” This occurs when the outside of the leaf dries so quickly that it forms a hard seal, trapping moisture deep inside the plant tissue. Herbs like mint and lemon balm are especially susceptible to this.
The fix: Trust the 95–115°F range. If your herbs are taking longer than expected, check whether they were fully surface-dried before loading (Step 2) and whether the trays are overcrowded (Step 3) — both are far more likely culprits than insufficient temperature.
Mistake 2: Skipping the Surface-Dry Step
Loading herbs that are still damp from washing is the #1 cause of uneven batches. The dehydrator must first evaporate the surface water before it can begin removing moisture from inside the leaf — effectively doubling the drying time for the affected leaves and creating conditions where some leaves over-dry while others stay pliable.
If water droplets remain on the leaves, the dehydrator’s heat can actually cause those spots to steam, leading to black, bruised-looking patches on your finished herbs.
The fix: After washing, always pat herbs completely dry and allow them to air-rest for 10–15 minutes before loading. If you’re in a hurry, a high-quality salad spinner removes surface water faster than paper towels alone.
Mistake 3: Overlapping Herbs on Trays
Overcrowded trays block the dehydrator fan’s airflow — the moving warm air that does the actual drying work. Leaves stacked on top of each other create a micro-environment where moisture gets trapped, extending drying time and increasing mold risk during storage.
When wet leaves stick together, they form a dense, impenetrable mat. The warm air simply flows over and around this clump rather than through it. This not only drastically extends your drying time but practically guarantees that the center of the clump will remain damp.
The fix: One layer, no exceptions. If you have more herbs than tray space, refrigerate the excess in a damp paper towel and run a second batch. Two clean batches beat one crowded, uneven batch every time.
Mistake 4: Storing Herbs While Warm
Sealing warm herbs in an airtight jar creates condensation on the inside of the glass. That condensation reintroduces moisture to herbs that tested perfectly dry — undoing your work and creating conditions for mold to develop within days.
This micro-environment is the perfect breeding ground for mold spores. Even if the herbs felt perfectly crisp when you took them out, that trapped steam will soften them within hours, ruining the entire batch.
The fix: After removing herbs from the dehydrator, spread them on a clean tray or cutting board and wait a full 20–30 minutes before filling jars. The herbs should feel cool and completely room-temperature before the lid goes on.
Mistake 5: Skipping the Conditioning Phase
Even after passing the snap test, herbs can hold hidden moisture. Conditioning is a safety net that many beginners overlook.
The fix: Place your cooled herbs in a glass jar, seal it, and shake it daily for one week. Check the glass for any signs of condensation or clumping. If you spot moisture, put the herbs back in the dehydrator for an hour. If the jar remains completely dry after a week, your herbs are safe for long-term storage.
Mistake 6: Dehydrating Old or Bruised Herbs
Dehydration concentrates flavor, but it also concentrates bitterness and decay. Trying to “save” herbs that are already turning brown or slimy will only result in dried herbs that taste like compost.
The fix: Always start with the freshest, most vibrant herbs you can find. Inspect your harvest carefully during the washing phase and discard any leaves that are yellowing or damaged.
One more to watch for: Trying to dehydrate herb-based preparations like pesto, chimichurri, or herb-infused oils. The fat content in these preparations prevents proper moisture removal and creates a food-safety concern. According to Washington State University Extension, high-fat foods are not suitable for home dehydration and should be frozen instead (WSU Extension, 2026).
Frequently Asked Questions
Can you put fresh herbs in a dehydrator?
Yes, you can put fresh herbs directly in a dehydrator — that’s exactly what it’s designed for. Wash and surface-dry the herbs first, arrange them in a single layer on the trays, and set the temperature to 95–115°F. Most fresh herbs dry in 1–4 hours. The key requirement is that herbs must be completely surface-dry before loading; residual water from washing extends drying time and increases mold risk during storage.
Do you need to blanch herbs before dehydrating?
No, most culinary herbs do not require blanching before dehydrating. In fact, blanching delicate leafy herbs can destroy their essential oils and cause them to turn black. The only exception is basil, which turns black in a dehydrator regardless; for basil, it is better to briefly blanch it and freeze it in olive oil rather than attempting to dehydrate it at all.
Can you dehydrate herbs in the oven instead?
While you can use an oven, it is highly discouraged because most ovens cannot maintain temperatures low enough to protect the herbs. Even an oven set to its lowest setting (typically 170°F to 200°F) is far too hot for herbs and will destroy their essential oils, leaving them flavorless and papery. A dedicated food dehydrator operating at 95–115°F is required for optimal flavor preservation.
Common Dehydrating Mistakes?
The most common mistakes are: using too-high a temperature, skipping surface drying, overcrowding the trays, and storing herbs while still warm. Each one is easily avoided. Keep the temperature at 95–115°F; always pat herbs completely dry before loading; spread herbs in a single, non-overlapping layer; and let finished herbs cool for at least 20–30 minutes before sealing them in jars. Fixing any one of these typically resolves an uneven or failed batch.
How long to dry herbs in dehydrator?
Most herbs dry in 1–4 hours in a food dehydrator set to 95–115°F. Leafy herbs like mint and lemon balm typically finish in 1–2 hours. Woody herbs like rosemary and thyme take 2–4 hours. Seeds and spices require 3–4 hours at 120–125°F. Always start checking at the 1-hour mark using the Snap Test and Crumble Test rather than relying on time alone — humidity, herb thickness, and tray loading all affect the actual drying time (Oregon State University Extension, 2026).
What not to put in a dehydrator?
Avoid putting high-fat or high-moisture foods in a dehydrator — these include herb-based sauces like pesto and chimichurri, avocado, olives, and dairy products. The fat content in these foods prevents proper moisture removal and creates food-safety risks. Among herbs specifically, basil, cilantro, and chives should not be dehydrated — they lose nearly all their flavor in the process. Freeze basil in olive oil, blend cilantro into a paste and freeze flat, and freeze-dry chives in an airtight container instead.
What food cannot be dehydrated?
Foods that cannot be safely or effectively dehydrated include high-fat foods (butter, oils, nut butters, avocado), dairy products (milk, cheese, yogurt), and fully cooked or marinated foods with high fat content. Fat does not evaporate during dehydration — it goes rancid instead, creating both a quality and food-safety problem. Raw eggs and foods with high water activity (like watermelon) also dehydrate poorly. Stick to low-fat, high-carbohydrate or high-fiber foods for dehydrating (WSU Extension, 2026).
12-Hour Dehydrator Running Costs?
Running a 600-watt food dehydrator for 12 hours costs approximately $1.22 at the 2026 U.S. average electricity rate of $0.17 per kWh (EcoFlow, citing U.S. Energy Information Administration, 2026). The formula is: watts ÷ 1,000 × hours = kWh, then multiply by your local rate. A typical herb-drying session of 2–4 hours costs $0.10–$0.41 for a 600-watt unit. Check your electricity bill for your local rate — costs vary significantly by state and region.
Wrap Up: Your First Batch Starts Today
For home cooks and food-preservation beginners, a food dehydrator turns a wilting bunch of herbs into a year’s supply of concentrated flavor — all at 95–115°F, in under 4 hours, for less than the cost of a coffee. The core principle is straightforward: low heat, maximum airflow, complete surface drying. Get those three elements right and the rest follows naturally.
The Herb Dehydration Decision Matrix makes every batch decision simple. Woody herb? Set to 105–115°F. Delicate or high-moisture herb? Freeze it instead. Recipe calls for fresh herbs? Divide by three. This three-question framework removes the guesswork that causes most beginner failures — and it applies to every herb you’ll ever preserve.
Now that you know how to use a dehydrator for herbs and spices, you can start with oregano or thyme for your first batch. Both are forgiving, dry quickly, and produce results that are immediately, noticeably better than anything from the spice aisle. Set your dehydrator to 105–110°F, load a single layer of clean, surface-dry herbs, and check at the 1-hour mark. Run that first batch this week — by the time you seal the jar, you’ll already be planning the next one.

Dave King
Recipe developer and writer at Quick Dish Cookbook.
![How Long to Cook Pork Shoulder at 250°F [Chart]](https://quickdishcookbook.com/wp-content/uploads/2026/07/pork-shoulder-cook-time-250f-720x450.webp "How Long To Cook Pork Shoulder At 250°F [Chart] 12")