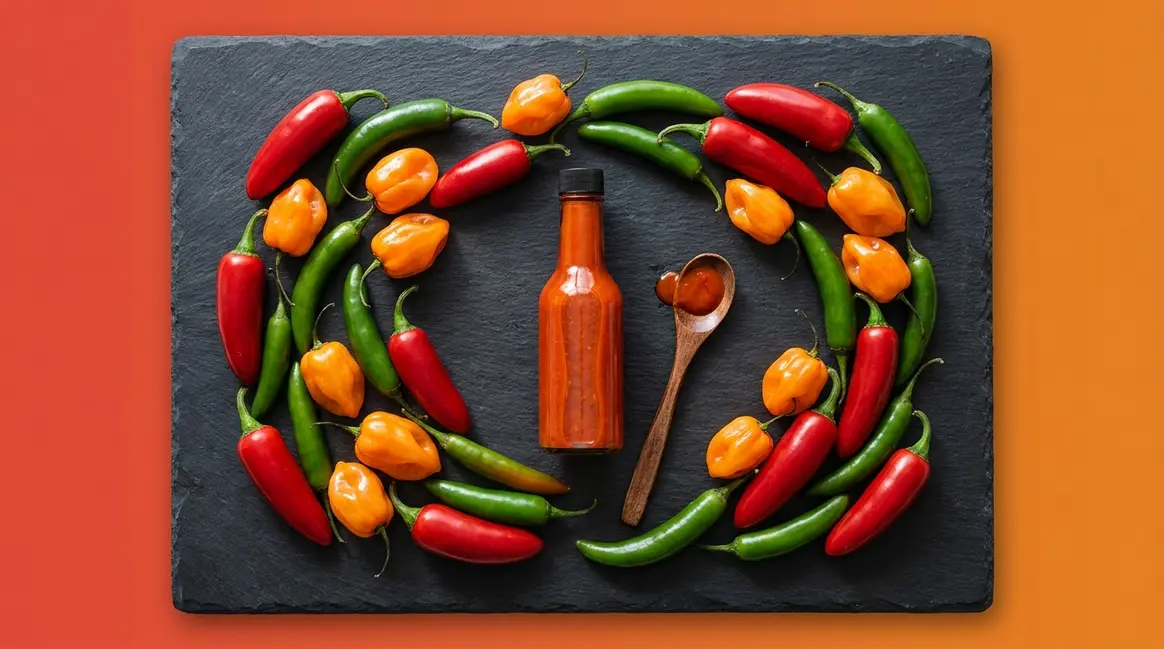

To make a homemade hot sauce recipe, combine fresh chili peppers, garlic, vinegar, and salt in a saucepan. Simmer for about 20 minutes until the peppers soften, then blend until completely smooth. The process involves 5 simple steps and takes under 45 minutes. You can strain the sauce for a thinner texture before bottling in sterilized jars.
What’s in this guide
- What You'll Need — Equipment and Ingredients
- Step 1: Choose and Prep Your Peppers
- Step 2: Simmer the Peppers Until Soft
- Step 3: Blend the Sauce Until Smooth
- Step 4: Taste, Season, and Add Vinegar
- Step 5: Bottle, Test pH, and Store Safely
- Hot Sauce Variations and Recipe Ideas
- How to Make Fermented Hot Sauce
- Common Mistakes and Safety Warnings
- Frequently Asked Questions
- Your First Batch Won't Be Your Last
Making your own homemade hot sauce recipe from scratch is one of those kitchen projects that feels ambitious but turns out to be surprisingly simple. You pick your peppers, simmer them with a few pantry staples, blend everything smooth, and bottle it up — all in under an hour. The result beats anything on a grocery store shelf, because you control the heat level.
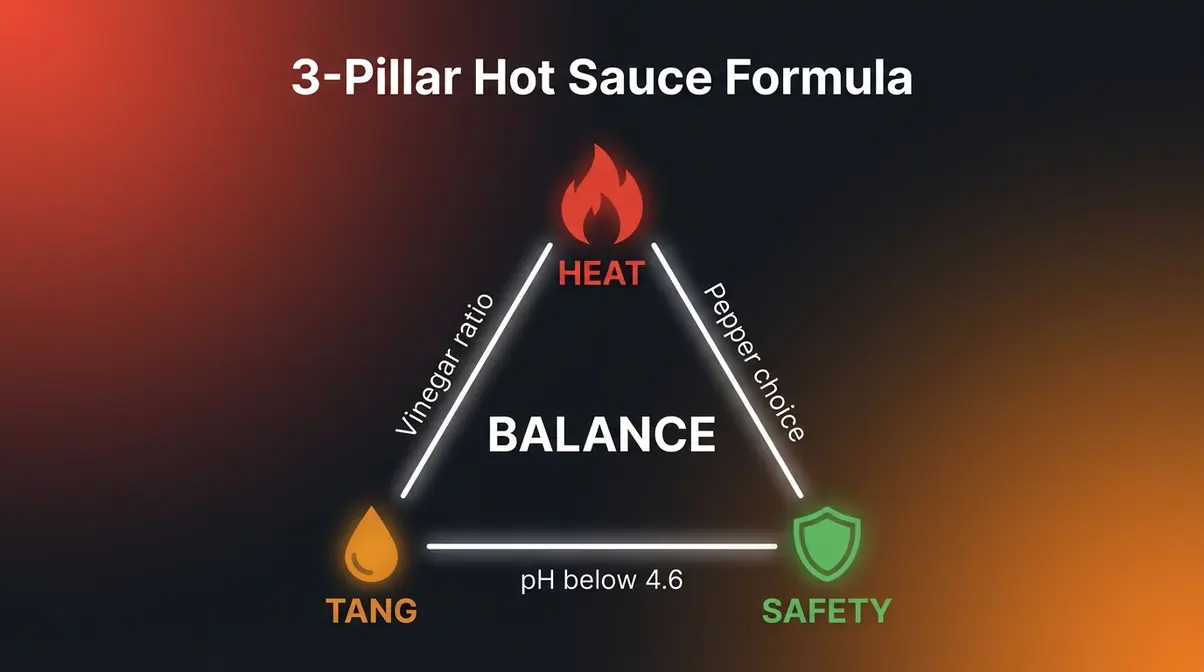
The secret to a great sauce isn’t a complicated technique. It’s understanding three things: Heat (which pepper you choose), Tang (how much vinegar you add), and Safety (keeping the pH low enough so your sauce stays fresh). That’s the “3-Pillar Hot Sauce Formula” — and once you understand it, every batch you make will be balanced, delicious, and safe to store.
This guide walks you through each pillar in a clear, step-by-step format. Whether you’re starting with mild jalapeños or going bold with habaneros, you’ll have a finished sauce — and the confidence to tweak it — by the end.
What You’ll Need — Equipment and Ingredients
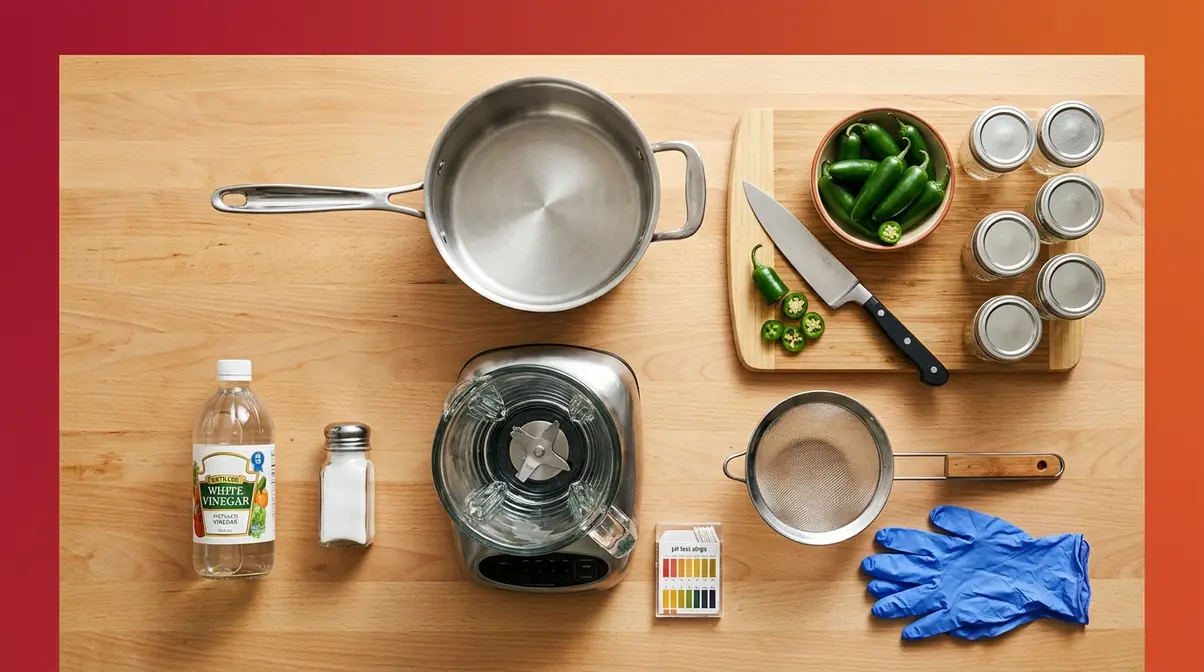
You don’t need a professional kitchen to pull this off. A few basic tools and a short grocery list are all it takes. Setting up your workspace properly before you begin will make the entire process smoother and safer.
Equipment List
| Tool | Why You Need It |
|---|---|
| Medium saucepan | Simmers the peppers until soft |
| Blender or immersion blender | Purees the sauce smooth |
| Fine-mesh strainer (optional) | Removes seeds/skin for a thinner texture |
| Sterilized glass bottles or mason jars | Safe storage |
| pH strips or digital pH meter | Confirms safe acidity before bottling |
| Gloves (nitrile or latex) | Protects skin from capsaicin burns |
| Cutting board + sharp knife | Pepper prep |
A digital pH meter gives you the most accurate reading. Strips work fine too — look for ones that measure down to pH 3.0. When selecting your saucepan, always opt for a non-reactive material like stainless steel or enamel. Because hot sauce relies heavily on vinegar, using reactive metals like aluminum or unseasoned cast iron can leach a metallic taste into your final product. Additionally, heavy-duty nitrile gloves are highly recommended over thin latex, as potent capsaicin oils can sometimes permeate cheaper materials.
Your Ingredients and What They Do
This base recipe makes about 1 cup (8 oz) of hot sauce.
| Ingredient | Amount | Role in the Sauce |
|---|---|---|
| Fresh chili peppers | 6–8 oz (about 10–12 jalapeños) | Heat + body |
| Garlic cloves | 3–4 cloves | Savory depth |
| White vinegar (5% acidity) | ½ cup | Tang + preservation |
| Water | ¼ cup | Thins consistency |
| Salt | 1 tsp | Flavor + mild preservation |
| Sugar (optional) | 1 tsp | Balances acidity |
Every hot sauce — from Tabasco to Frank’s RedHot — builds on this same foundation: peppers, acid, and salt. Everything else is your choose-your-own-adventure spice level. Add onion for sweetness, citrus for brightness, or roasted garlic for another layer of flavor.
What are the basic ingredients?
Every hot sauce is built on three core ingredients: peppers, acid, and salt. The peppers provide heat and body, the acid (almost always vinegar) preserves the sauce and adds tang, and salt enhances every other flavor. Beyond this foundation, most recipes add garlic for savory depth and water to control consistency. Commercial favorites all follow this same structure — they just use different pepper varieties, vinegar types, and ratios to achieve their signature flavor profiles.
Step 1: Choose and Prep Your Peppers
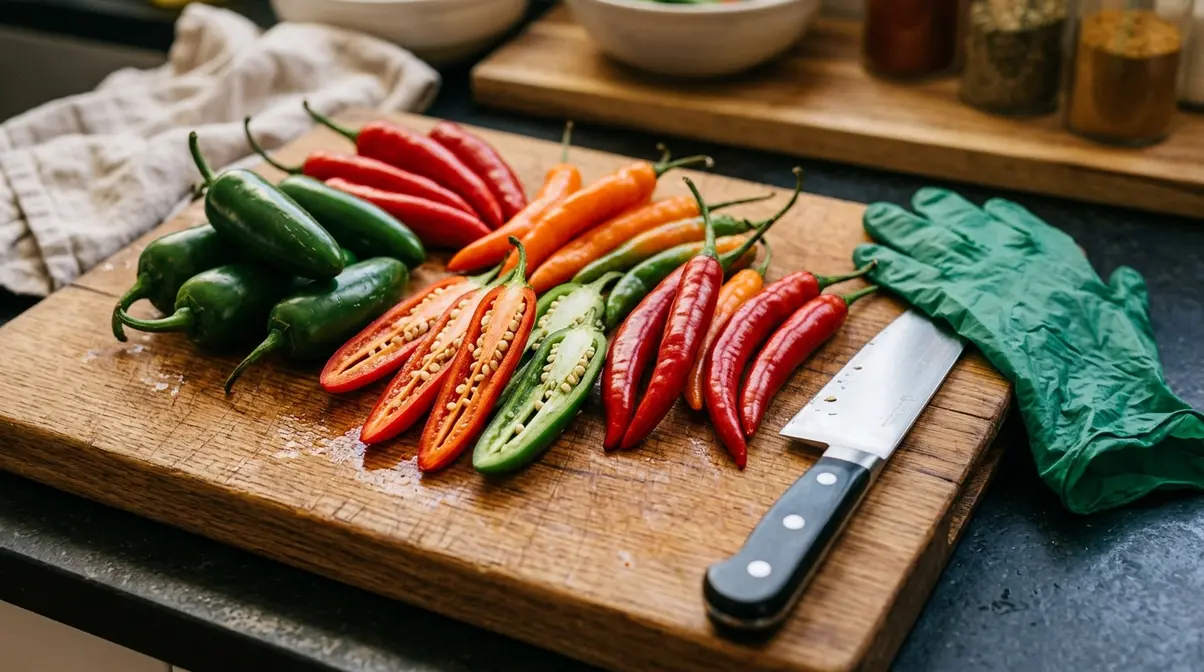
Your pepper choice is the single biggest decision in this whole recipe. Get this right, and everything else falls into place.
Picking the Right Pepper
Pepper heat is measured in Scoville Heat Units (SHU) — a scale that tells you how spicy a pepper is. The higher the number, the hotter the burn.
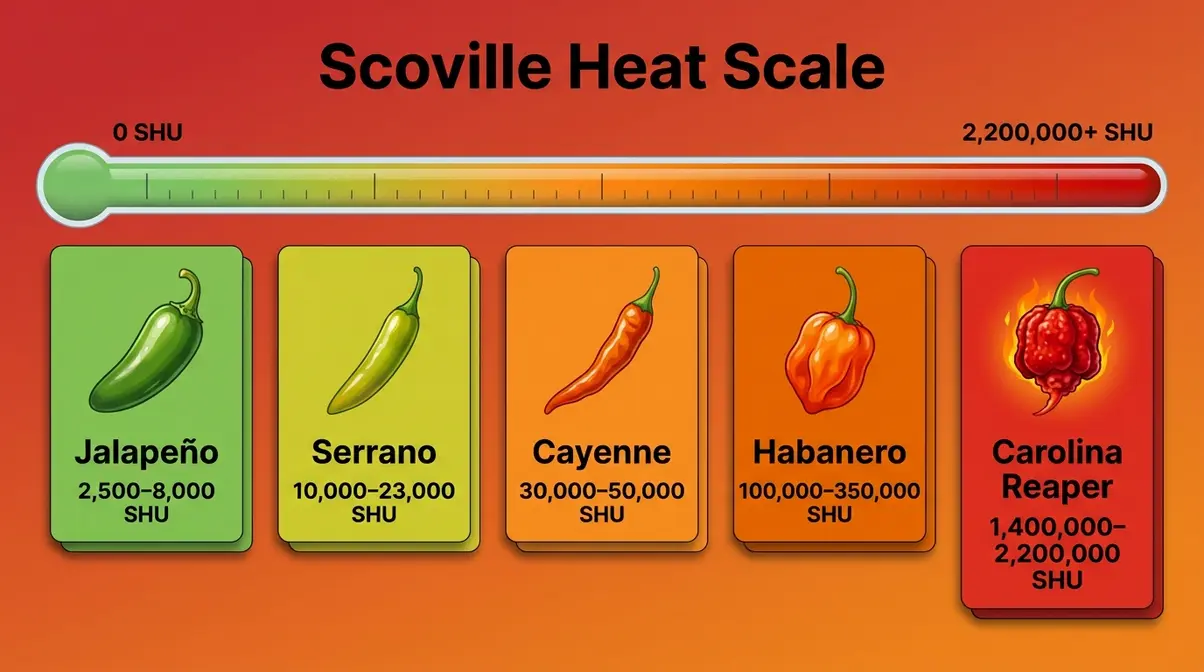
| Pepper | SHU Range | Best For |
|---|---|---|
| Jalapeño | 2,500–8,000 | Mild, everyday hot sauce |
| Serrano | 10,000–23,000 | Medium heat, bright flavor |
| Cayenne | 30,000–50,000 | Classic hot sauce burn |
| Habanero | 100,000–350,000 | Fruity, intense heat |
| Carolina Reaper | 1.4M–2.2M | Extreme — experienced only |
Home cooks across recipe communities consistently recommend starting with jalapeños or serranos for your first batch. The flavor is approachable, the heat is manageable, and you’ll learn the technique without overwhelming your palate.
Prep your peppers: Rinse them well. Remove the stems. For a milder sauce, slice the peppers in half and scrape out the seeds and white membrane (that’s where most of the heat lives). Leave them in for full fire.
How to Handle Hot Peppers Safely
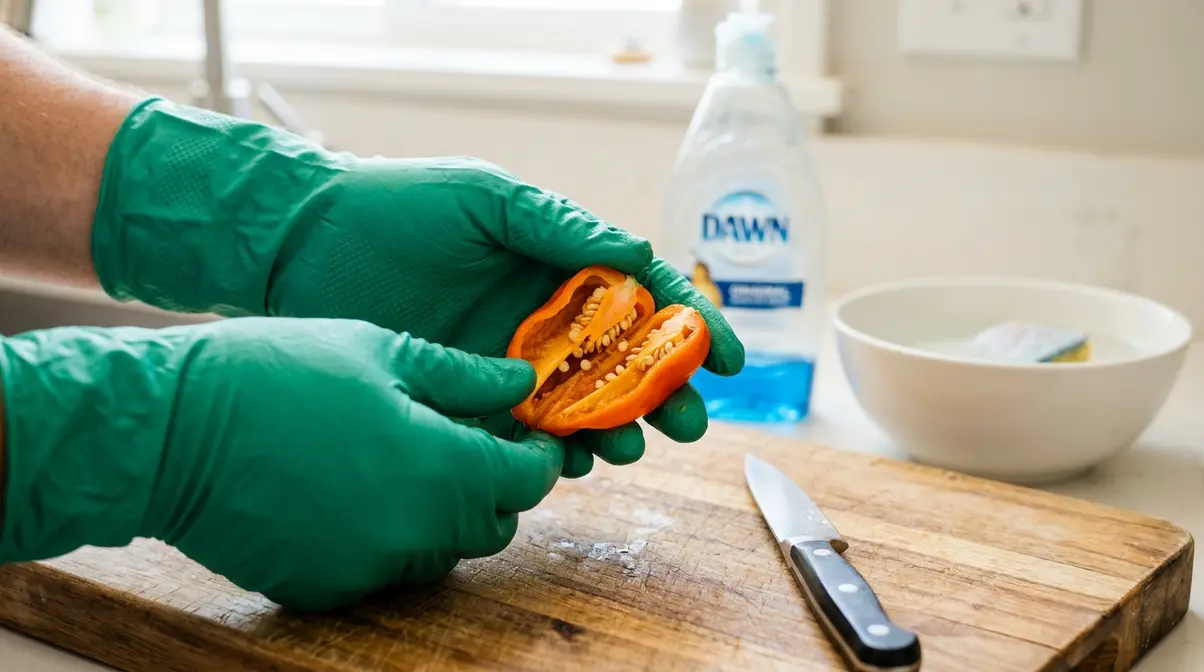
⚠️ Safety Warning: Capsaicin — the compound that makes peppers hot — can cause serious skin and eye irritation. Always wear nitrile or latex gloves when cutting hot peppers. Avoid touching your face. If you’re working with super-hot peppers like habaneros or Carolina Reapers, consider safety glasses too.
Wash your cutting board, knife, and hands with soap and water immediately after prep. Capsaicin is oil-based and doesn’t rinse off with water alone.
✅ Step 1 Checkpoint: Peppers are rinsed, stemmed, and prepped to your heat preference. Gloves are on. You’re ready to cook.
Step 2: Simmer the Peppers Until Soft
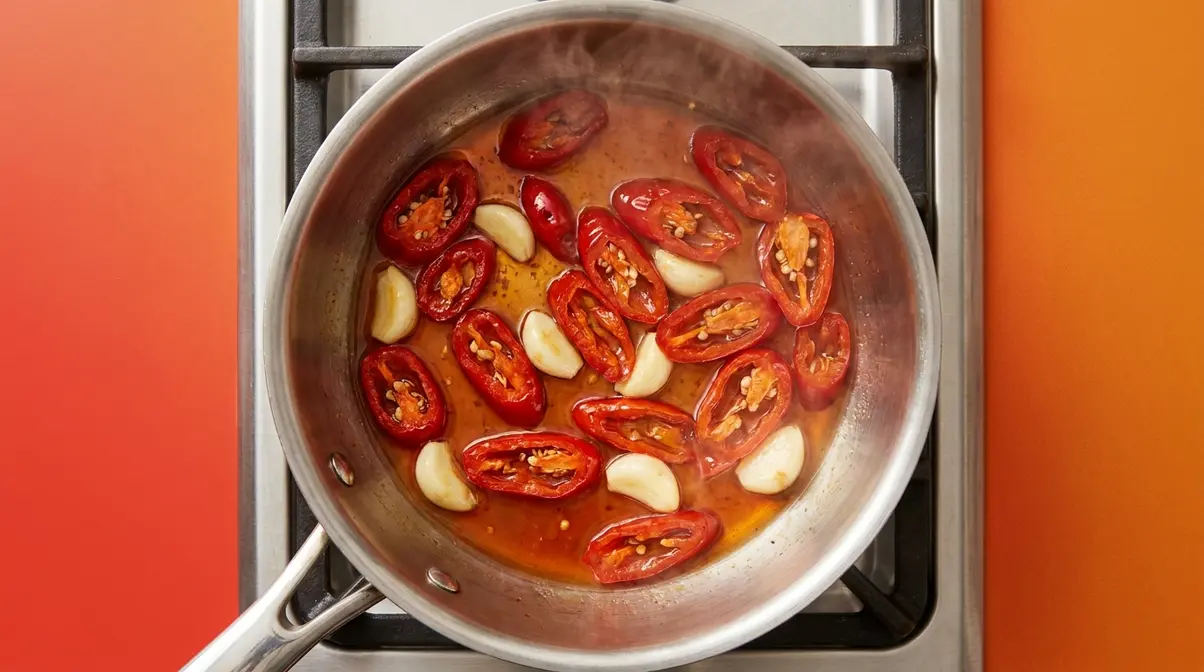
Now the kitchen starts smelling amazing. Add your prepped peppers, garlic, vinegar, and water to a medium saucepan over medium heat. Bring it to a gentle simmer — not a rolling boil.
Building Flavor While They Cook
Simmering does two important things. First, it softens the peppers so they blend into a completely smooth sauce. Second, it lets the flavors meld together — the garlic sweetens, the vinegar mellow out, and you get that cohesive “sauce” quality rather than a jumble of separate ingredients.
Simmering for exactly 20 minutes breaks down the pepper’s pectin — ensuring a smoother emulsion that won’t separate in the bottle. This is also your moment to add another layer of flavor. Try tossing in a small piece of onion, a bay leaf, or a pinch of cumin. These additions won’t overpower the peppers — they’ll round out the sauce and make it taste like it came from a restaurant kitchen.
Simmer uncovered for 18–22 minutes, stirring occasionally. You’re looking for the peppers to turn very soft and the liquid to reduce by about one-third.
Checkpoint — Know When They’re Ready
The peppers are ready when you can easily smash one against the side of the pan with a spoon. The skin should look slightly wrinkled and the color will have deepened. The liquid should look thickened and fragrant — not watery.
✅ Step 2 Checkpoint: Peppers are fork-tender. Liquid has reduced. The saucepan smells incredible. Move to blending.
Step 3: Blend the Sauce Until Smooth
Let your mixture cool for 5–10 minutes before blending. Hot liquid in a sealed blender builds pressure fast — a burnt face is not part of this recipe. Taking a few minutes to let the steam subside is a crucial kitchen safety practice.
Blending Tips for a Silky Texture
Pour the cooled mixture into your blender. Start on low speed for 10 seconds to break everything down, then increase to high. Blend for 60–90 seconds until the sauce is completely smooth with no visible pepper chunks.
A high-speed blend of at least 60 seconds pulverizes the capsaicin-rich skins — unlocking the pepper’s full heat potential and creating a velvety, restaurant-quality texture.
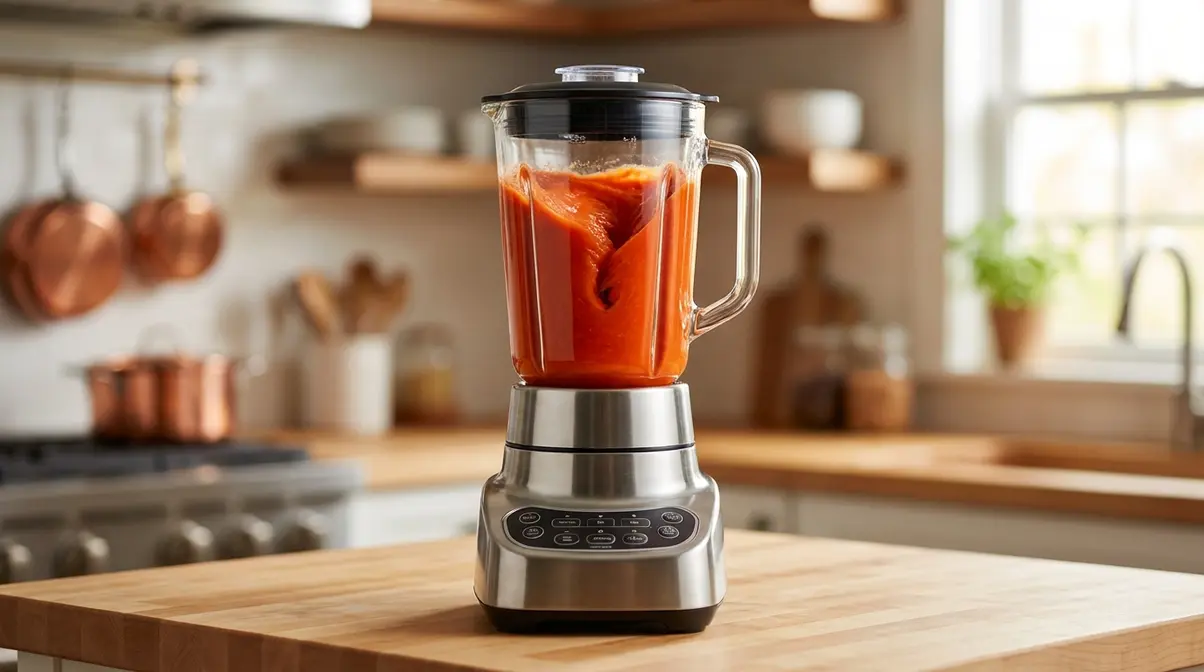
If you’re using an immersion blender, blend directly in the saucepan. Move the blender head in slow circles to catch all the solids. It takes a little longer — about 2–3 minutes — but the cleanup is much easier.
How to Strain for a Thinner Sauce
Like a thinner, pourable sauce? Set a fine-mesh strainer over a bowl and pour the blended sauce through it. Use a rubber spatula to press the solids against the mesh. You’ll get a silky, smooth liquid and leave behind the skins and any remaining seeds.
Skip the strainer if you want a thicker, chunkier sauce with more body. Both textures work well — it’s personal preference.
✅ Step 3 Checkpoint: Sauce is smooth and vibrant. Texture is adjusted to your preference. Ready for seasoning.
Step 4: Taste, Season, and Add Vinegar
This is where your sauce goes from “pretty good” to “I can’t stop putting this on everything.” Taste your sauce and adjust.
Balancing Heat, Tang, and Salt
This is the heart of the 3-Pillar Hot Sauce Formula. Every adjustment you make pulls one of three levers:
- Heat (Pillar 1): Too mild? Add a pinch of cayenne powder. Too hot? Stir in a teaspoon of honey or a splash more water.
- Tang (Pillar 2): Too flat? Add another tablespoon of vinegar. Too sharp? A pinch of sugar softens the edge.
- Safety (Pillar 3): More vinegar isn’t just about flavor — it’s your primary tool for lowering pH and making the sauce shelf stable. Don’t skip it.
Work in small increments. Add a little, stir, taste. Repeat. Home cooks who’ve made dozens of batches consistently report that patience at this stage is what separates a good sauce from a great one.
What vinegar is best for hot sauce?
Finding the best vinegar for hot sauce is crucial for both flavor and safety. White distilled vinegar (5–7% acidity) is the best all-purpose choice for homemade hot sauce. It’s neutral enough to let the pepper flavor shine, it’s reliably above the 5% acidity minimum required for safe preservation, and it’s inexpensive.
Not all vinegars are equal for hot sauce. The key requirement: minimum 5% acidity. According to Colorado State Extension, vinegar with less than 5% acidity may not reliably preserve your sauce at safe levels.
| Vinegar Type | Acidity | Flavor Profile | Best For |
|---|---|---|---|
| White distilled | 5–7% | Clean, neutral | Classic hot sauces, lets pepper flavor shine |
| Apple cider | 5–6% | Fruity, slightly sweet | Fruity pepper sauces (habanero, mango) |
| White wine | 5–7% | Bright, slightly floral | Green sauces, milder peppers |
| Rice vinegar | 4–4.5% | Mild, sweet | Not recommended — too low acidity |
Apple cider vinegar works beautifully with fruity peppers like habaneros, while white distilled vinegar remains the workhorse choice for most beginner small batch recipes.
✅ Step 4 Checkpoint: Sauce is seasoned and balanced. Vinegar is incorporated. You’re almost there.
Step 5: Bottle, Test pH, and Store Safely
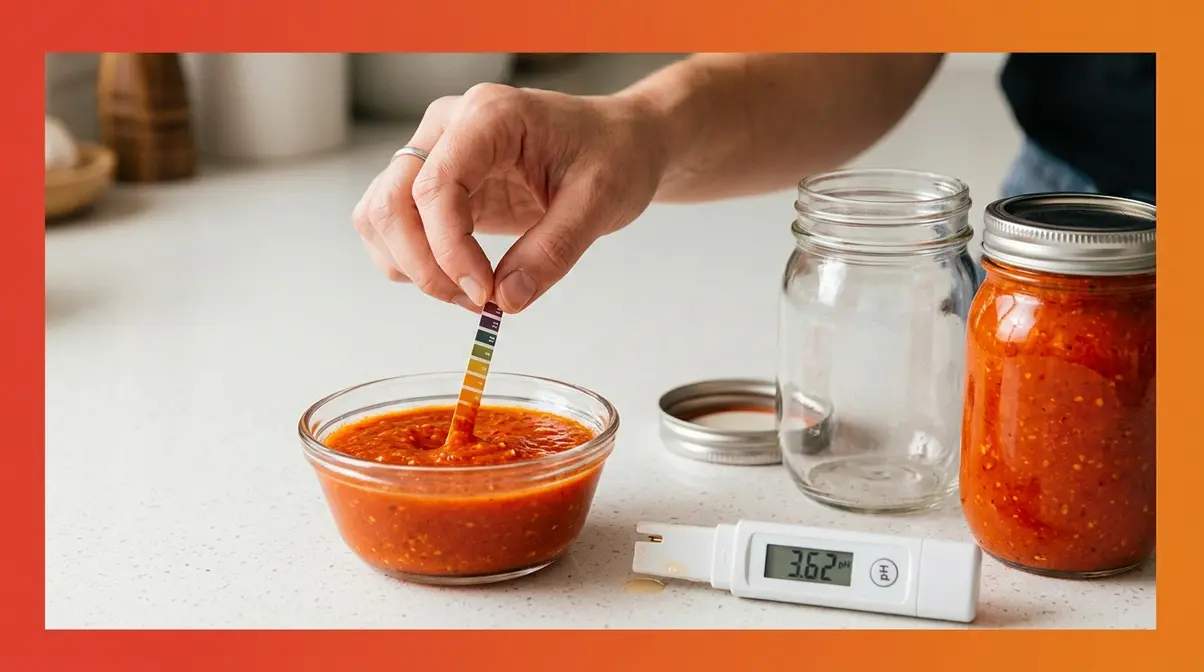
This is the step most beginner guides skip — and it’s the most important one for keeping your sauce safe to eat weeks from now.
How to Test pH for Safe Bottling
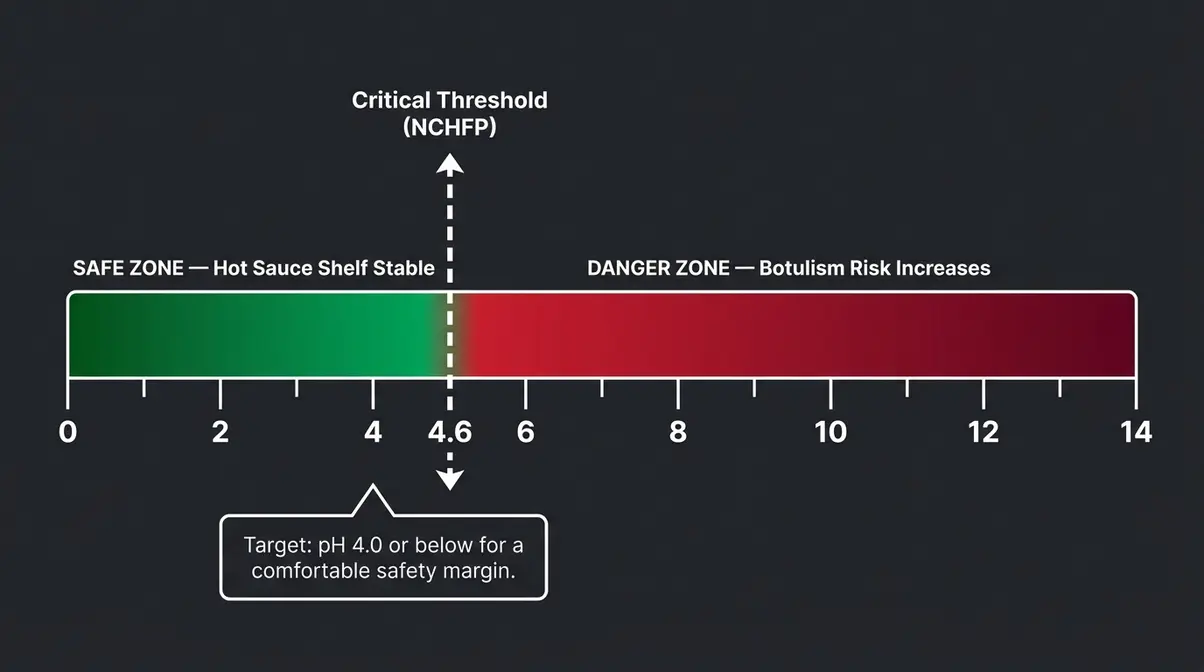
pH (a measure of acidity — lower numbers mean more acidic) determines whether harmful bacteria can survive in your sauce. The critical threshold is pH 4.6.
According to the National Center for Home Food Preservation (NCHFP), foods with a pH below 4.6 are considered high-acid and safe from Clostridium botulinum (the bacteria responsible for botulism) at room temperature. Foods at or above 4.6 require pressure canning for safe shelf storage.
- How to test:
- Let your finished sauce cool to room temperature.
- Dip a pH strip into the sauce for 10–15 seconds, or use a digital meter.
- Compare the color to the chart (strips) or read the display (meter).
- Target: pH 4.0 or below for a comfortable safety margin.
If your pH reads above 4.6, add more vinegar (1 tablespoon at a time), stir thoroughly, and retest. The USDA FSIS notes that the bacterial “danger zone” for food sits between 40°F and 140°F (4°C–60°C) — so don’t leave your sauce sitting at room temperature for extended periods before bottling.
To sterilize your bottles: Wash glass bottles or mason jars in hot soapy water, then place them in a 225°F (107°C) oven for 10 minutes. Fill while still warm.
How Long Does Your Sauce Last?
Consulting a hot sauce shelf life guide helps you maximize freshness.
| Storage Method | Shelf Life | Notes |
|---|---|---|
| Refrigerator (opened) | 3–6 months | Best flavor in first 8 weeks |
| Refrigerator (unopened) | Up to 12 months | Keep away from light |
| Room temperature (sealed, pH < 4.0) | 3–6 months | Must confirm pH first |
| Freezer | Up to 12 months | Texture may thin slightly |
Signs your sauce has gone bad: visible mold, off smell, unusual color change, or a bulging lid. When in doubt, throw it out.
✅ Step 5 Checkpoint: pH confirmed below 4.6. Sauce bottled in sterilized containers. Labeled with the date. You did it — that’s a shelf-stable homemade hot sauce.
Hot Sauce Variations and Recipe Ideas
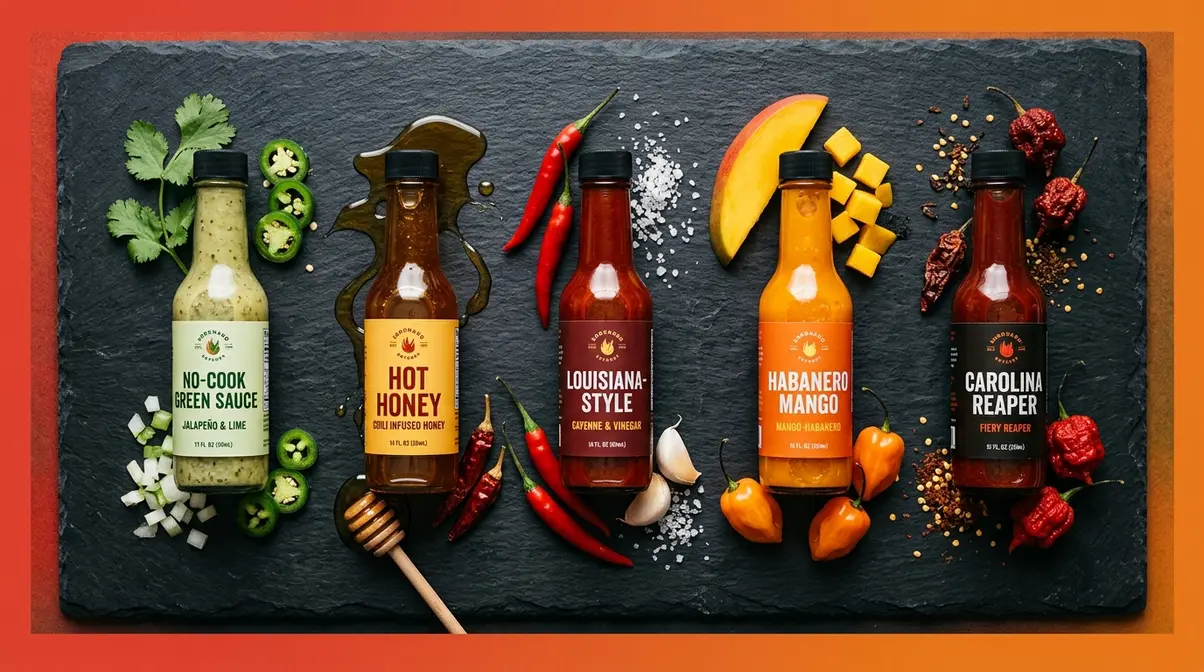
Once you’ve nailed the base recipe, the fun really starts. These variations use the same 5-step process — just swap the peppers and a few flavor additions.
Habanero Hot Sauce
Swap jalapeños for 6–8 habaneros (remove seeds for medium heat, keep them for full fire). Add ½ a ripe mango or a few slices of fresh pineapple during the simmer — the fruit’s sweetness tames the habanero’s intense burn while adding a tropical depth. You can also add a chopped carrot to the simmer to build natural sweetness and body. Finish with a squeeze of lime juice. Expect a fruity, building heat that hits about 30 seconds after you taste it.
Carolina Reaper Hot Sauce
⚠️ Caution: Carolina Reapers average 1.4–2.2 million SHU. Wear gloves, safety glasses, and work in a well-ventilated area to avoid inhaling potent capsaicin fumes. Use just 2–3 Reapers per batch — they’re that potent. Pair with roasted red bell peppers (3–4) to add body and color without diluting the heat. Serve this alongside dairy-heavy dishes like mac and cheese to help cool the intense burn. This is a hot stuff sauce for people who mean it.
No-Cook Green Hot Sauce
Skip the stovetop entirely. Blend 10–12 fresh serrano or jalapeño peppers with ½ cup white wine vinegar, 3 garlic cloves, a handful of fresh cilantro, and 1 tsp salt. Adding a fresh tomatillo to the blender provides extra tang and volume. Blend until smooth, strain, and bottle. The raw peppers give you a bright, grassy flavor that cooking destroys. Refrigerate and use within 3 weeks — no-cook sauces have a shorter shelf life.
Hot Honey Sauce
Warm ½ cup of honey in a small saucepan over low heat. Using a high-quality local honey will introduce better floral notes to the final product. Add 2–3 minced dried chili peppers (or 1 tsp red pepper flakes) and let them steep for 10 minutes. Remove from heat, add 1 tbsp apple cider vinegar, and stir. Strain out the solids. The result is a sweet, slow-building drizzle sauce perfect for pizza, fried chicken, and cheese boards.
Homemade Buffalo Wing Sauce
Combine ½ cup Frank’s RedHot (or your homemade cayenne sauce) with 4 tbsp cold unsalted butter in a small saucepan over low heat. Whisk constantly until the butter is fully melted and the sauce is emulsified. Add 1 tsp white vinegar and a pinch of garlic powder. This classic 3:2 ratio (hot sauce to butter) is the foundation of every great Buffalo sauce. Serve immediately over crispy wings, or store in the fridge and gently reheat before use.
Louisiana-Style Hot Sauce
This style is all about fermented cayenne peppers aged in vinegar brine — but you can fake the depth with a cooked version. Simmer 12–15 fresh cayenne peppers with ½ cup white vinegar, ¼ cup water, 3 garlic cloves, and 1 tsp salt for 20 minutes. Blend, strain through a fine-mesh strainer until very thin, and bottle. Letting this sauce rest in the refrigerator for a full week before using helps simulate the traditional aging process. The result is a pourable, tangy sauce with that recognizable Louisiana heat.
How to Make Fermented Hot Sauce
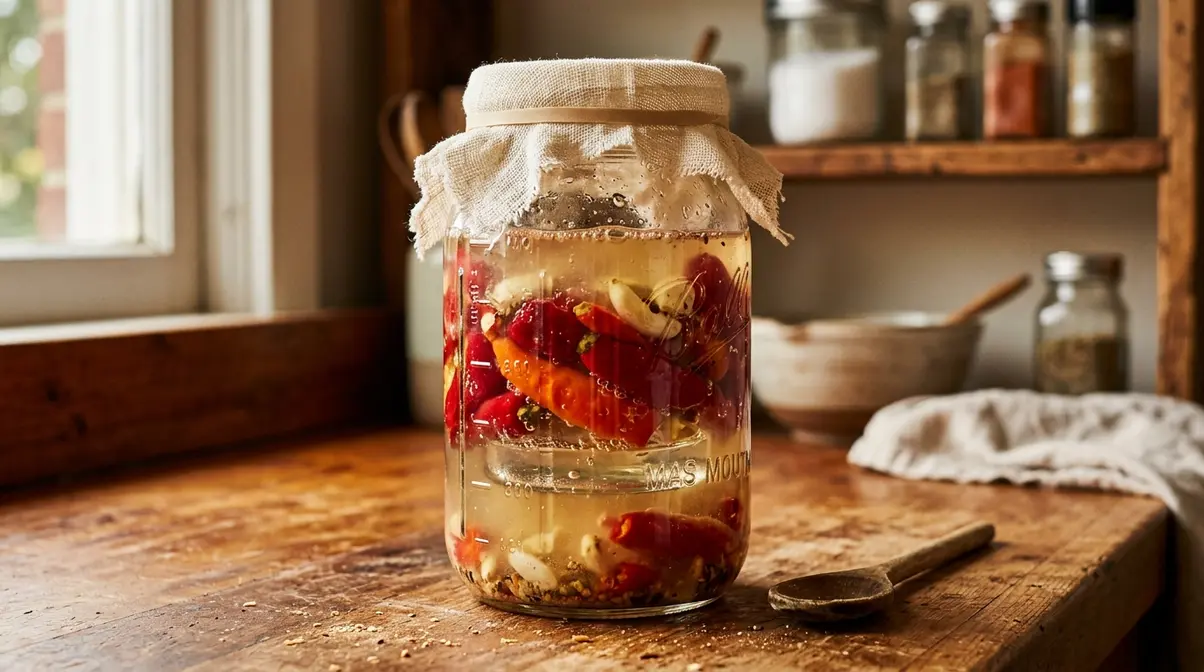
Fermented hot sauce is the deep-cut version — more complex, funkier, and with a flavor that cooked sauces simply can’t replicate. It takes more time (5–10 days), but the hands-on work is minimal.
“If you have never fermented food before, this is a great recipe to start with — it’s easy and almost foolproof.” — A sentiment echoed consistently across home fermentation communities.
What You Need to Ferment at Home
- Wide-mouth mason jar (quart-sized)
- Fermenting weight or small zip-lock bag filled with brine (to keep peppers submerged)
- Loose lid, cheesecloth, or airlock lid
- Non-iodized salt (iodized salt can inhibit fermentation)
For a complete breakdown, check our fermented pepper sauce guide. According to Penn State Extension, a 2–3% salt brine by weight is the recommended starting point for vegetable ferments. For hot peppers, mix 1 tablespoon of non-iodized salt per 2 cups of water to create your brine.
Step-by-Step Fermentation Process
- Prep your peppers. Rinse, stem, and roughly chop. No need to remove seeds.
- Make the brine. Dissolve 1 tbsp non-iodized salt in 2 cups of non-chlorinated water (filtered or bottled).
- Pack the jar. Add peppers and garlic cloves to your mason jar, packing them firmly.
- Pour the brine. Cover the peppers completely with brine, leaving 1 inch of headspace.
- Weigh them down. Use a fermenting weight to keep peppers submerged below the brine. Exposed peppers can mold.
- Cover loosely. Use cheesecloth, a loose lid, or an airlock. CO₂ needs to escape.
- Ferment at room temperature. Place in a spot between 65–75°F (18–24°C). Fermentation starts in 24–48 hours — you’ll see small bubbles.
- Taste-test daily from Day 5. When the flavor is tangy and complex to your liking (typically 5–10 days), strain the brine, blend the peppers with some of the reserved brine, and bottle.
Fermented vs. Cooked Comparison
| Factor | Cooked Hot Sauce | Fermented Hot Sauce |
|---|---|---|
| Time to make | Under 1 hour | 5–10 days |
| Flavor profile | Bright, clean, direct | Complex, tangy, funky |
| Skill level | Beginner | Beginner–Intermediate |
| Shelf life (refrigerated) | 3–6 months | 6–12 months |
| pH control | Via vinegar | Via natural lactic acid |
| Equipment needed | Saucepan + blender | Mason jar + patience |
| Best for | Quick weeknight sauce | Signature “craft” sauce |
Fermented sauces develop their acidity naturally through lactic acid fermentation — the same process used to make kimchi and sauerkraut. The result is a sauce with layers of flavor you simply can’t rush.
Common Mistakes and Safety Warnings
Even a simple small batch recipe has a few ways to go sideways. Here’s what to watch for.
Pepper Handling and Kitchen Pitfalls
Skipping gloves. Capsaicin oil from cutting habaneros or hotter peppers can linger on your skin for hours. It transfers easily to your eyes or face. Wear gloves — every time.
Boiling instead of simmering. A hard boil evaporates too much liquid too fast and can scorch the garlic. Keep the heat at medium-low and aim for gentle bubbles.
Blending hot liquid with a sealed lid. Steam pressure builds quickly. Always let the mixture cool 5–10 minutes first, and hold a folded towel over the blender lid when starting.
Using vinegar below 5% acidity. Rice vinegar and some specialty vinegars fall below the 5% threshold. Check the label. Colorado State Extension guidelines are clear: under 5% acidity is not reliable for preservation.
When Your Sauce Isn’t Safe to Eat
- Discard your sauce immediately if you notice:
- Visible mold (any color — don’t scrape it off and continue)
- A foul, “off” or putrid smell that isn’t just sour vinegar
- A bulging lid or hissing sound when you open the bottle
- Slimy texture that wasn’t there before
⚠️ Food Safety Reminder: Never store homemade hot sauce at room temperature long-term unless you have confirmed the pH is below 4.6 AND used properly sterilized, sealed containers. If you are unsure, refrigerate it. The gold standard resource for home food preservation safety is the NCHFP safety guidelines.
Frequently Asked Questions
How do I make my own hot sauce at home?
Making hot sauce at home takes 5 steps and under 45 minutes. Start by simmering fresh chili peppers, garlic, vinegar, and salt until the peppers are completely soft — about 20 minutes. Blend the mixture until smooth, taste and adjust the seasoning, then test the pH before bottling in sterilized jars. The key is keeping the sauce below pH 4.6 for safe storage. Start with jalapeños if you’re new — they’re forgiving and flavorful.
Is hot sauce good for diabetics?
Traditional hot sauce made with peppers, vinegar, and salt is very low in carbohydrates and does not cause significant blood sugar spikes for most people. Research published on NIH PubMed suggests capsaicin may support metabolism and insulin sensitivity. However, some commercial hot sauces contain added sugar — check labels carefully. ⚠️ Medical Disclaimer: Every person’s response to food is different. Consult your doctor or registered dietitian before making dietary changes if you have diabetes or a related condition.
Is Tabasco really just 3 ingredients?
Yes — Tabasco Original Red Sauce contains just three ingredients: aged red peppers, distilled vinegar, and salt. According to the McIlhenny Company, the peppers are mashed with salt and aged in white oak barrels for up to three years, then blended with distilled vinegar. The simplicity is the point — the long aging process creates flavor complexity that doesn’t require additional ingredients. Making a similarly minimal sauce at home is absolutely achievable with cayenne peppers and white vinegar.
Does homemade hot sauce need to be refrigerated?
Homemade hot sauce does not always need refrigeration if the pH is properly controlled. If your sauce tests at a pH of 4.6 or lower and is bottled in sterilized containers, it is generally considered shelf-stable at room temperature. However, refrigerating your sauce will significantly extend its peak flavor and color vibrancy. If you do not test the pH of your batch, you must store it in the refrigerator to prevent bacterial growth.
Can I use dried peppers to make hot sauce?
Yes, dried peppers are excellent for making hot sauce and offer a deeper, smokier flavor profile. To use them, you must first rehydrate the peppers by soaking them in boiling water for 15 to 20 minutes until they become soft and pliable. Once rehydrated, you can blend them with vinegar, salt, and aromatics following the standard hot sauce process. Many authentic Mexican-style sauces rely exclusively on dried varieties like ancho, guajillo, and pasilla peppers.
Your First Batch Won’t Be Your Last
A solid homemade hot sauce recipe is one of the most rewarding things you can make from scratch. In under an hour, you go from a bag of fresh chili peppers to a bottled sauce that’s entirely your own — dialed to your heat preference, balanced with the right tang, and safe to store for months. The 3-Pillar Hot Sauce Formula (Heat, Tang, Safety) gives you a framework that works for every variation you’ll ever try, from mild jalapeño blends to a blazing habanero mango drizzle.
The formula matters because it removes the guesswork. Once you understand why you’re adding vinegar (not just that you should), every future batch becomes easier to adjust and improve.
Start with the base jalapeño recipe this week. Make one small tweak — swap in serranos, add a splash of lime, try apple cider vinegar instead of white. Within three or four batches, you’ll have a signature sauce that’s genuinely yours. Check out our complete hot sauce collection for more pepper combinations and flavor ideas to try next.

quickdishcook
Recipe developer and writer at Quick Dish Cookbook.